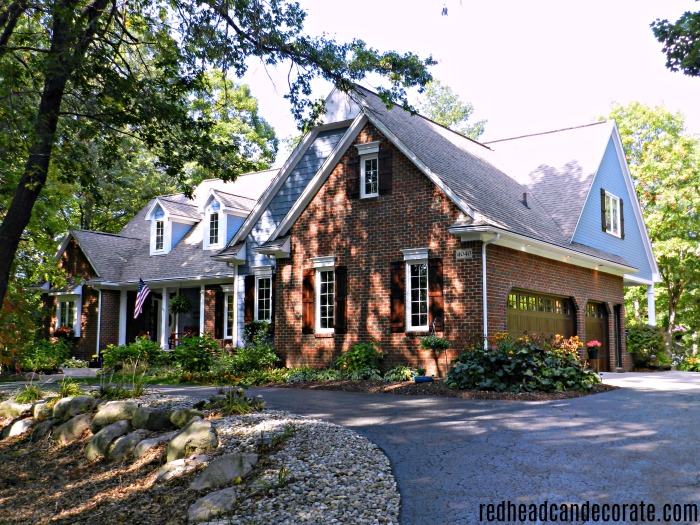
Welcome to “Cedar Oak Cottage”. You got that right. I named our house. I think it’s about time, don’t you? My husband was up on the ladder hanging these shutters and we had a discussion on it. I chose the word cedar, due to the cedar shutters 😆 . I chose the word Oak due to the 1 million oak trees surrounding our house. And now, finally, after our latest DIY transformation “Exterior Cedar Shutters (the reveal)” I truly believe we are ready to use the word “cottage”. These cedar shutters truly made our house look a little more like a cottage.
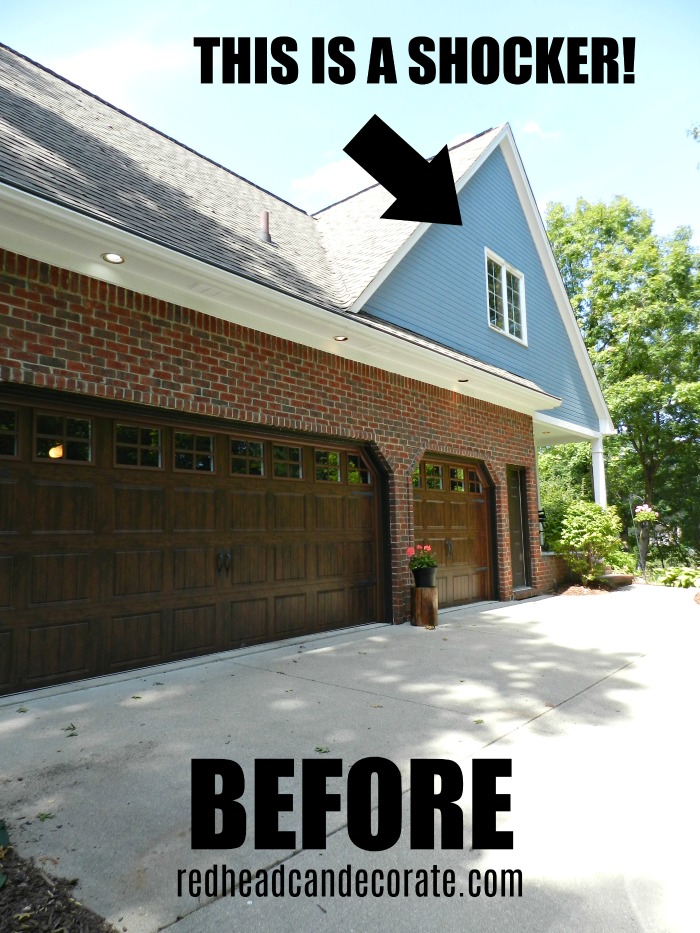
Here’s a bunch of before photos…
Pay no attention to the big chip of paint off our house below or the hostas that were eaten by the deer. Stay focused on those shutters.
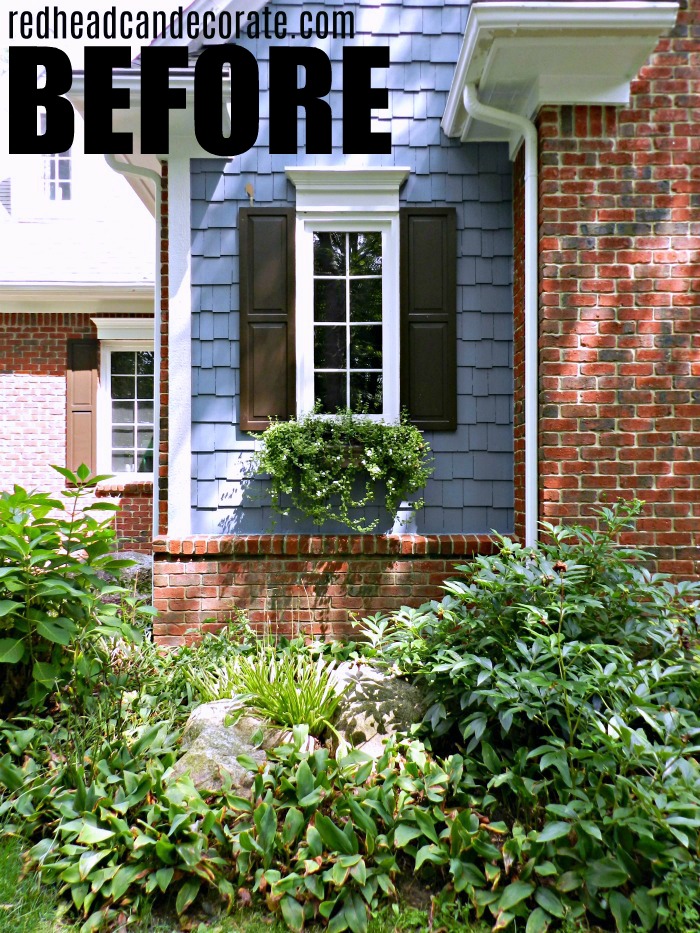
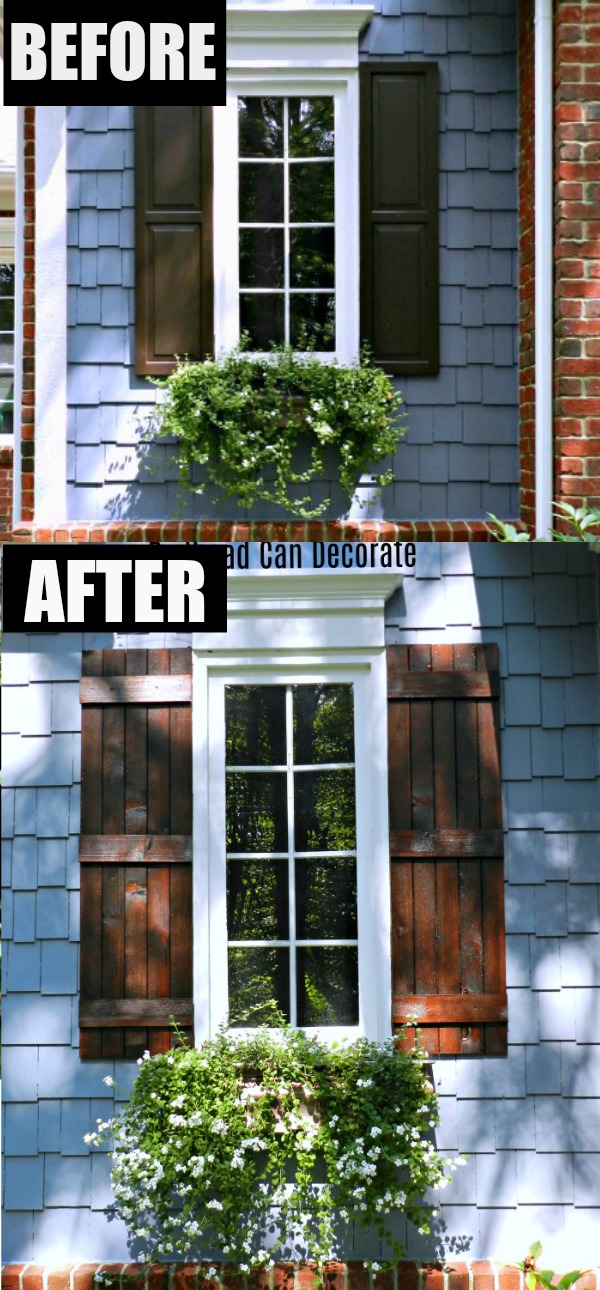
This next one really shows the problem we were having. Our (real wood) shutters were finally showing their age after 25 years. They could have at least waited until they were 40, geesh.

I know they don’t really look that bad, but a few more Winters and these wrinkled up peeps were going to need real help. I was ready now. Plus, just look how “plain” they are. They look good, but there is no wow factor.
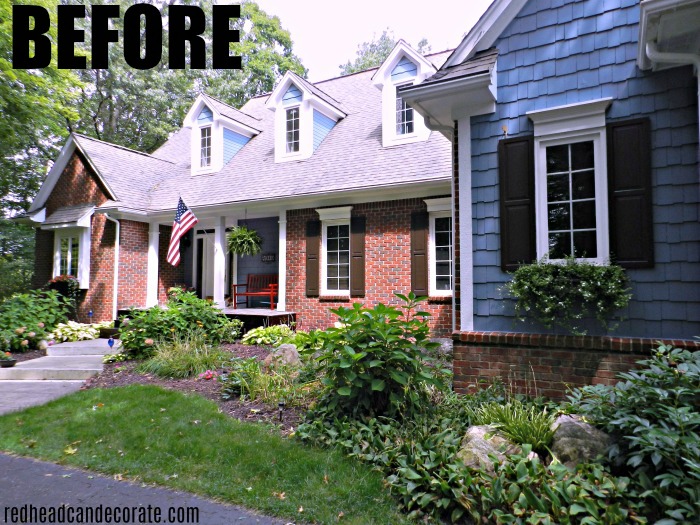
The originals were a very traditional style. I actually felt like they were a little “stuffy”. They matched the house perfectly before we moved in. Now a days though, matching isn’t always a good thing, you know? I like to mix it up. Traditional, rustic, farmhouse, modern, eclectic, mid-century …I like all of it.
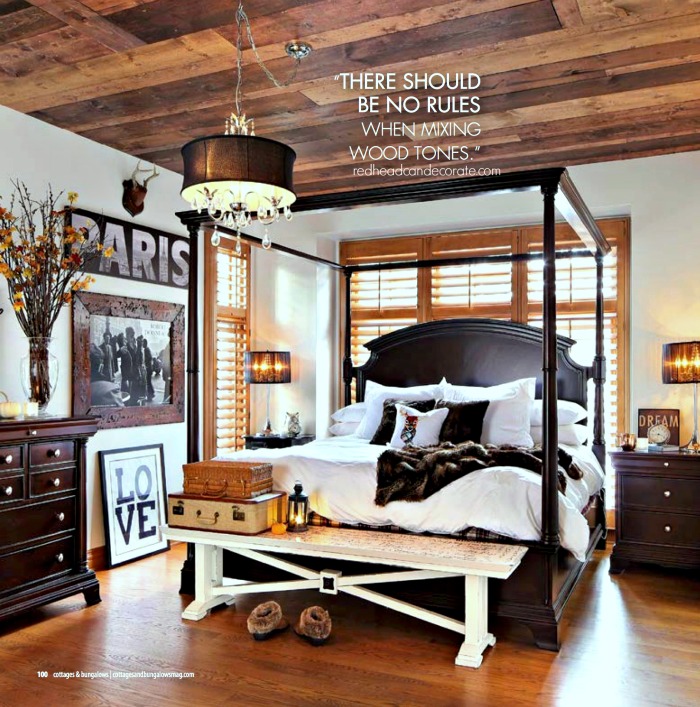
In addition, if you have followed us over the years, you will remember how we have added stained wood throughout the interior of our home to give it that rustic cozy vibe I am so fond of. Here’s several examples:
Interior Sidelight Wood Shutters
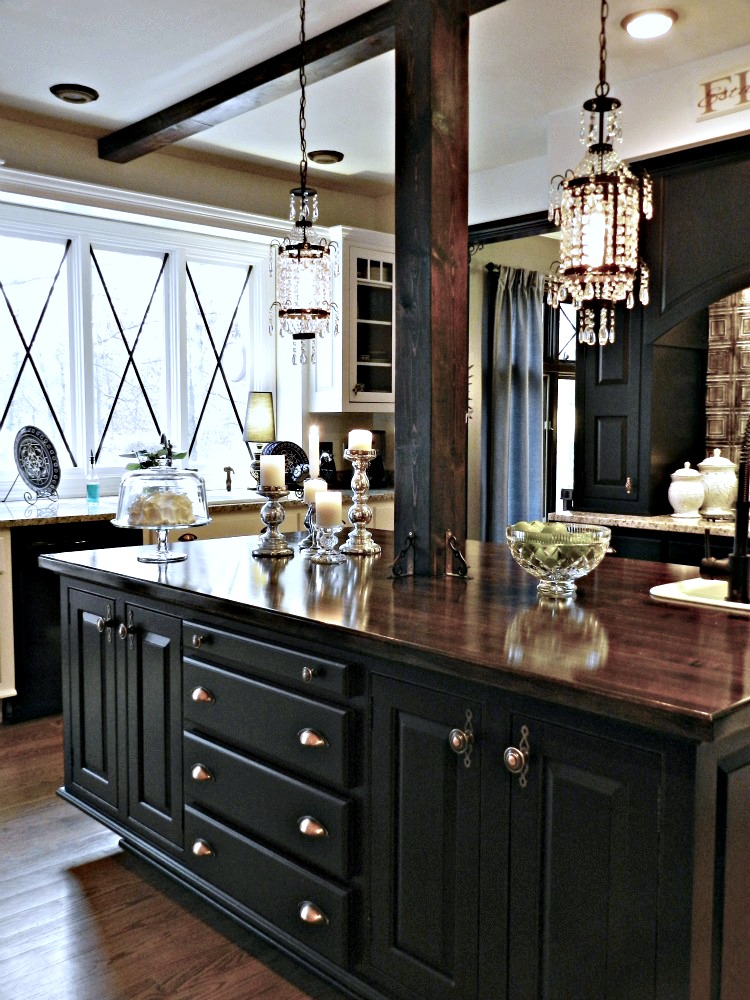
And here’s the kitchen…just look at all that WOOD.
We finally started spreading our wings last year and took the wood outside. Here’s several examples:
So, now you know why I thought it was time to put the wood icing on the house and give Cedar Oak Cottage some gorgeous rustic stained cedar shutters. Luckily, my husband agreed and we got busy.
*** Some of the links in this post may contain affiliate links for your convenience. Read full disclosure policy here.
The first step was measuring the old shutters and ordering the new ones. The length was very important for obvious reasons. The width could change, but not the length. We found our cedar shutters on-line at Home Depot, but I also found some nice ones on-line here:
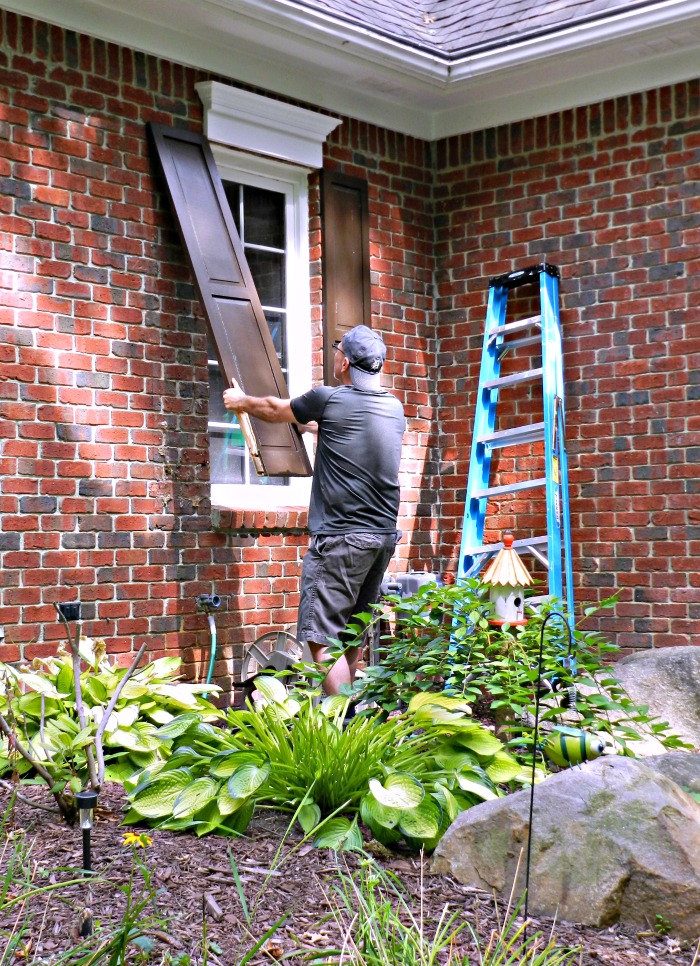
The second step was removing the old shutters. Be careful because there were a ton of spider eggs under our shutters. In addition, they did not come off as easy as you would think they would. These shutters have been on our house for over 20 years so all the harsh weather really sunk that screw into the wood and it would not budge. My husband ended up using a crow-bar to get them off. The good news is, he managed to save 2 of the shutters for a Christmas repurposing project coming up later this year.
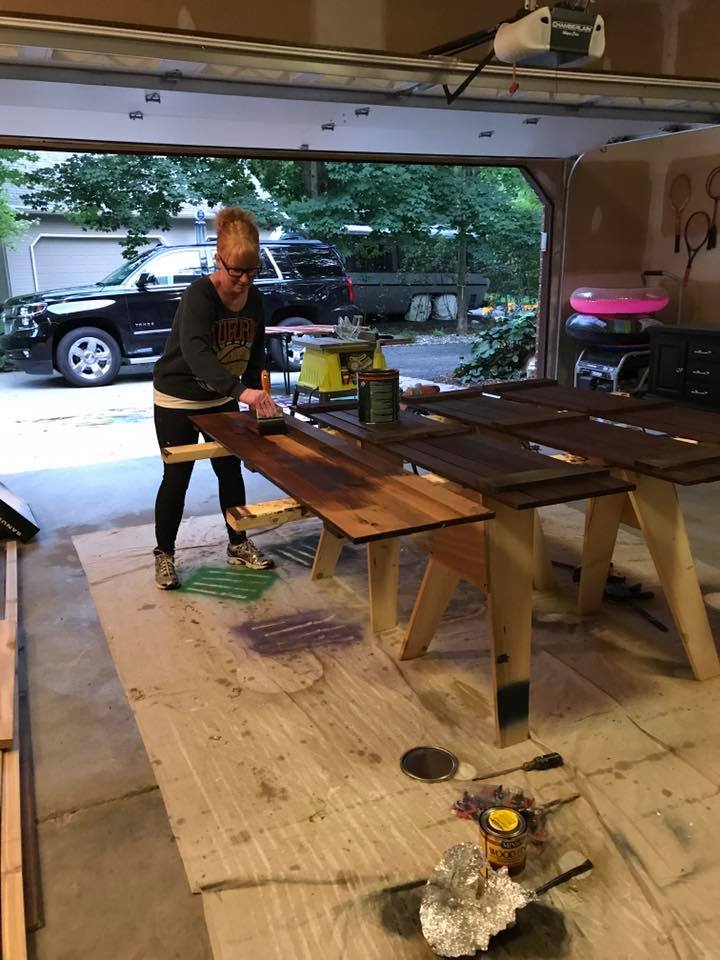
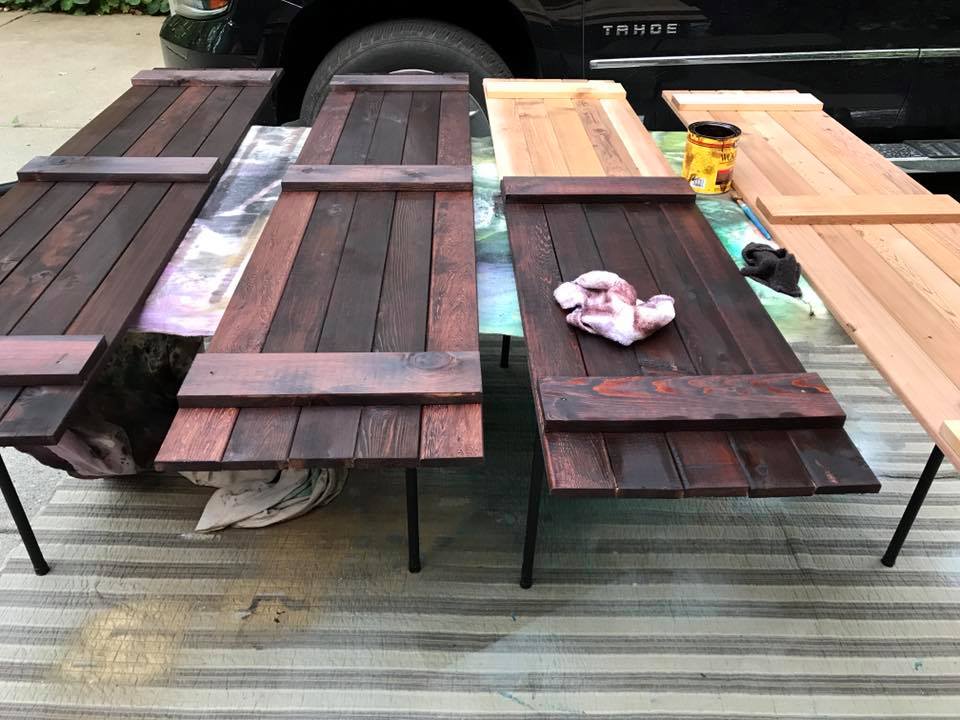
The third step was staining and sealing the shutters. I took on this job myself and I will tell you it was a lot of work, and took a couple weekends because of the time involved in drying (read the labels). I was very sure to take all precautions such as good ventilation, and proper disposal of rags and paint brushes. Here are the products I used:
The fourth, and final step was hanging the shutters. This was a pretty intense project, so I do recommend hiring a professional. When it came to screwing the shutters into the siding, that was pretty straight forward. However, screwing into brick (mortar) can be very tricky. Here are some of the products my husband used:
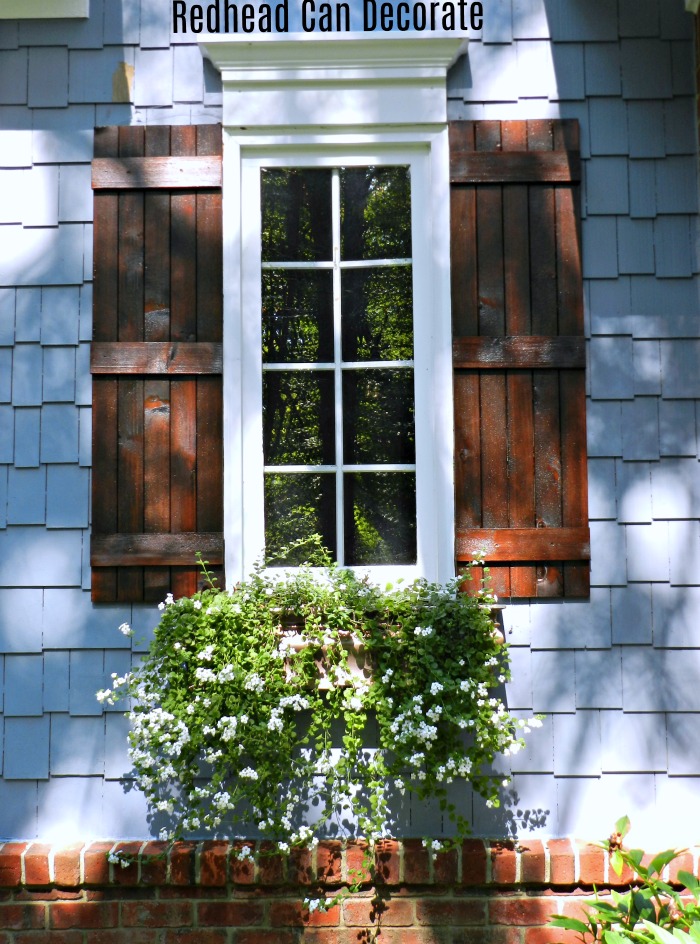
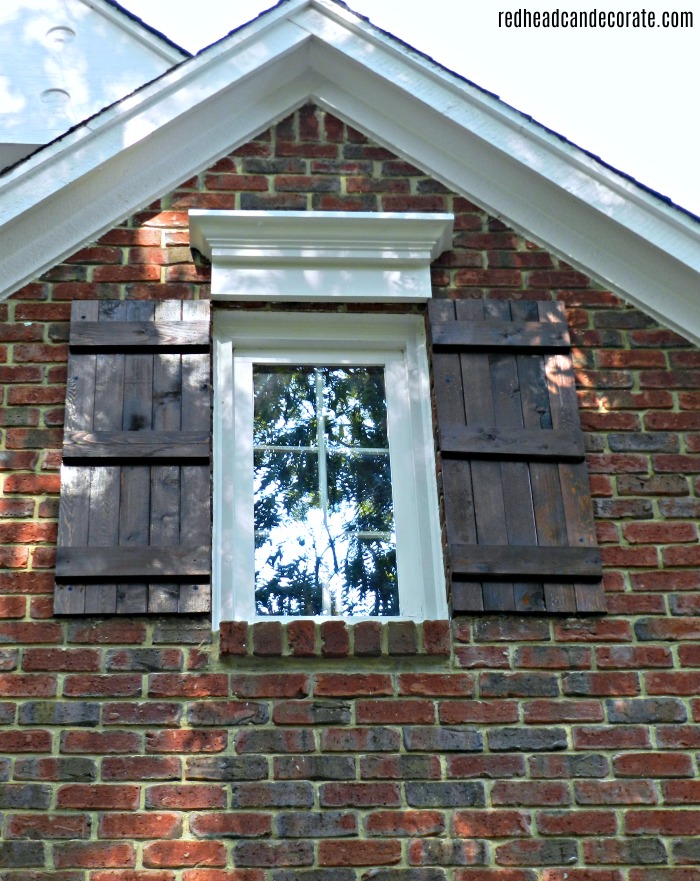
I absolutely love how they give the house an entire new “cottage” vibe. The stained wood is beautiful when the sun shines on it.
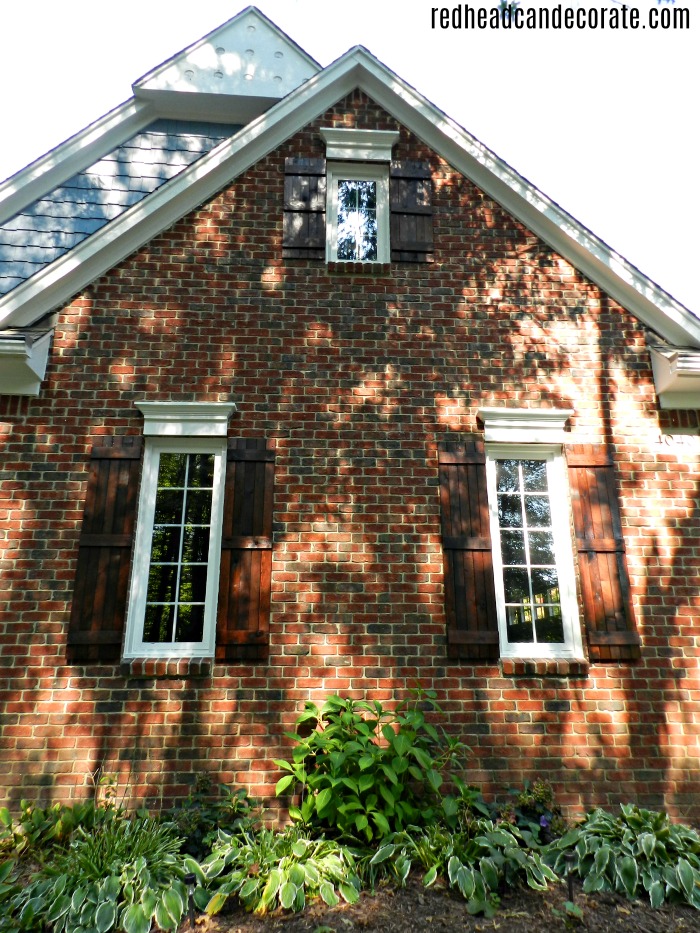
I kind of feel like Rapunzel is going to let down her hair here.
One quick note about the stain, and then I will let you enjoy the rest of the tour. We used interior stain and exterior sealer. The guy at the hardware store nearly had a tizzy fit when I told him. We have had fantastic results with the products listed above. Note to self: you can use interior stain outdoors as long as you seal it with exterior polyurethane.
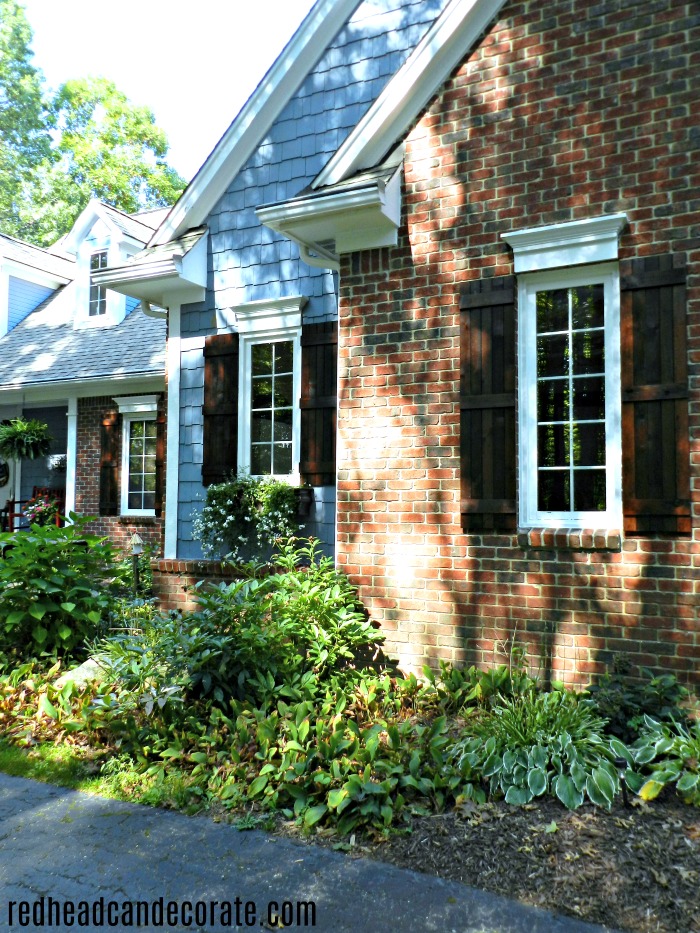
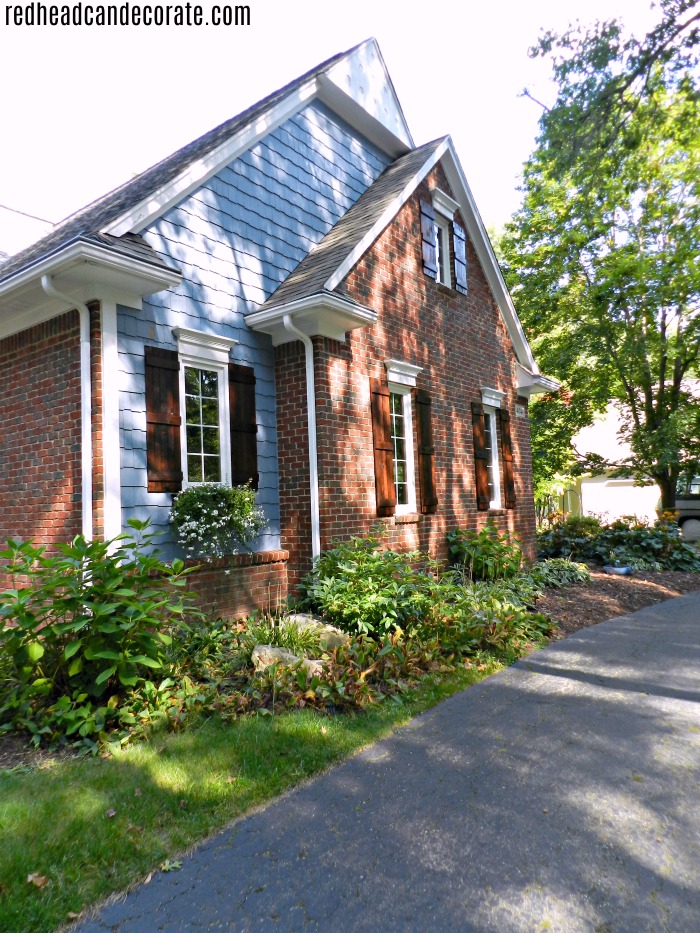
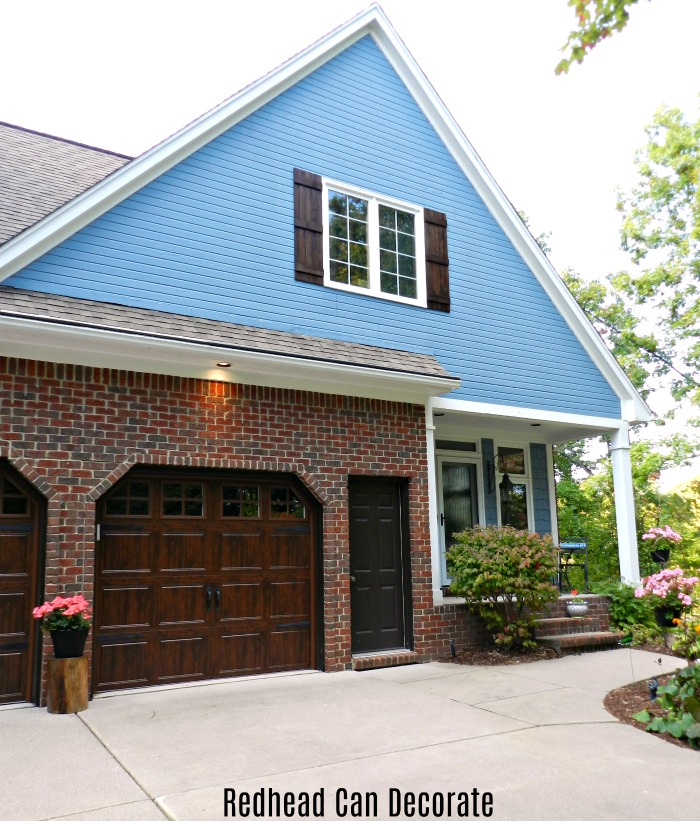
This is where it all comes together. The porch, the window box, the garage doors, and now the cedar shutters…

SaveSave


You did it again, nice job, love, Dad in NY
Wow! Just wow! Great results!
Very nicely done, love stain on shutters against the house.
But then after seeing many other projects you’ve both done am not one bit surprised this was done so well.
Have wonderful weekend
Beautiful! Very nice improvement on your home.
Sorry about the deer eating your hostas.
Deer are attracted to fragrant hostas so avoid planting the fragrant hostas – deer are attracted to the smell of fragrant hostas. If you have a lot of deer near your home, you might want to avoid planting these in your garden.
Also, motion lights might also help by place sensor lights around your garden that will turn on when deer come near your garden. The light will scare them away.
Last resort: Get what is called, Liquid Fence – a liquid repellent that you spray directly on your plants (be careful not to apply in direct sunlight as this could burn the plant). The scent of the spray will deter deer and other garden pests from destroying your garden.
Spreading human hair around your hostas may or may not help.
Our deer are smart. I’ve tried everything you mentioned. Nothing worked this year for some reason.
Oh, wanted to ask you; what are them plants called that you have in your window boxes? Whatever they are, they sure are pretty and bet they are shade loving plants as well.
Bacopa! I just looked on line. I meant to mention that. They start off small and go crazy. They dont need alot of water or sun. Just a little.
was wondering if you have ever collected the seeds from the Bacopa
No. But you are tempting me now. I’m not too good with that!
If you do decide to collect some seed; I would love to buy some from you.
Looks lovely….I can see that you sure did alot of work staining..hiw many shutters did you actually put up? You are so lucky Rick is so handy and willing to help you.You truly have made a beautiful home inside and out?
14 Lorri! Sometimes it seemed like 114 because you have to seal the back so lots of coats to dry. Thanks so much for stopping in ?
Wow! it may seem like a small thing to improve the outside of your house, but it definitely makes it feel more barn like. Love it! Hoping if I show this to my husband, it might be inclined to replace our vinyl ones! Wish me luck!
Good luck, girl!! Bake cookies, then show him ?
Just perfect, as usual!! ♥️ Them!!
Thank you, Barbara!
Absolutely beautiful! Give the house a cottage yet stately look 😉
That is so true! Thank you, Janet ?
Gorgeous, you always have such amazing makeovers. They make your house look stunning.
Thank you, Debbie! I appreciate your kind words!!
Oh Yes this is a fantastic ‘after’!!! Love the color of the stain; such a statement; and yet has your cottage feel you were going for. The brick and the wood make a beautiful pair. You two do great things.
Hi Carol! Great to hear from you!! Thank you!!
OMG girl you and hubs have done again! Your home is beautiful! I’m so impressed with Ya’ll (yes I’m from the South)! Love that you did name your home Cedar Oak Cottage….that’s perfect! Looking forward to seeing the next project!!
Hey, girl! Thank you!!! Big hugs. I hope you stop back soon 😉 Have a great Sunday ~ Julie
They look so nice!!!
What a great job on the shutters, as usual ? It might be the angle but the upper window shutters seem like they are hung too high, above the window on the top and too short on the bottom. Just my personal opinion ?
Hmmm…must be the angle ? They are flush with the window.
Love the new shutters. You and your husband did great work!
Oh Wow! ~ Those dark stained shutters, give your Cedar Oak Cottage, such a warm & inviting ‘feel’ Julie! ~ So nice that your hubby likes to help! ~ It looks fabulous ; )
Thank you, Becky! So happy you like them. Stay tuned for a thrifty Fall outdoor chandelier this week! ~ Julie
WOW! Your home just went from Great to Cottage Charming. I don’t take your (addition) of shutters lightly as we too did a major shutter overhaul and it was many many hours of work. Stain choice has just the touch of rustic your gorgeous property warrants. Now, pour a glass of wine, sit, and admire “Cedar Oak Cottage”.. Job well done guys! ?
Thank you, Darlene! Your comment made my night!!!! Long story, but I needed it. XO
Julie, you once again nailed it. This project is fabulou I love it! Keep your outstanding post coming. I so look forward to them. I posted a comment when THS post first came out, but for some reason it’s not on her.
Oh no! You are my biggest fan. I was having having some trouble with my comments. Thank you, Ivory!!!
I simply love the new look! The rustic feel it adds to the house just makes it even more interesting. Love it!
Thank you, Isadora!
[…] Exterior Cedar Shutters […]
[…] DIY STAINED CEDAR SHUTTER REVEAL […]
Of course I love the shutters – whew was that a task! What I love most is the color you have added to the house.
I always think of Buffalo when thinking of you. Remember that section of Tudor homes on the way out to the zoo (if memory serves me correctly from 40 years ago!) They could by now use the Redhead touch and they would again be marvelous!
I LOVE everything you have done to your beautiful home! But I am curious about the kitchen windows. What have you installed on them to create the X’s? I really love the look, and omg, all the wood in the kitchen is gorgeous too.
Hi Barbara! And thank you. I measured corner to corner for a tight fit and installed flat 1/2 inch wood molding in there. 2 in each window. I had to paint them black as well. Super easy! I don’t open those windows, so it works.
[…] Before we go further you may recall when we shared our DIY Stained Cedar Shutters? If interested you can see those here: DIY Stained Cedar Shutters Tutorial & Reveal. […]
[…] HOW TO UPDATE/ADD EXTERIOR SHUTTERS […]
I’m curious how your real cedar shutters look now, 2 years later. Did they hold up well, or have you had to restain them yet? I love the look but worry about the upkeep of real wood shutters…
Some of them need another coat of poly I am just noticing now. Be sure to put 2-3 coats on to be safe. I think we only did one.
OMG!!!!why would you want to move that house/home is outstanding!
Looks beautiful!! How did you do the sealant without leaving runs when doing in between the boards?
The boards need to be horizontal when staining/treating and they have to dry completely before you put them up.
[…] Replacing Old Shutters with Stained Wood Shutters […]
[…] redheadcand […]
[…] was definitely an upgrade from the drab sage. Once we replaced the traditional shutters with our DIY Cedar Stained Shutters, I began to appreciate the blue a lot better. It stayed this way for approximately 10 years. You […]