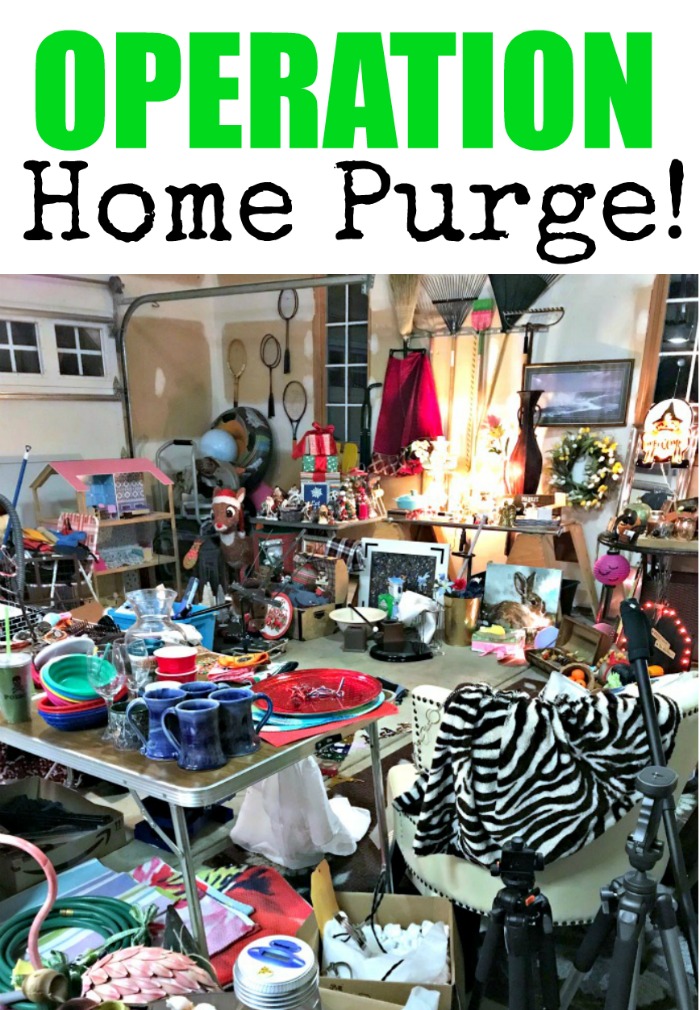
I always knew my husband was a stud, but now I have proof 😊. While he was recently visiting my “Decorating She Shed” located in our walkout basement, his exact words were, “You need shelves in here, Julie.” My first response was, “Heck, no. Shelves would be way too expensive, and a ton of work.” After a few minutes of trying to put back a few items I had gotten out, I began to fantasize about shelves! My husband was spot on…I needed shelves, and I needed them bad. Welcome to our “Affordable DIY Basement, Attic, or Garage Storage Stud Shelving” tour which includes a very basic DIY tutorial for those that want to build shelves of their own.
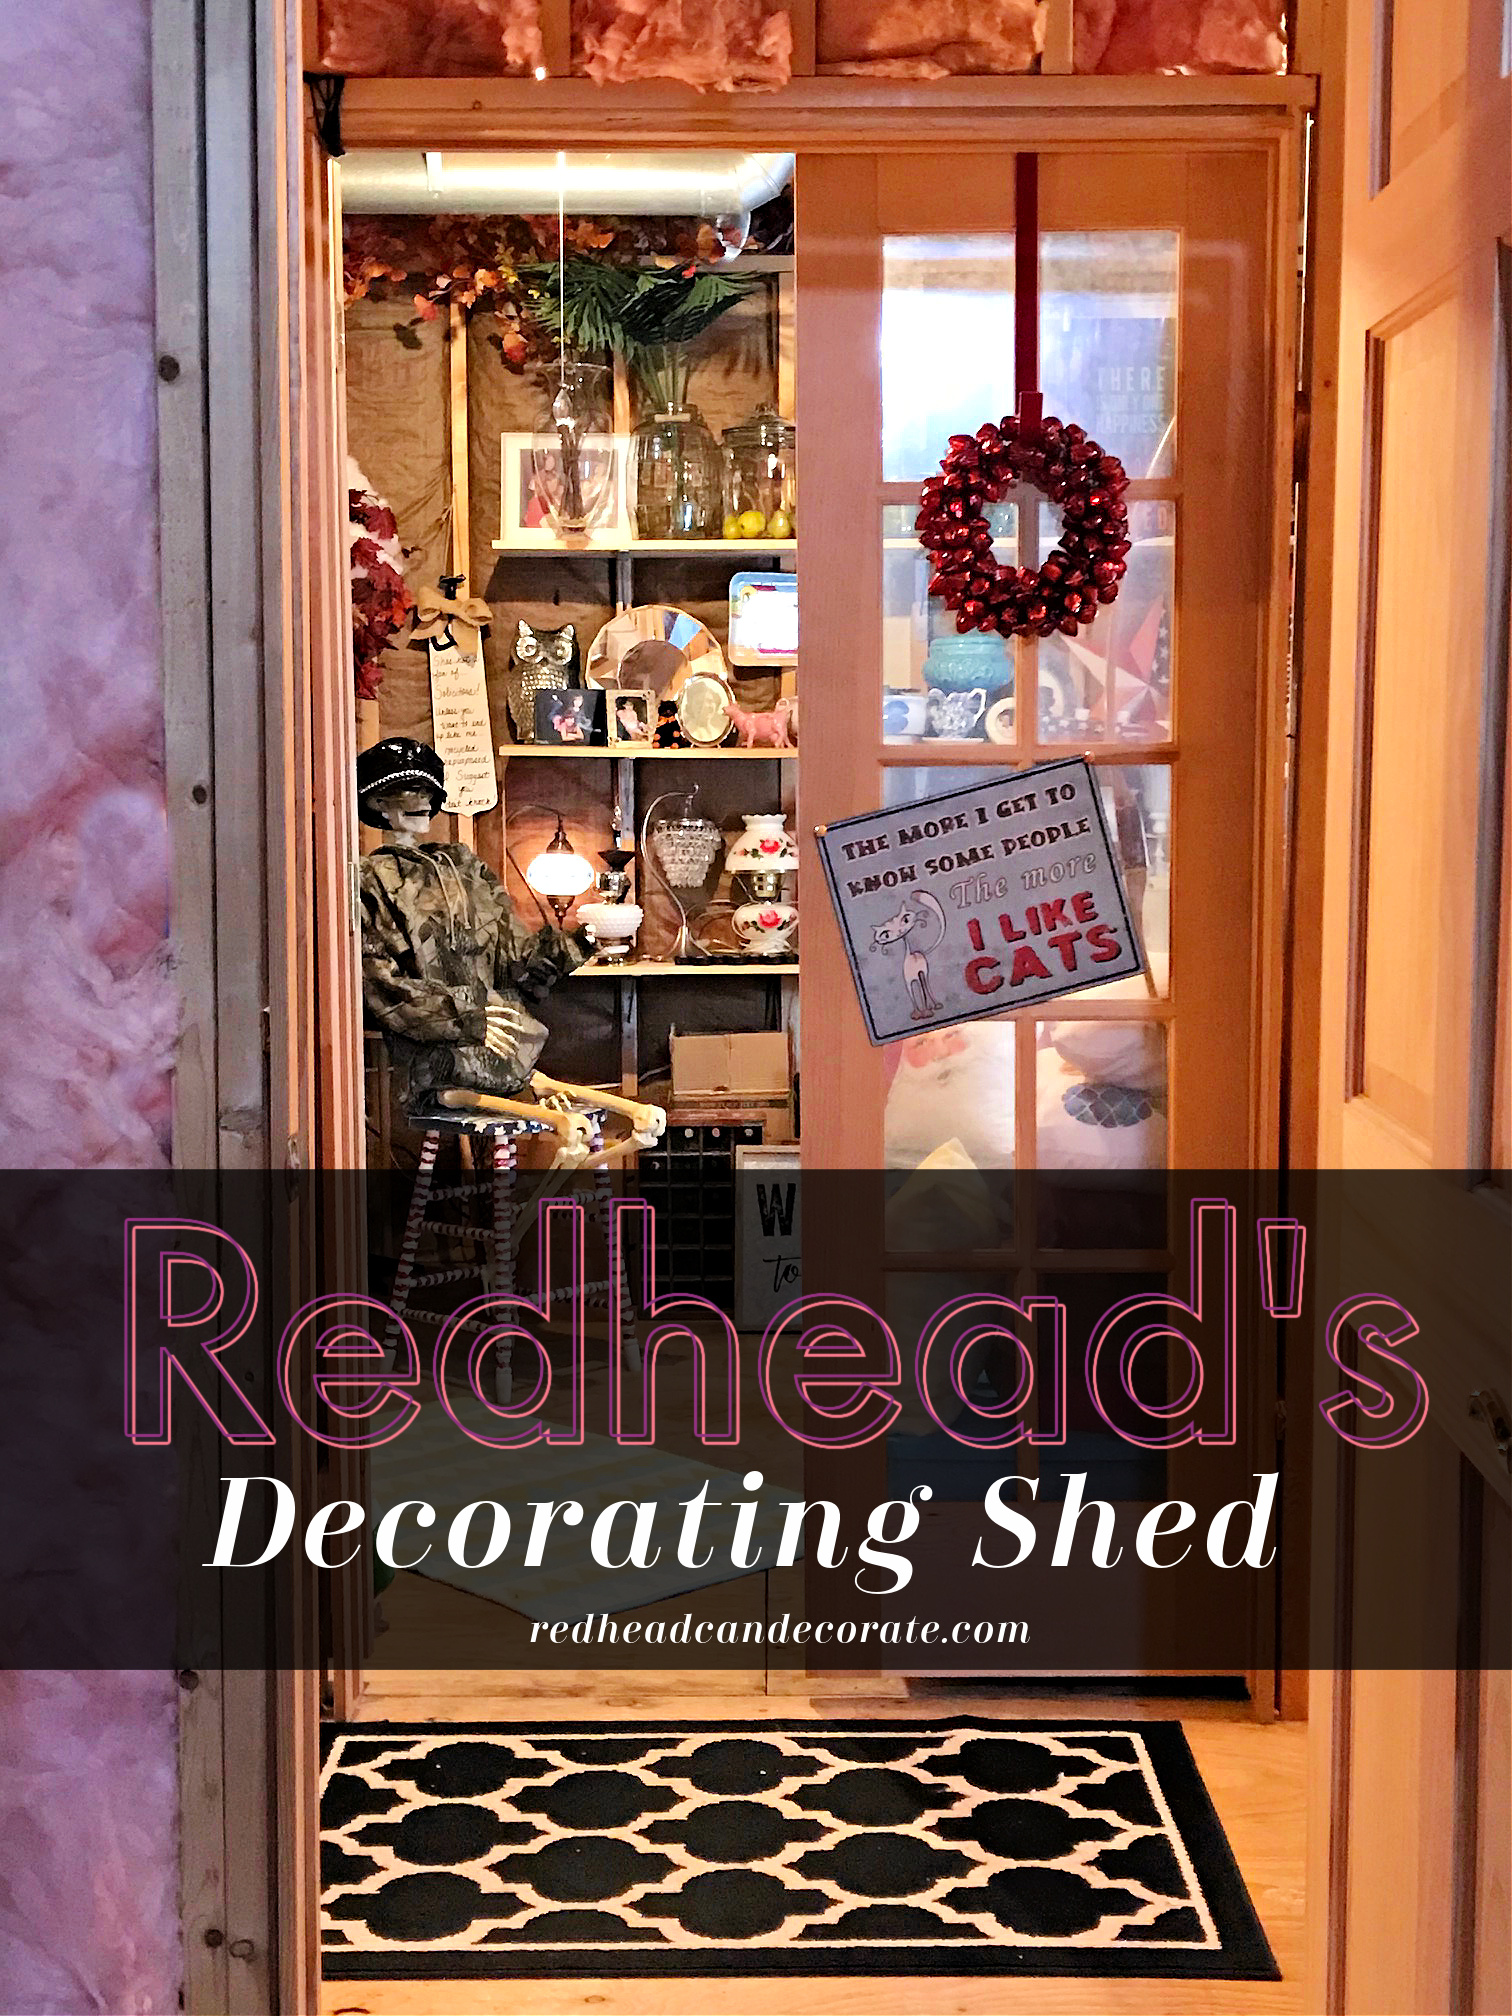
Redhead’s Decorating She Shed
We have a “walk-out” basement in our house, and 1 side of it has a guest suite, and a living room area, with a dining space. I recently shared the living room area that we transformed into an “Indoor Gym“. I also shared our “Our Guest Room Makeover” a couple years ago.
Then there’s the other side of the basement, that is “partially finished” and has 3 separate rooms with no dry wall. My husband uses one room as his “man cave”, and another room is used to store all of our paint, and outdoor furniture. I use the last room to store all of my home decorating items including holiday, seasonal, and even keepsakes for the kiddos. I guess we can call it “Redhead’s Decorating She Shed”.
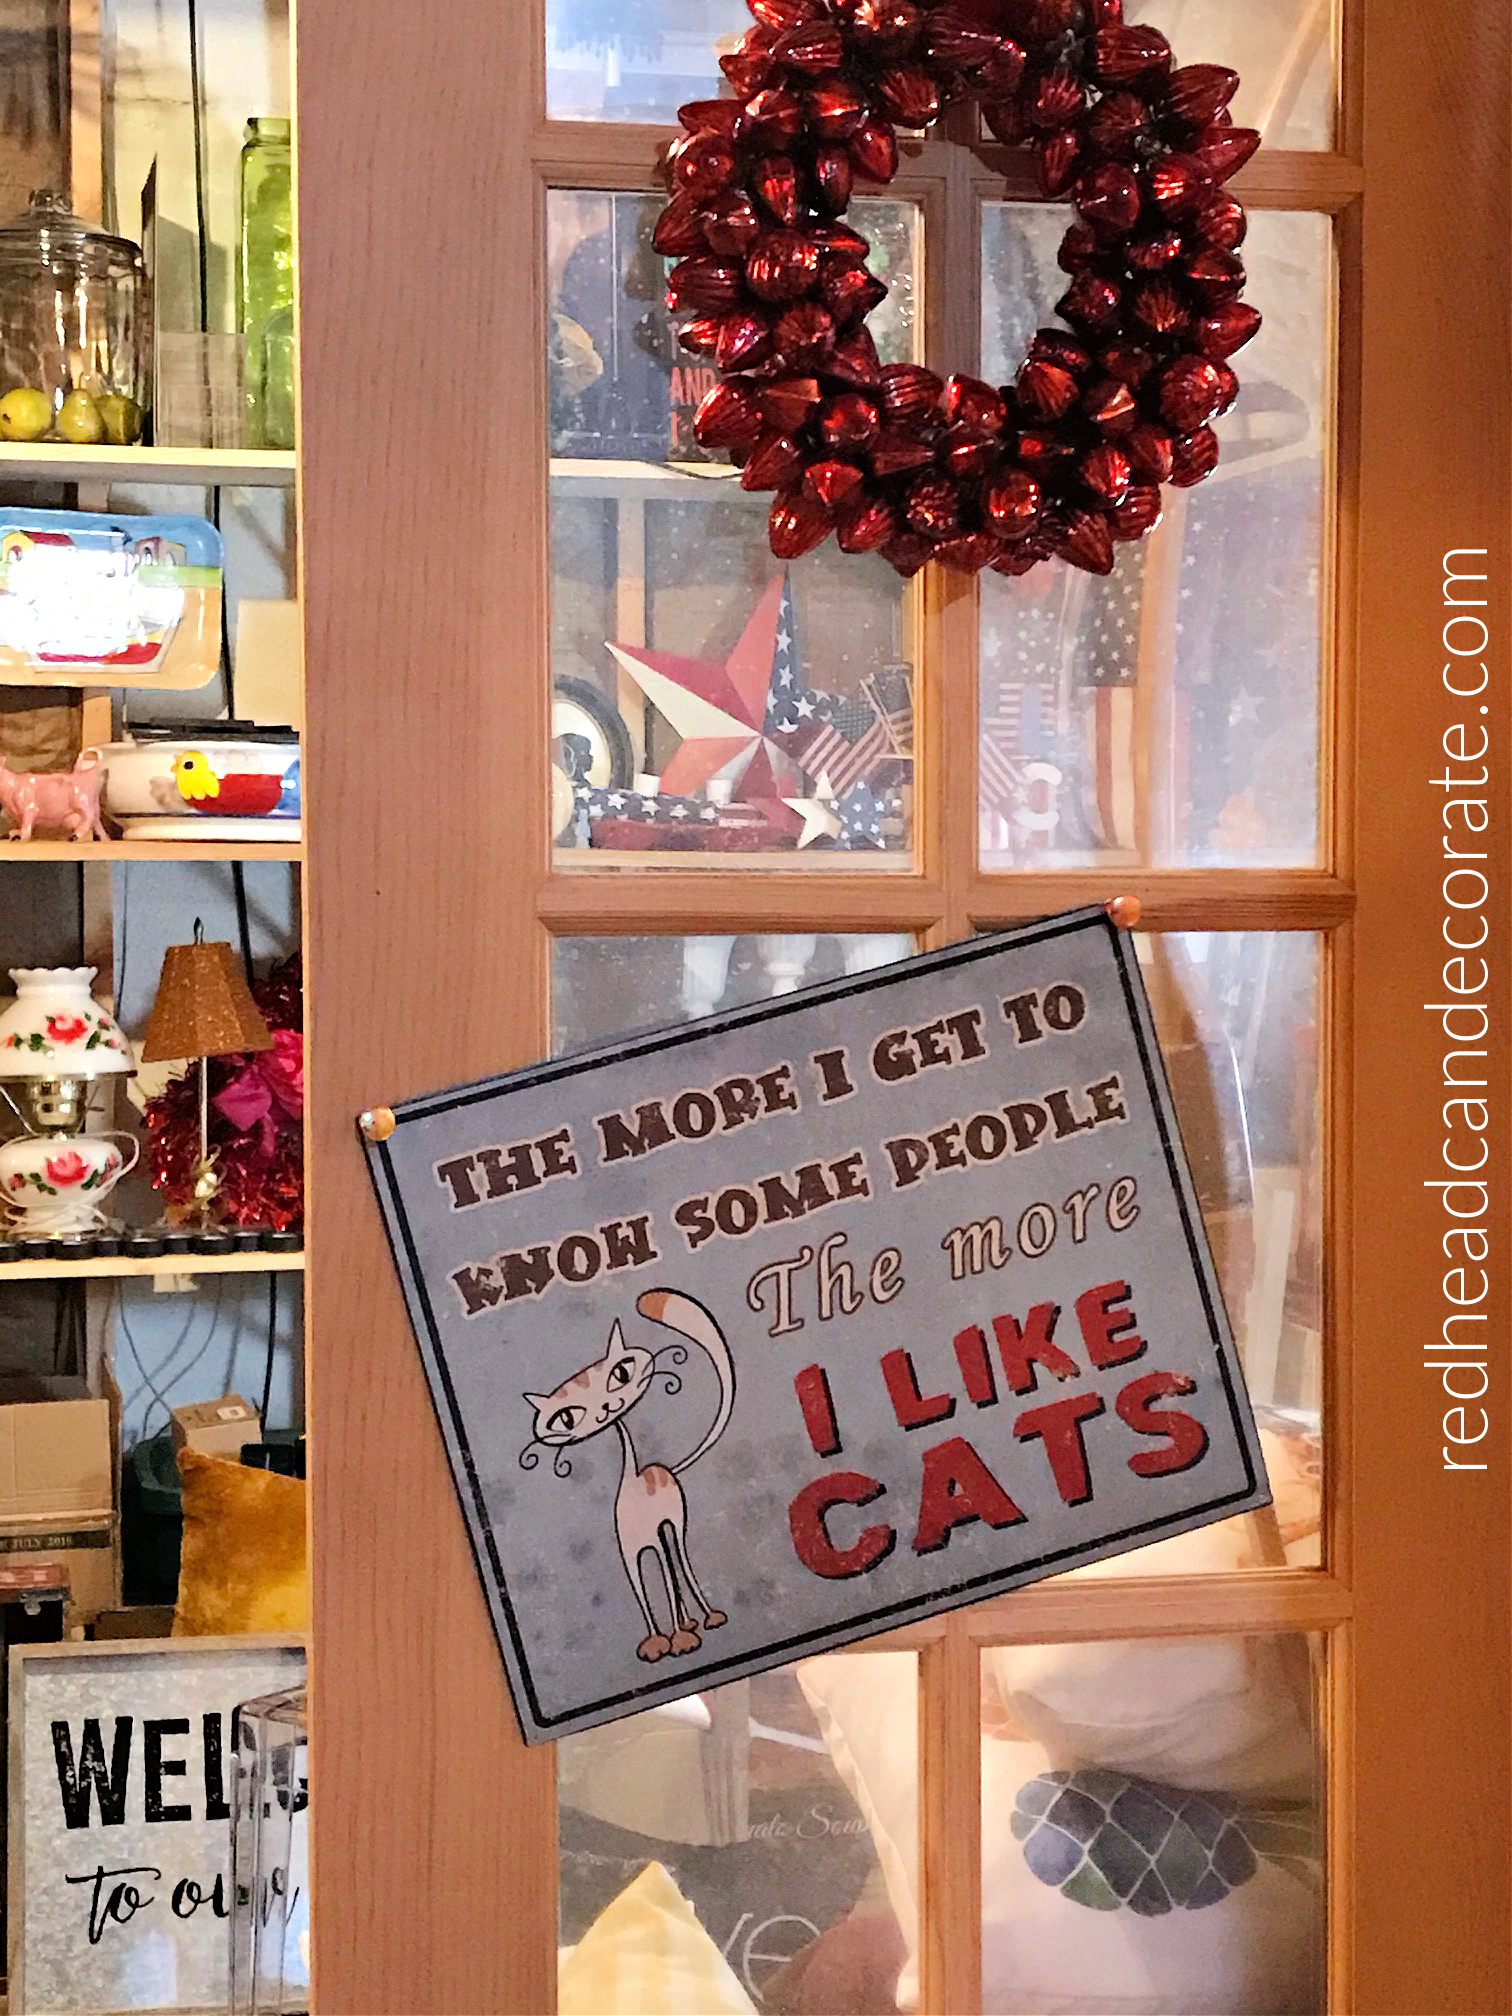
Welcome to Redhead’s Decorating She Shed front porch 😆…
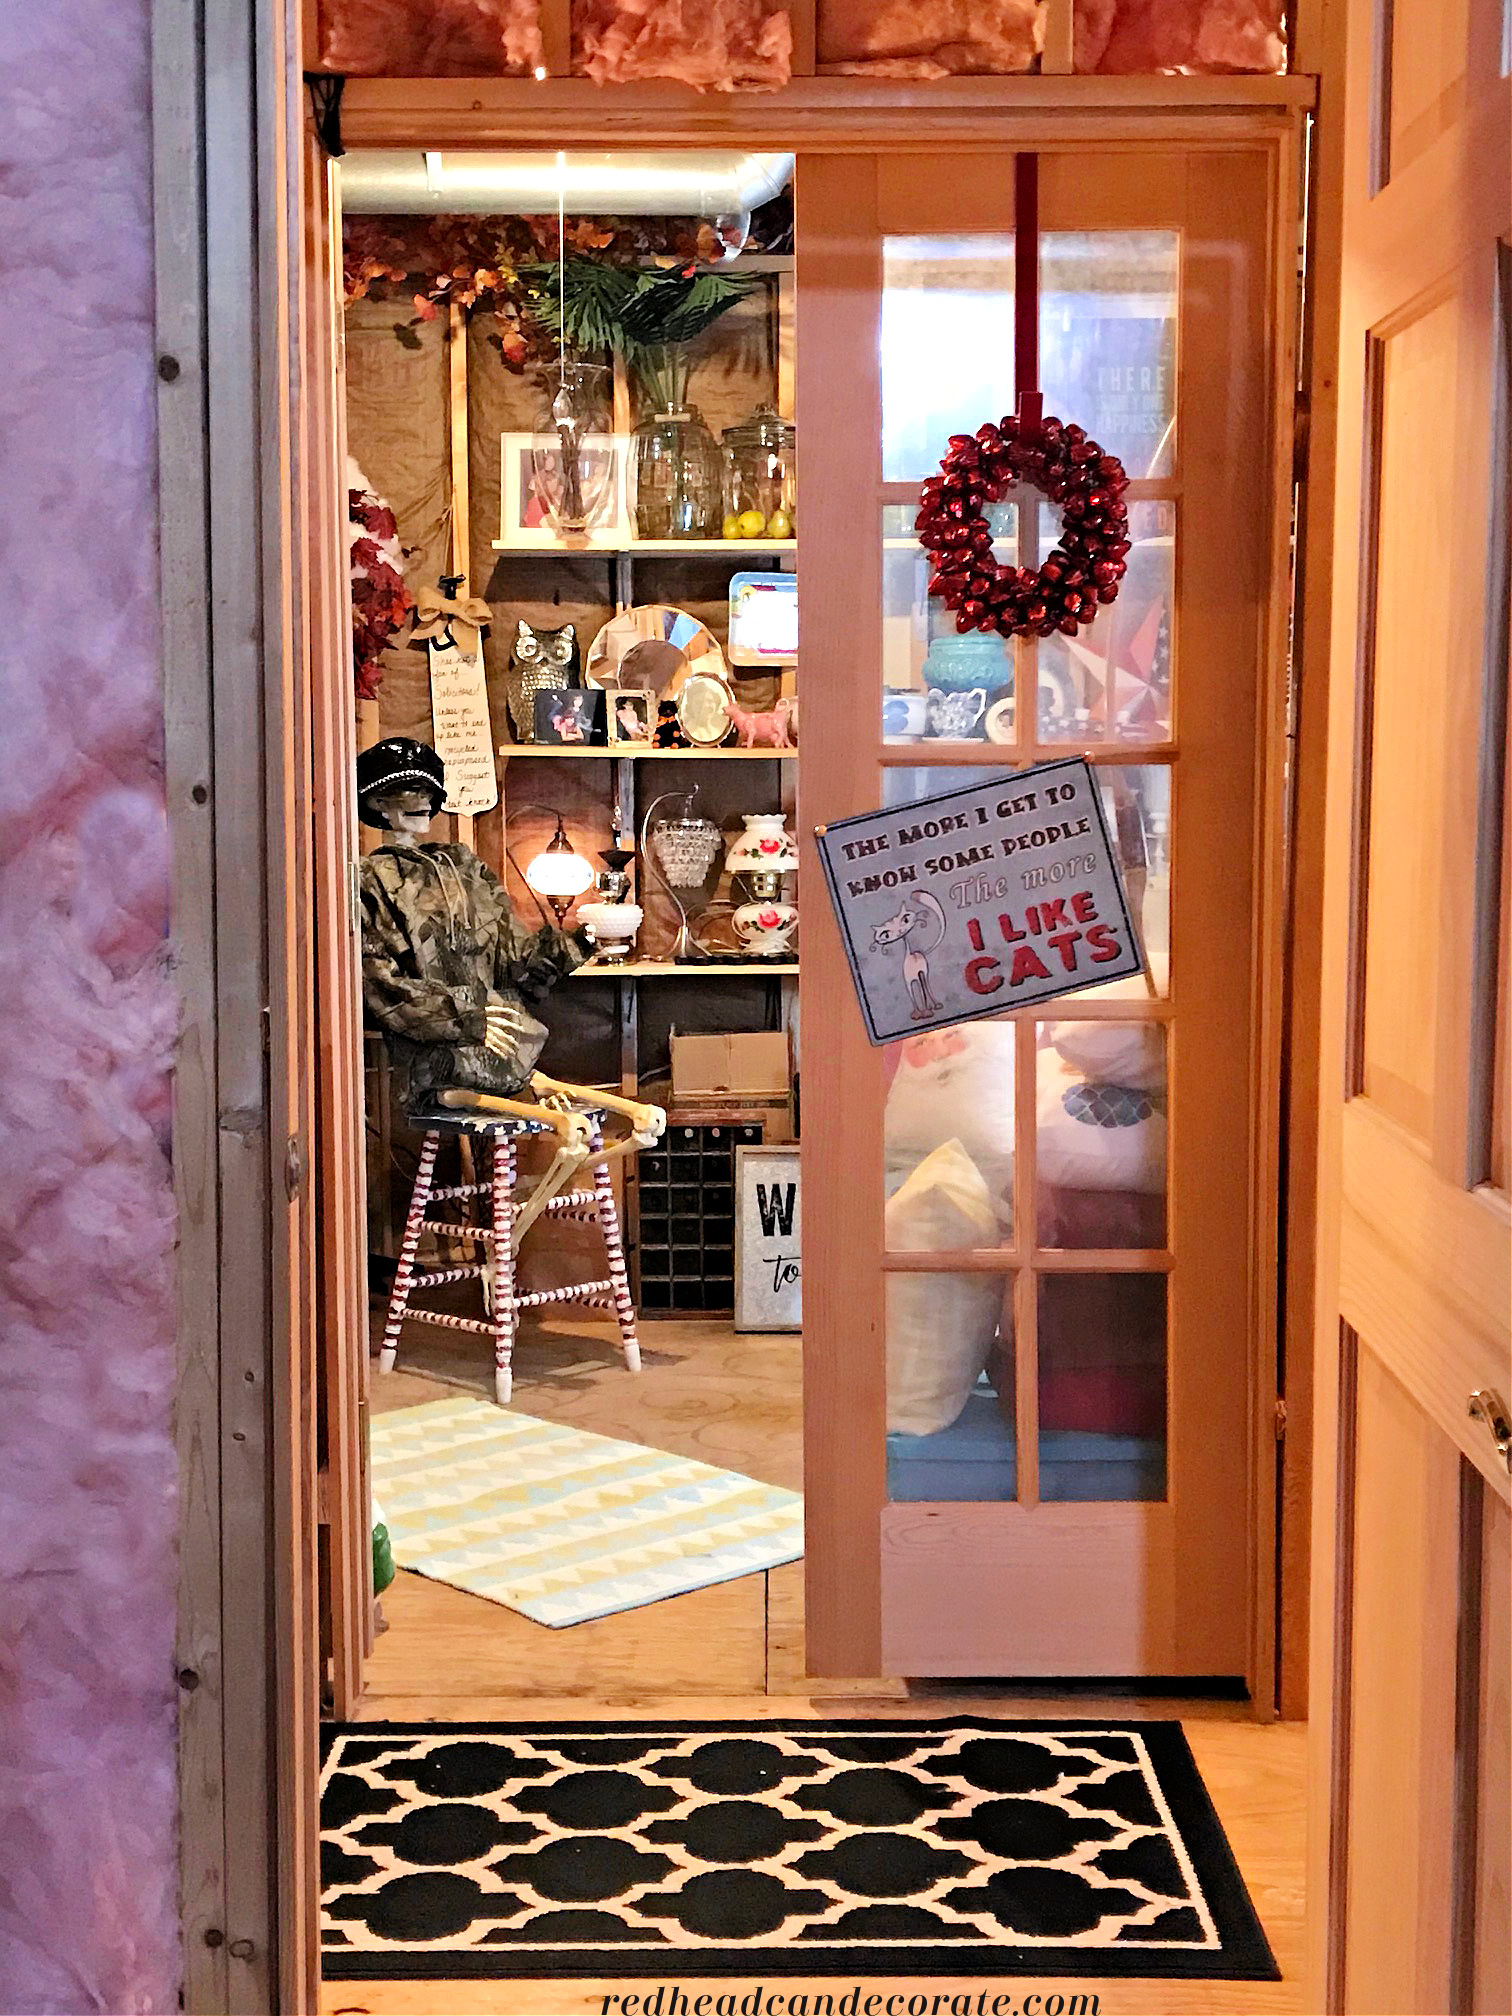
Trust me, a few months ago this entrance did not look so cute. It was a DISASTER after my huge Christmas Home Tour and I had just about given up on getting it organized before next Christmas.
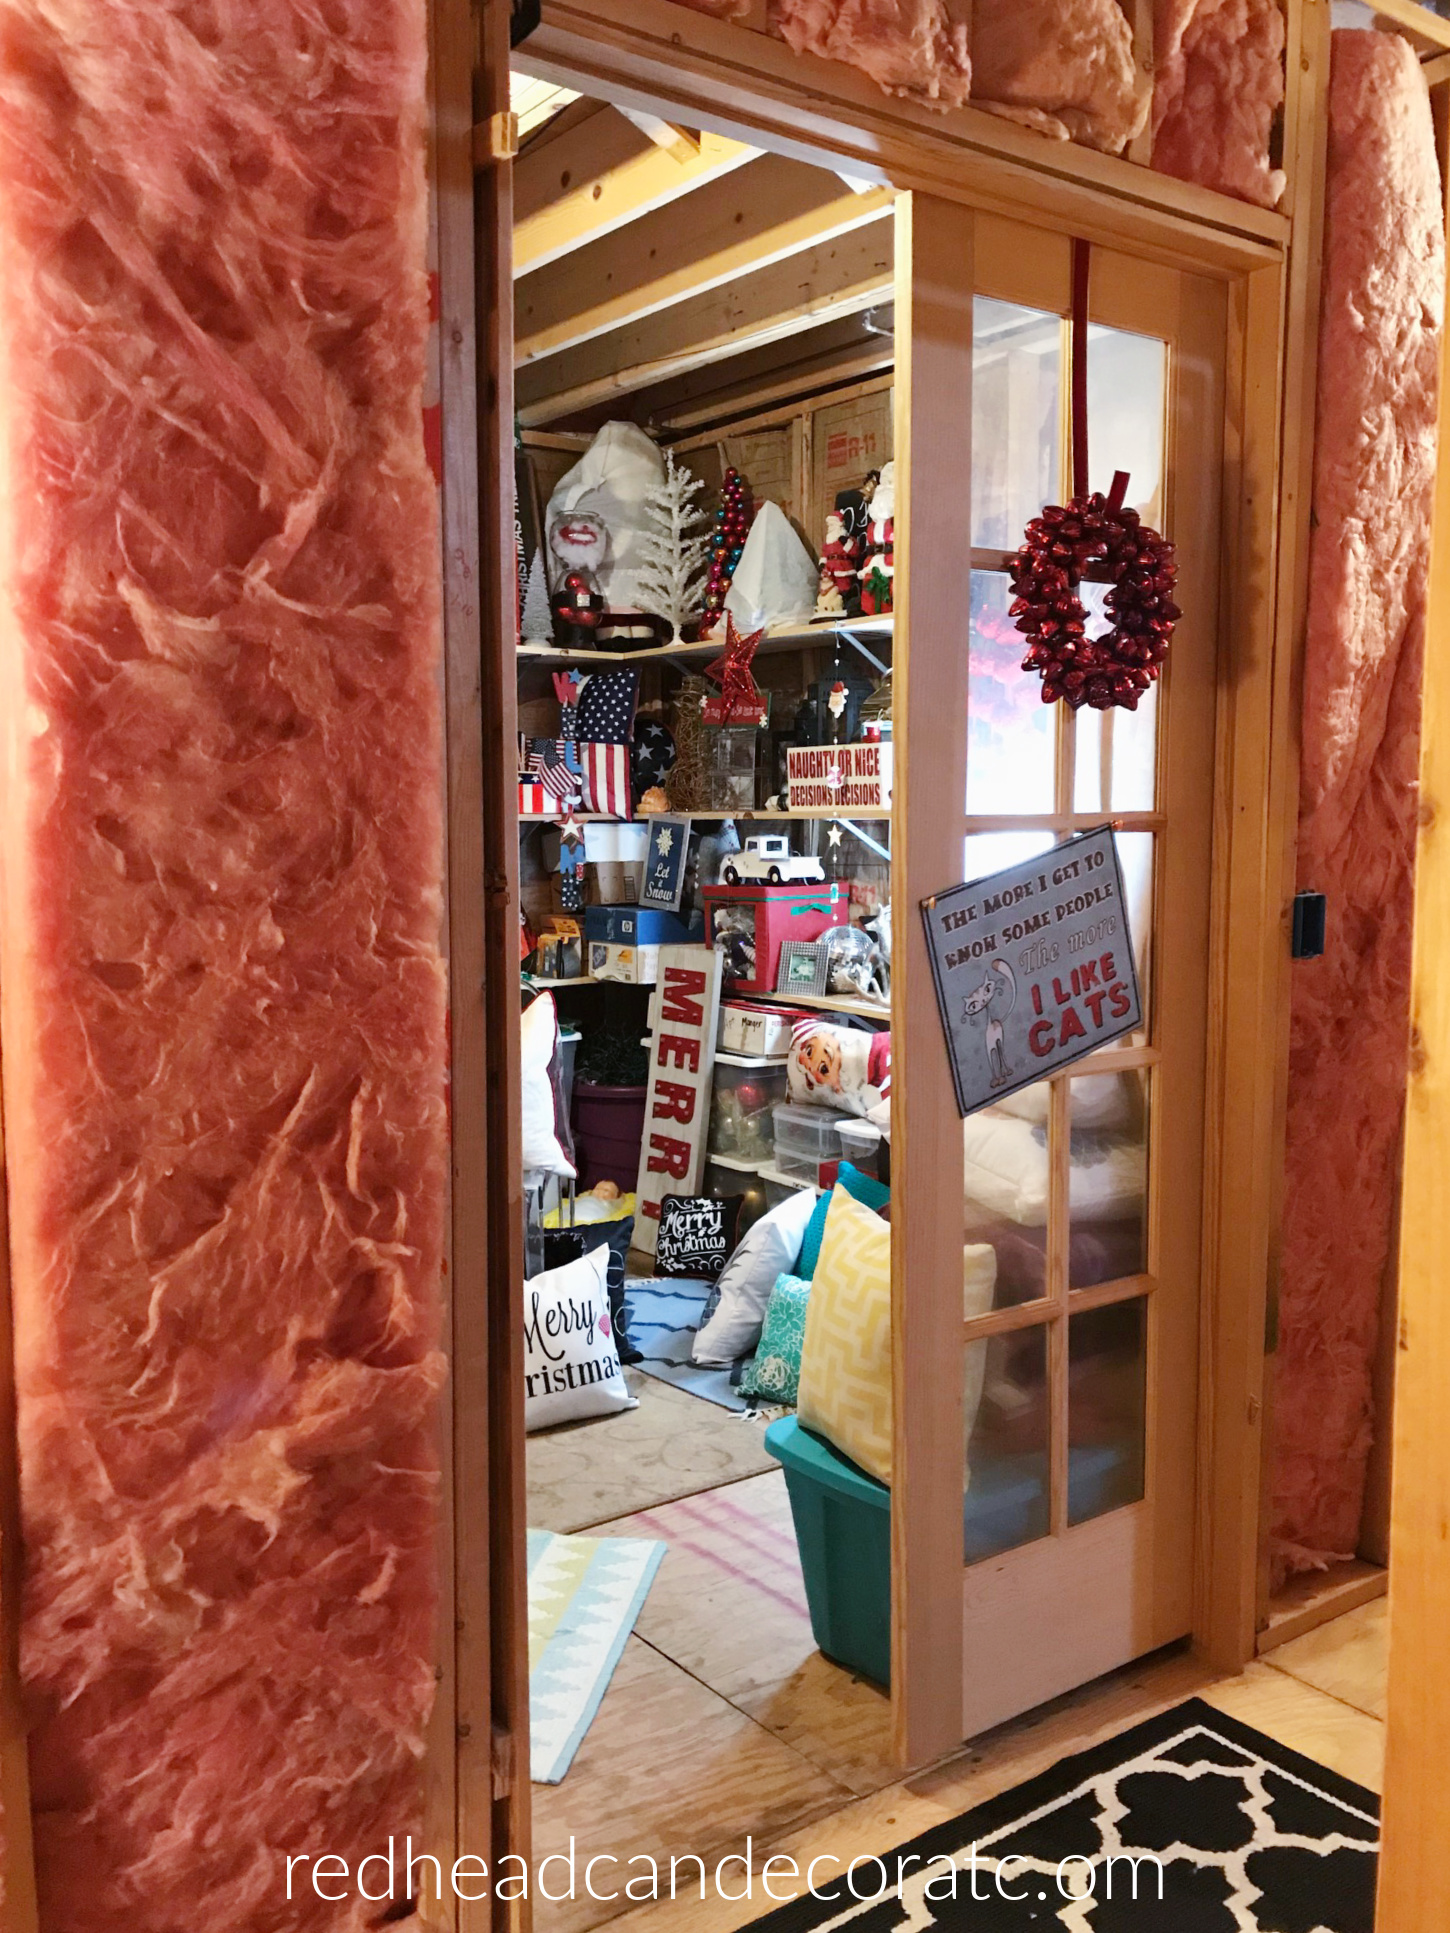
Even though I don’t have photos of the before, I can tell you that there was absolutely no room to walk because I was organizing everything on the floor 😖. I did have a few random nails in the studs for wreaths, but it really was ridiculous. My husband was so right, I really did need shelves to not only organize everything, but to help make me feel less stressed out when I had to gather things for my work. I actually look forward to coming down to my little she shed escape.
Where can DIY Storage Stud Shelves be used?
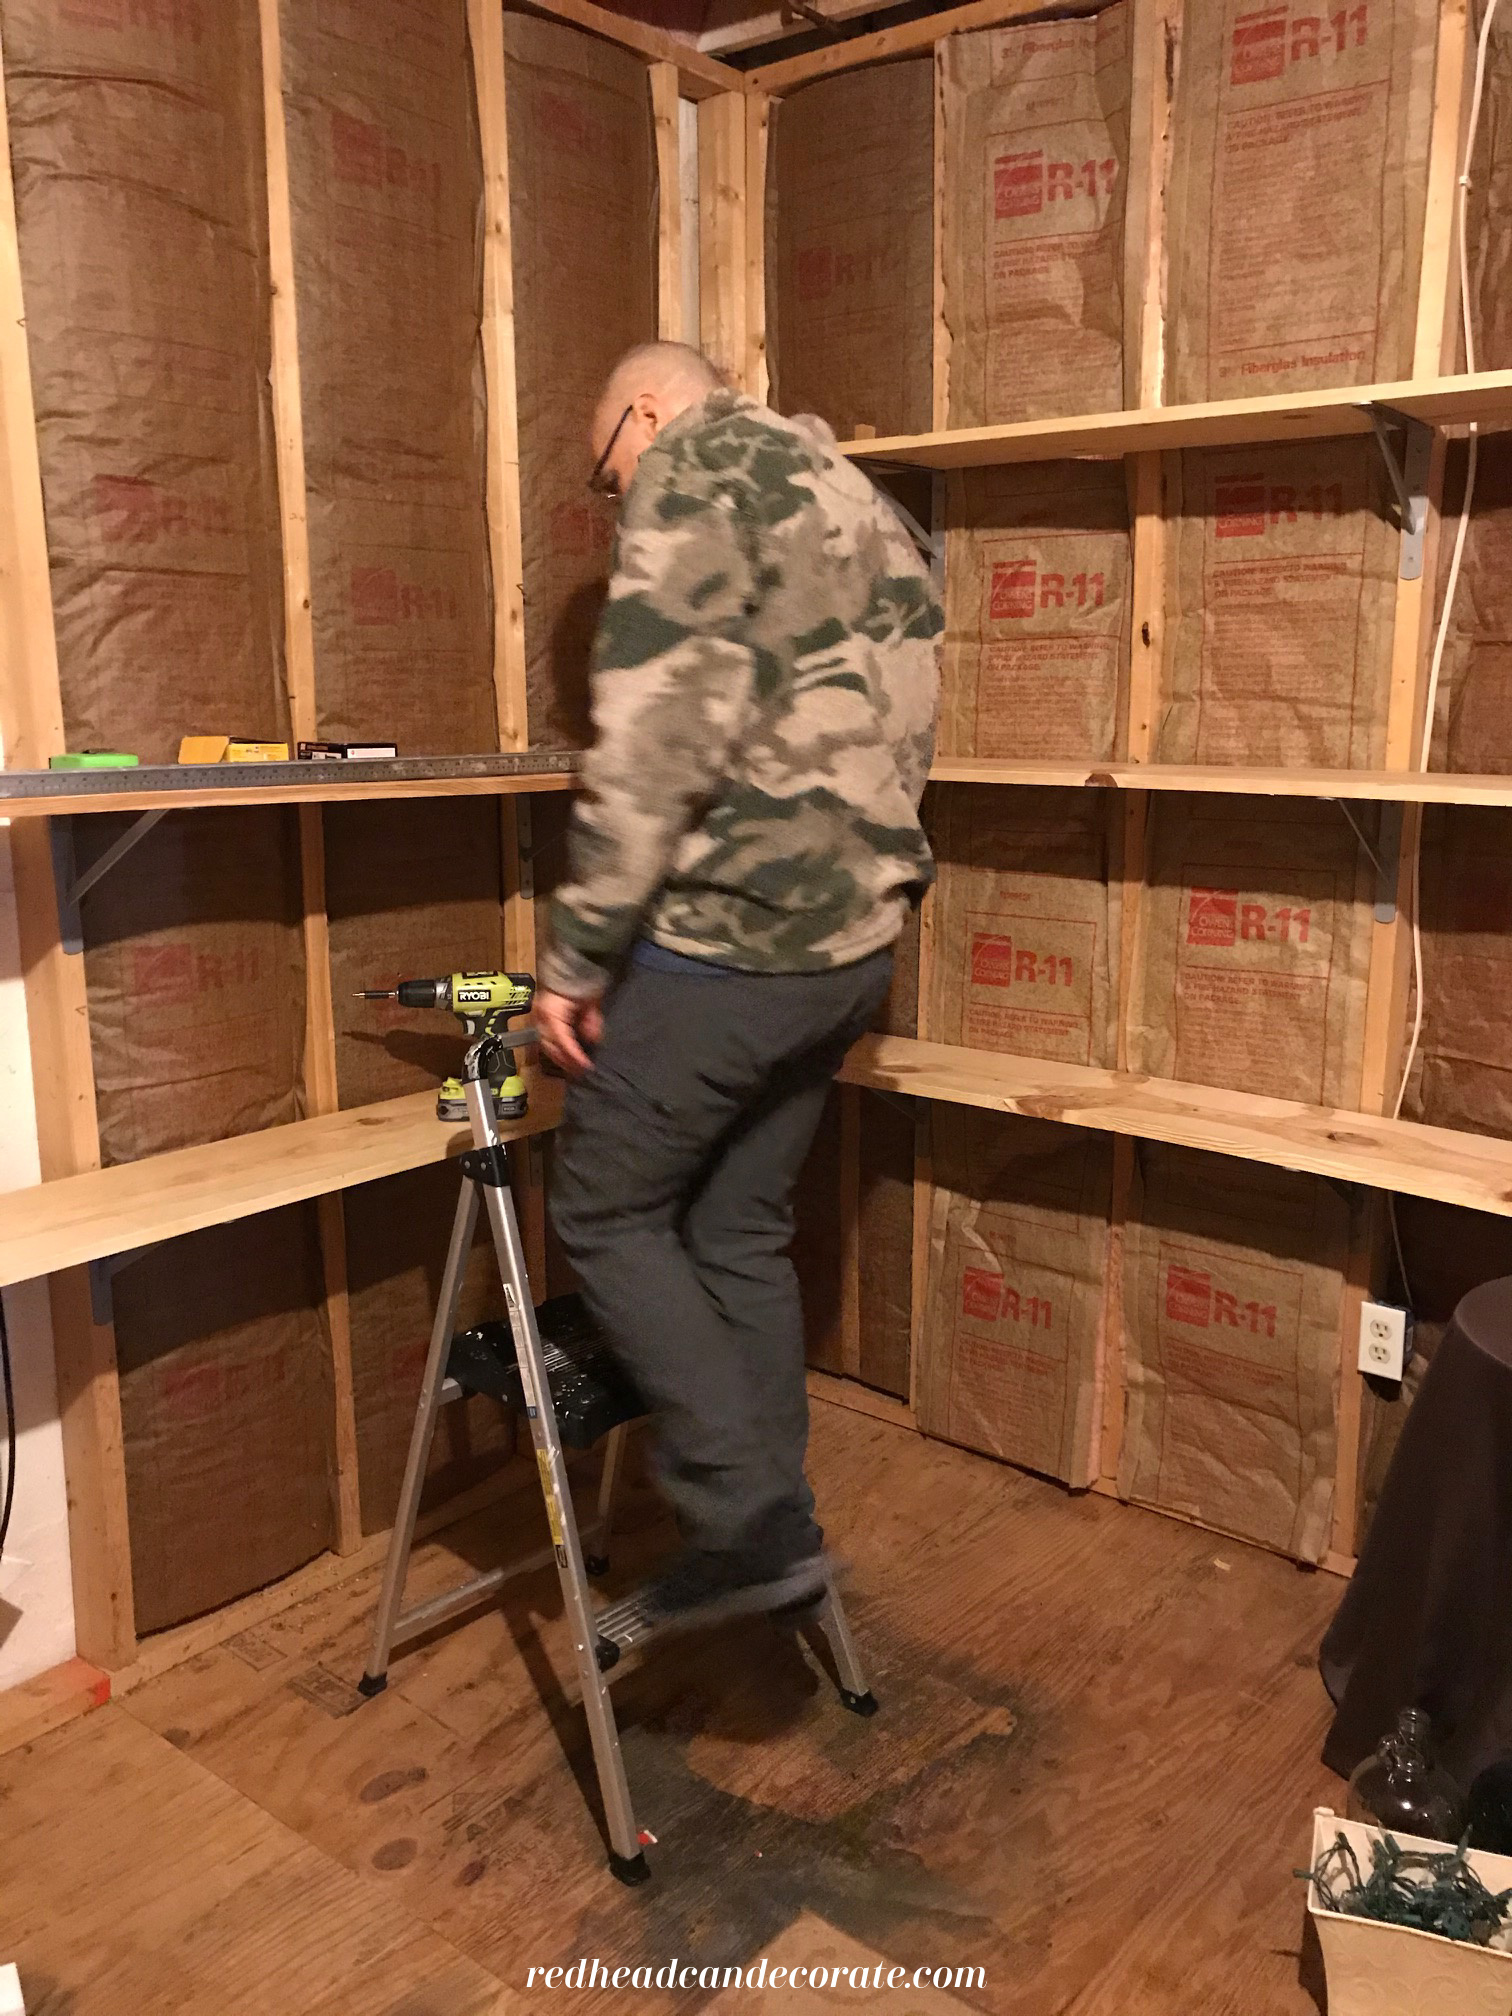
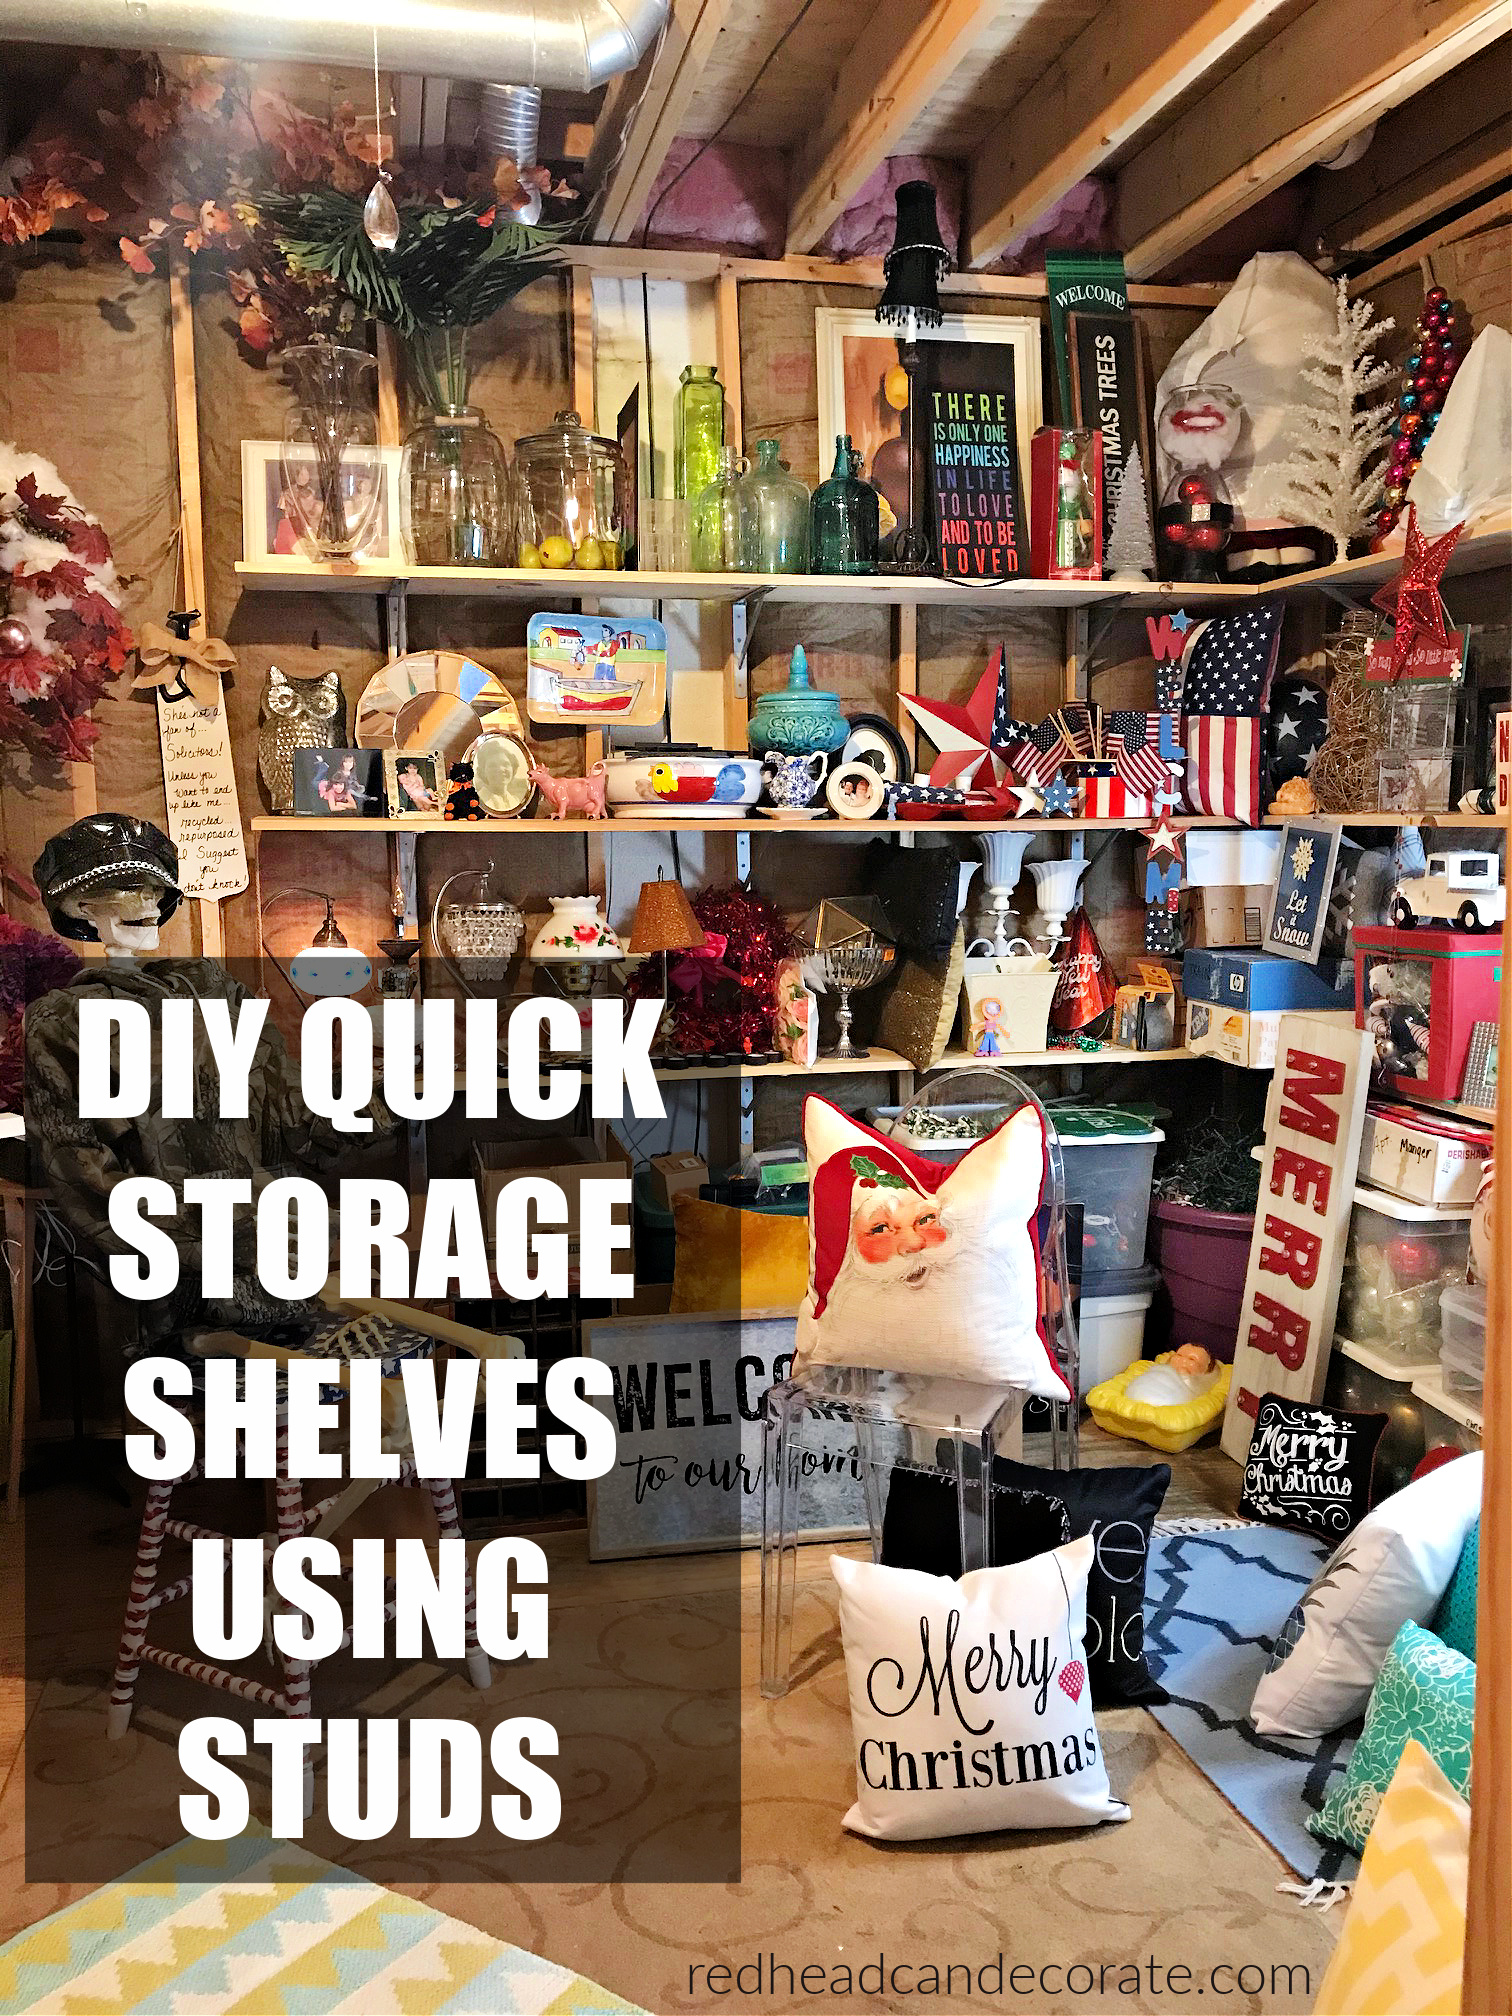
After we cleared everything out of the area where we thought the shelves would benefit the most, we discussed how long and high the shelves could go to get the most out of the area we had to work with. For example, I knew I wanted room on the floor below the bottom shelf so I could push bins under there. I also wanted the top shelf to have extra space for my “tall” vases, and trees. This was really getting exciting…I didn’t realize how fun shelves could be-YEEHAW!

Getting the Most Out of Your DIY Storage Stud Shelves
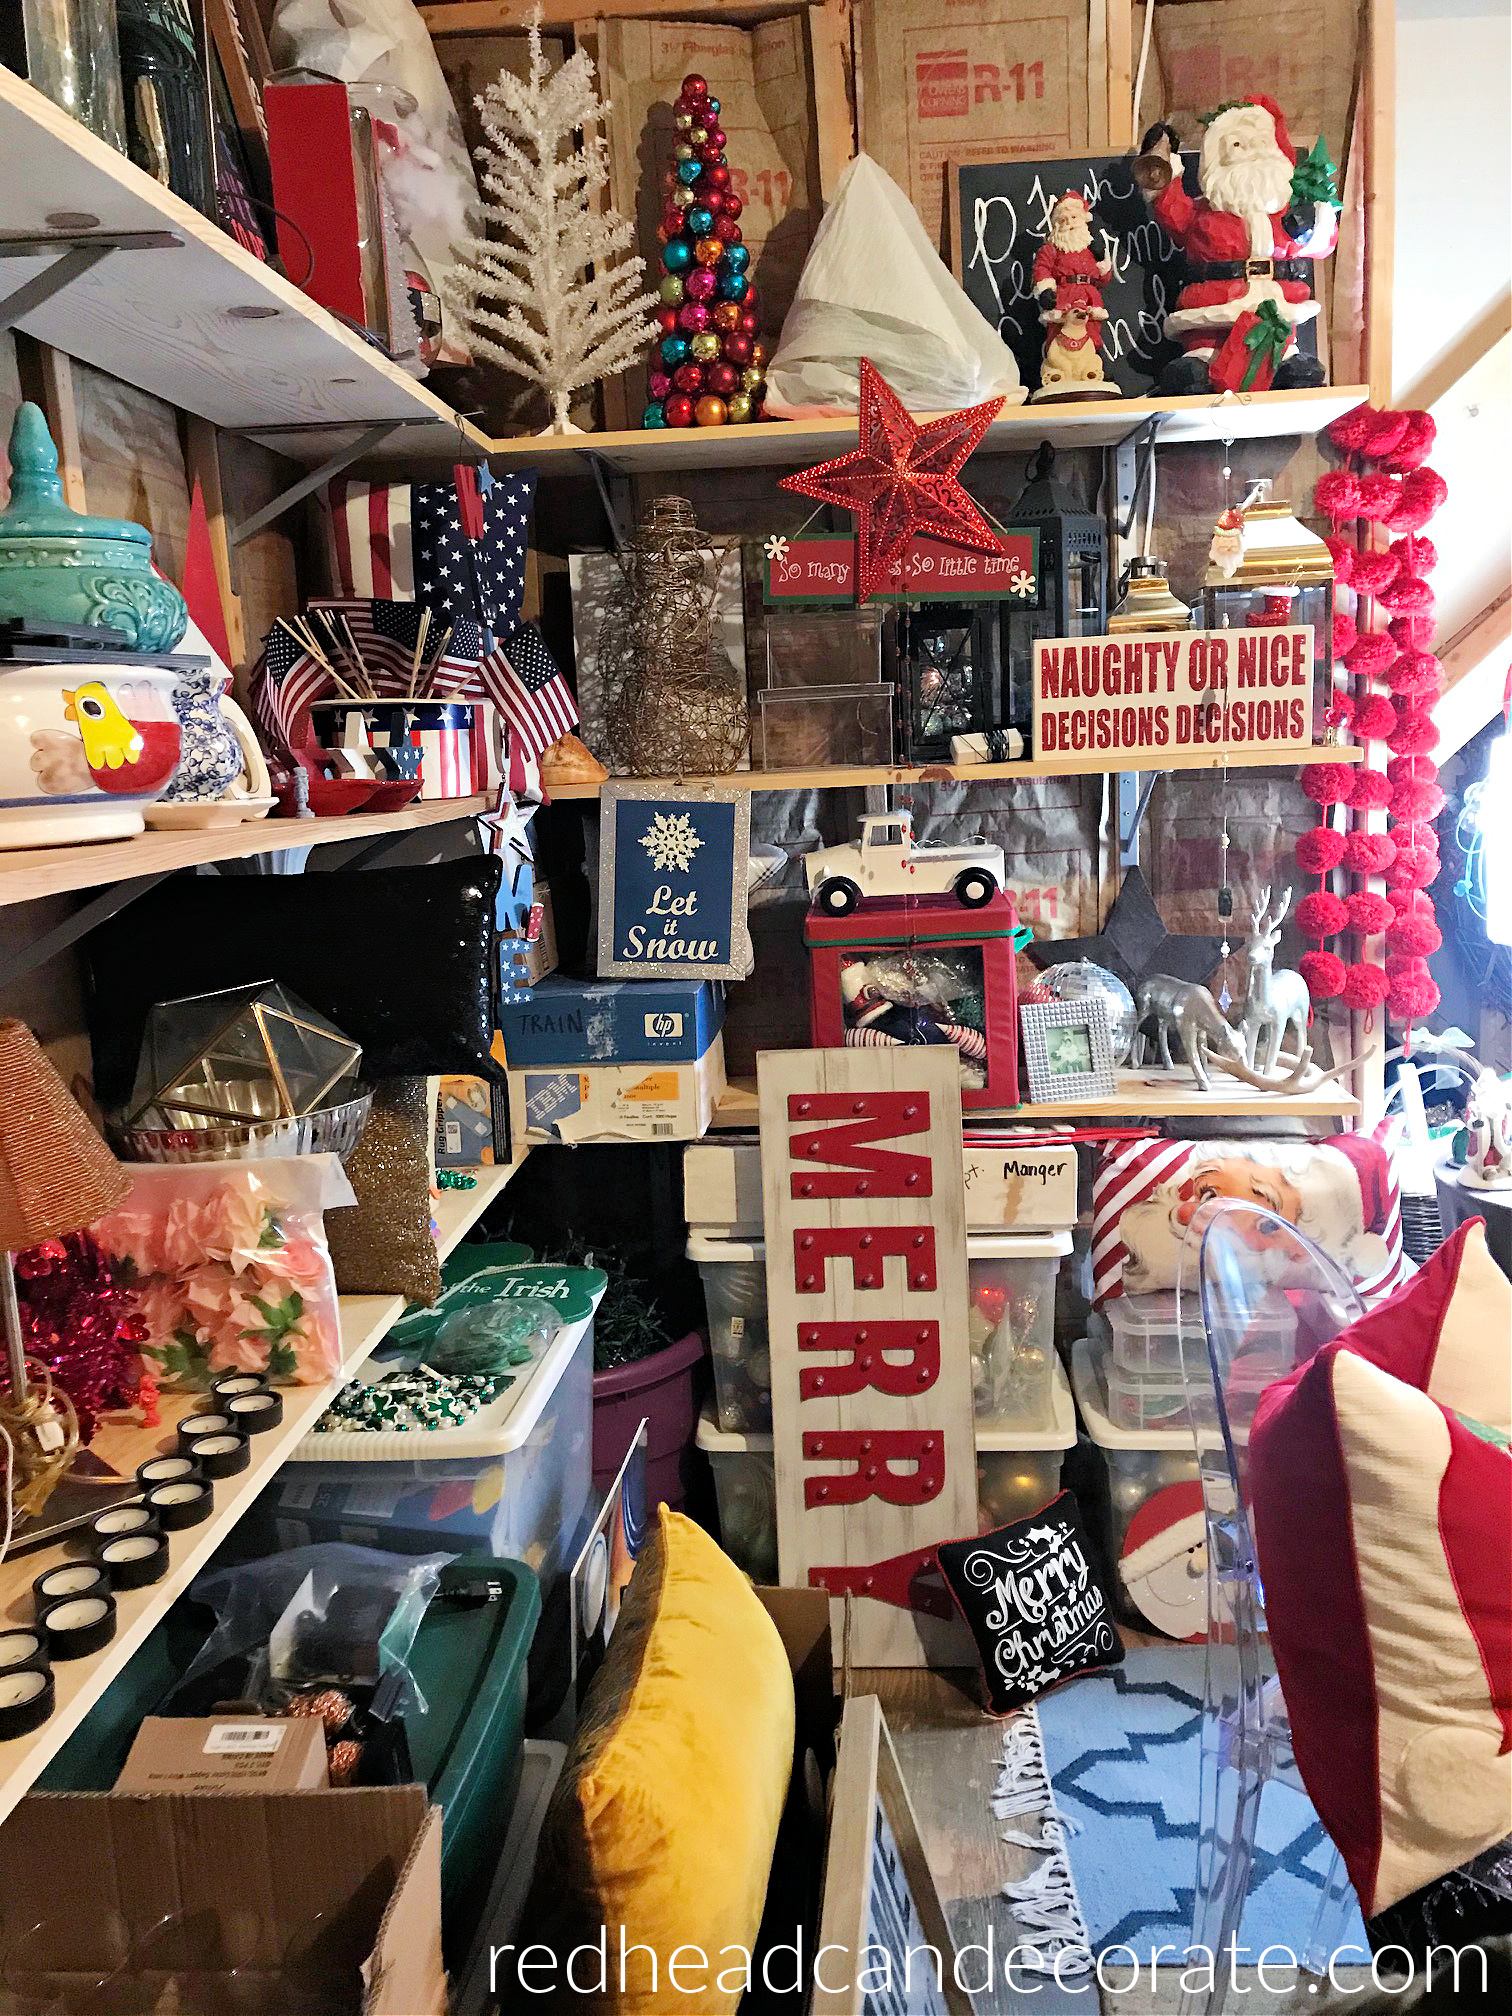
After the shelves were up, I celebrated with wine 😊 and had so much fun bringing everything back in. It was like a weight had been lifted off my shoulders, and I was now in my fantasy storage room. I actually began to feel like I was in an old fashioned country store filled with fun eye candy (those of you from Buffalo-think Kelly’s Country Store). Everything had a place and I organized it according to holidays, seasons, or just items that were the same such as lamps, or pillows. I even scattered some of my favorite family photos around just so I could enjoy them more.
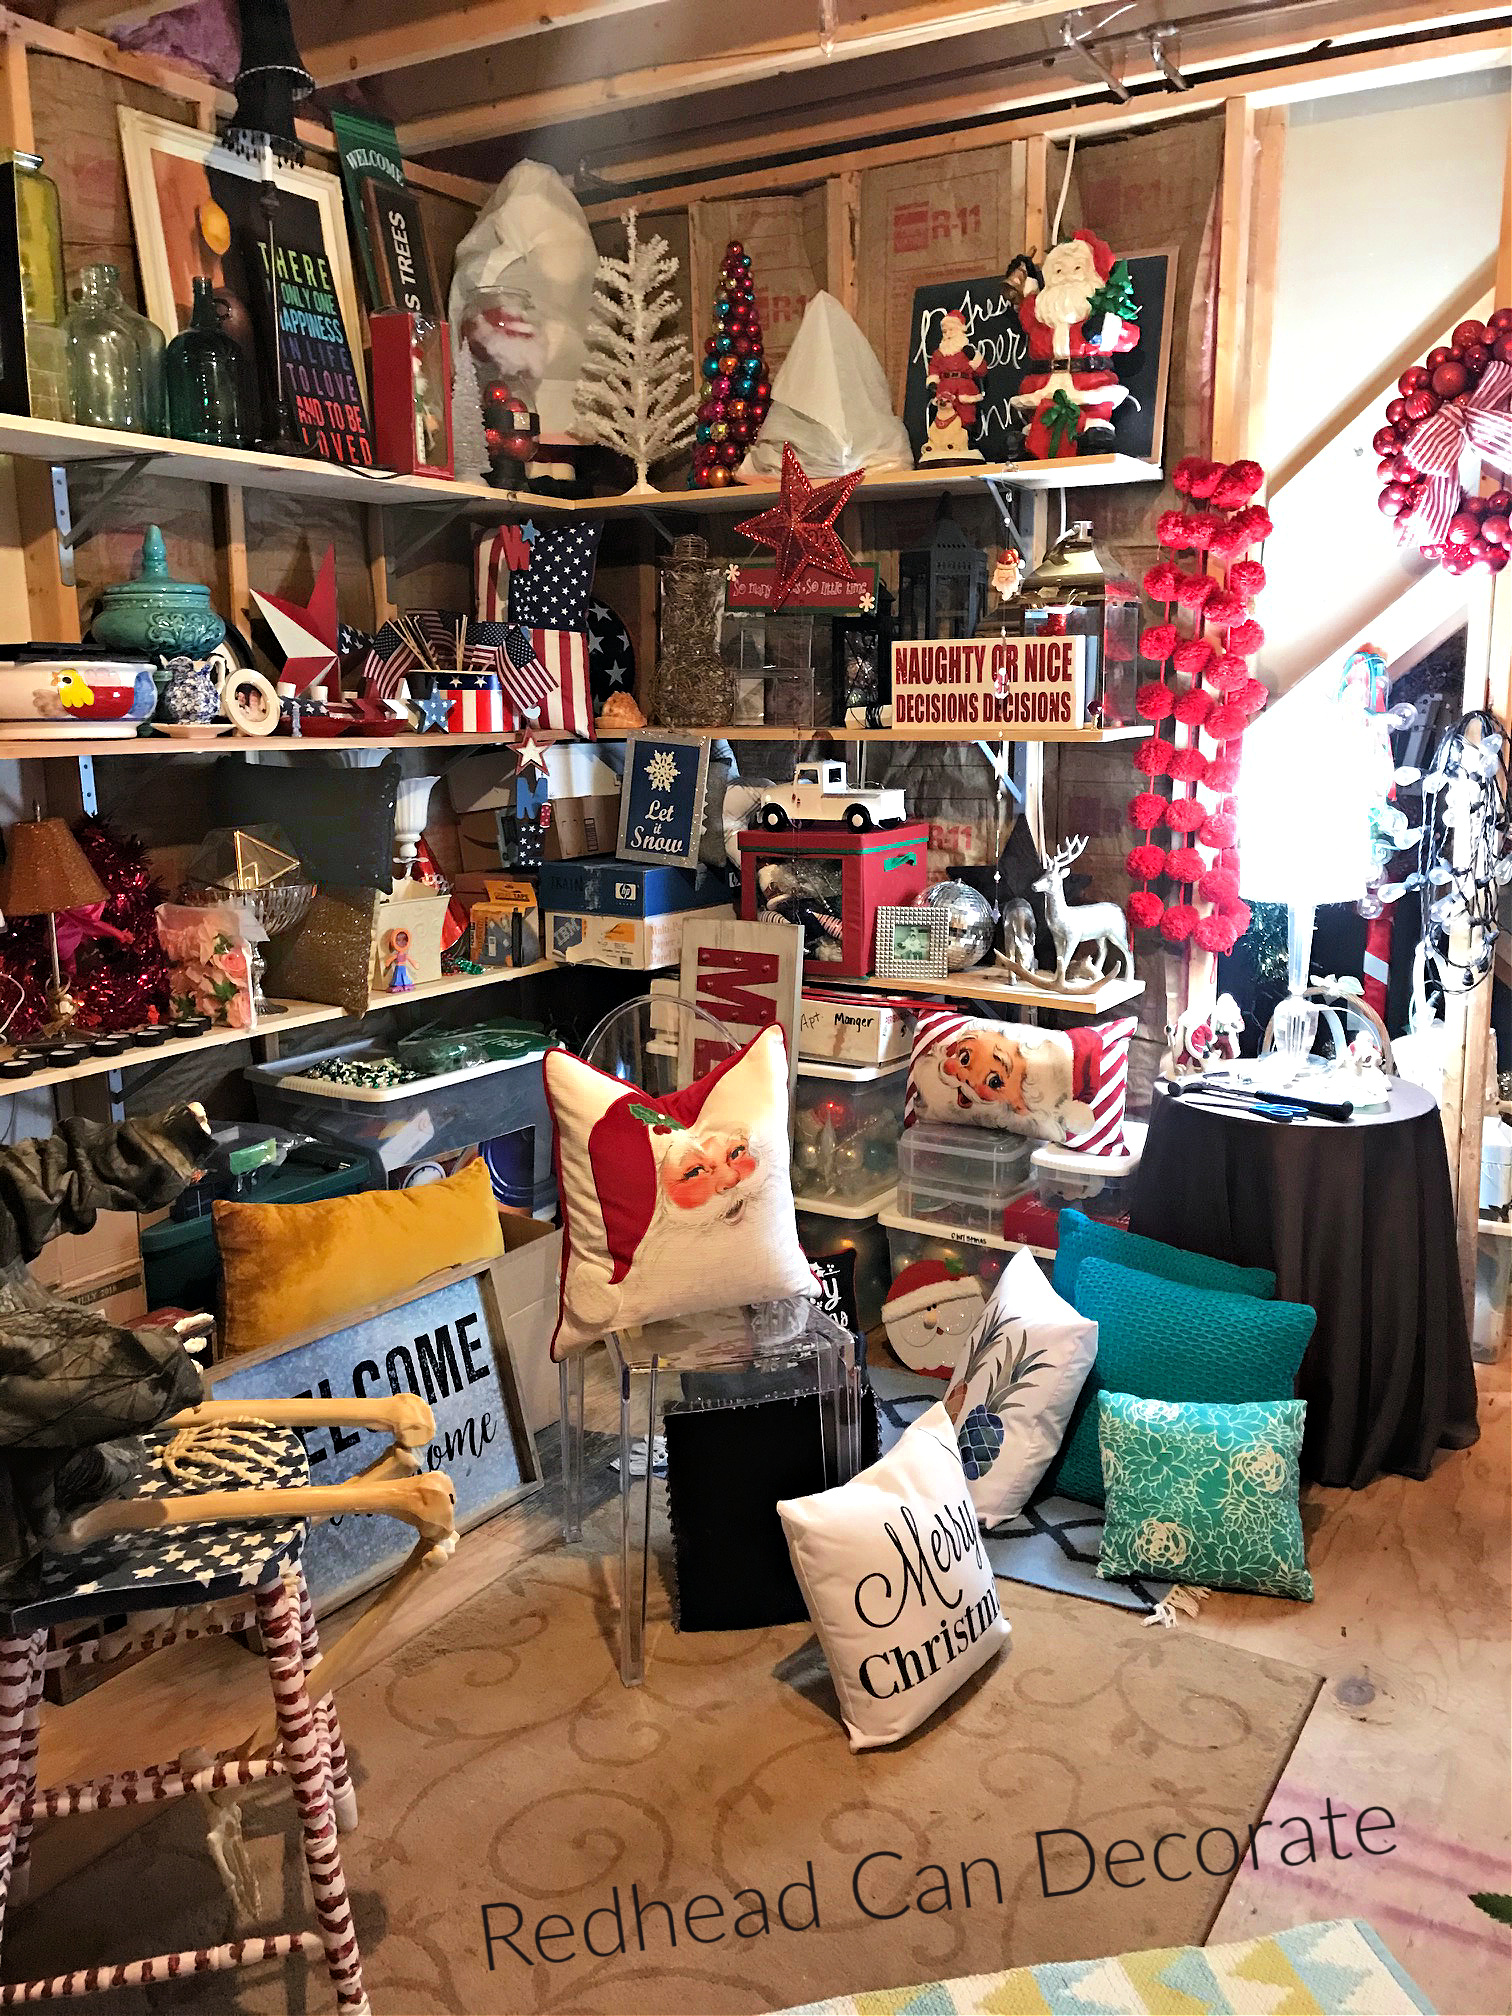
Anyone up for some cozy thrifty shopping in Redhead’s basement 😆? Do you like looking at other people’s trash I mean stash, too? Does anything look familiar?
It’s rather peaceful & cozy down here now isn’t it!? All thanks to my brilliant, loving husband for coming up with the idea for shelves on the studs.

Affordable DIY Basement, Attic, or Garage Storage Stud Shelves Tutorial
- Empty the space you plan to use for your shelves so you can measure and get rid of anything you no longer need, use, or want.
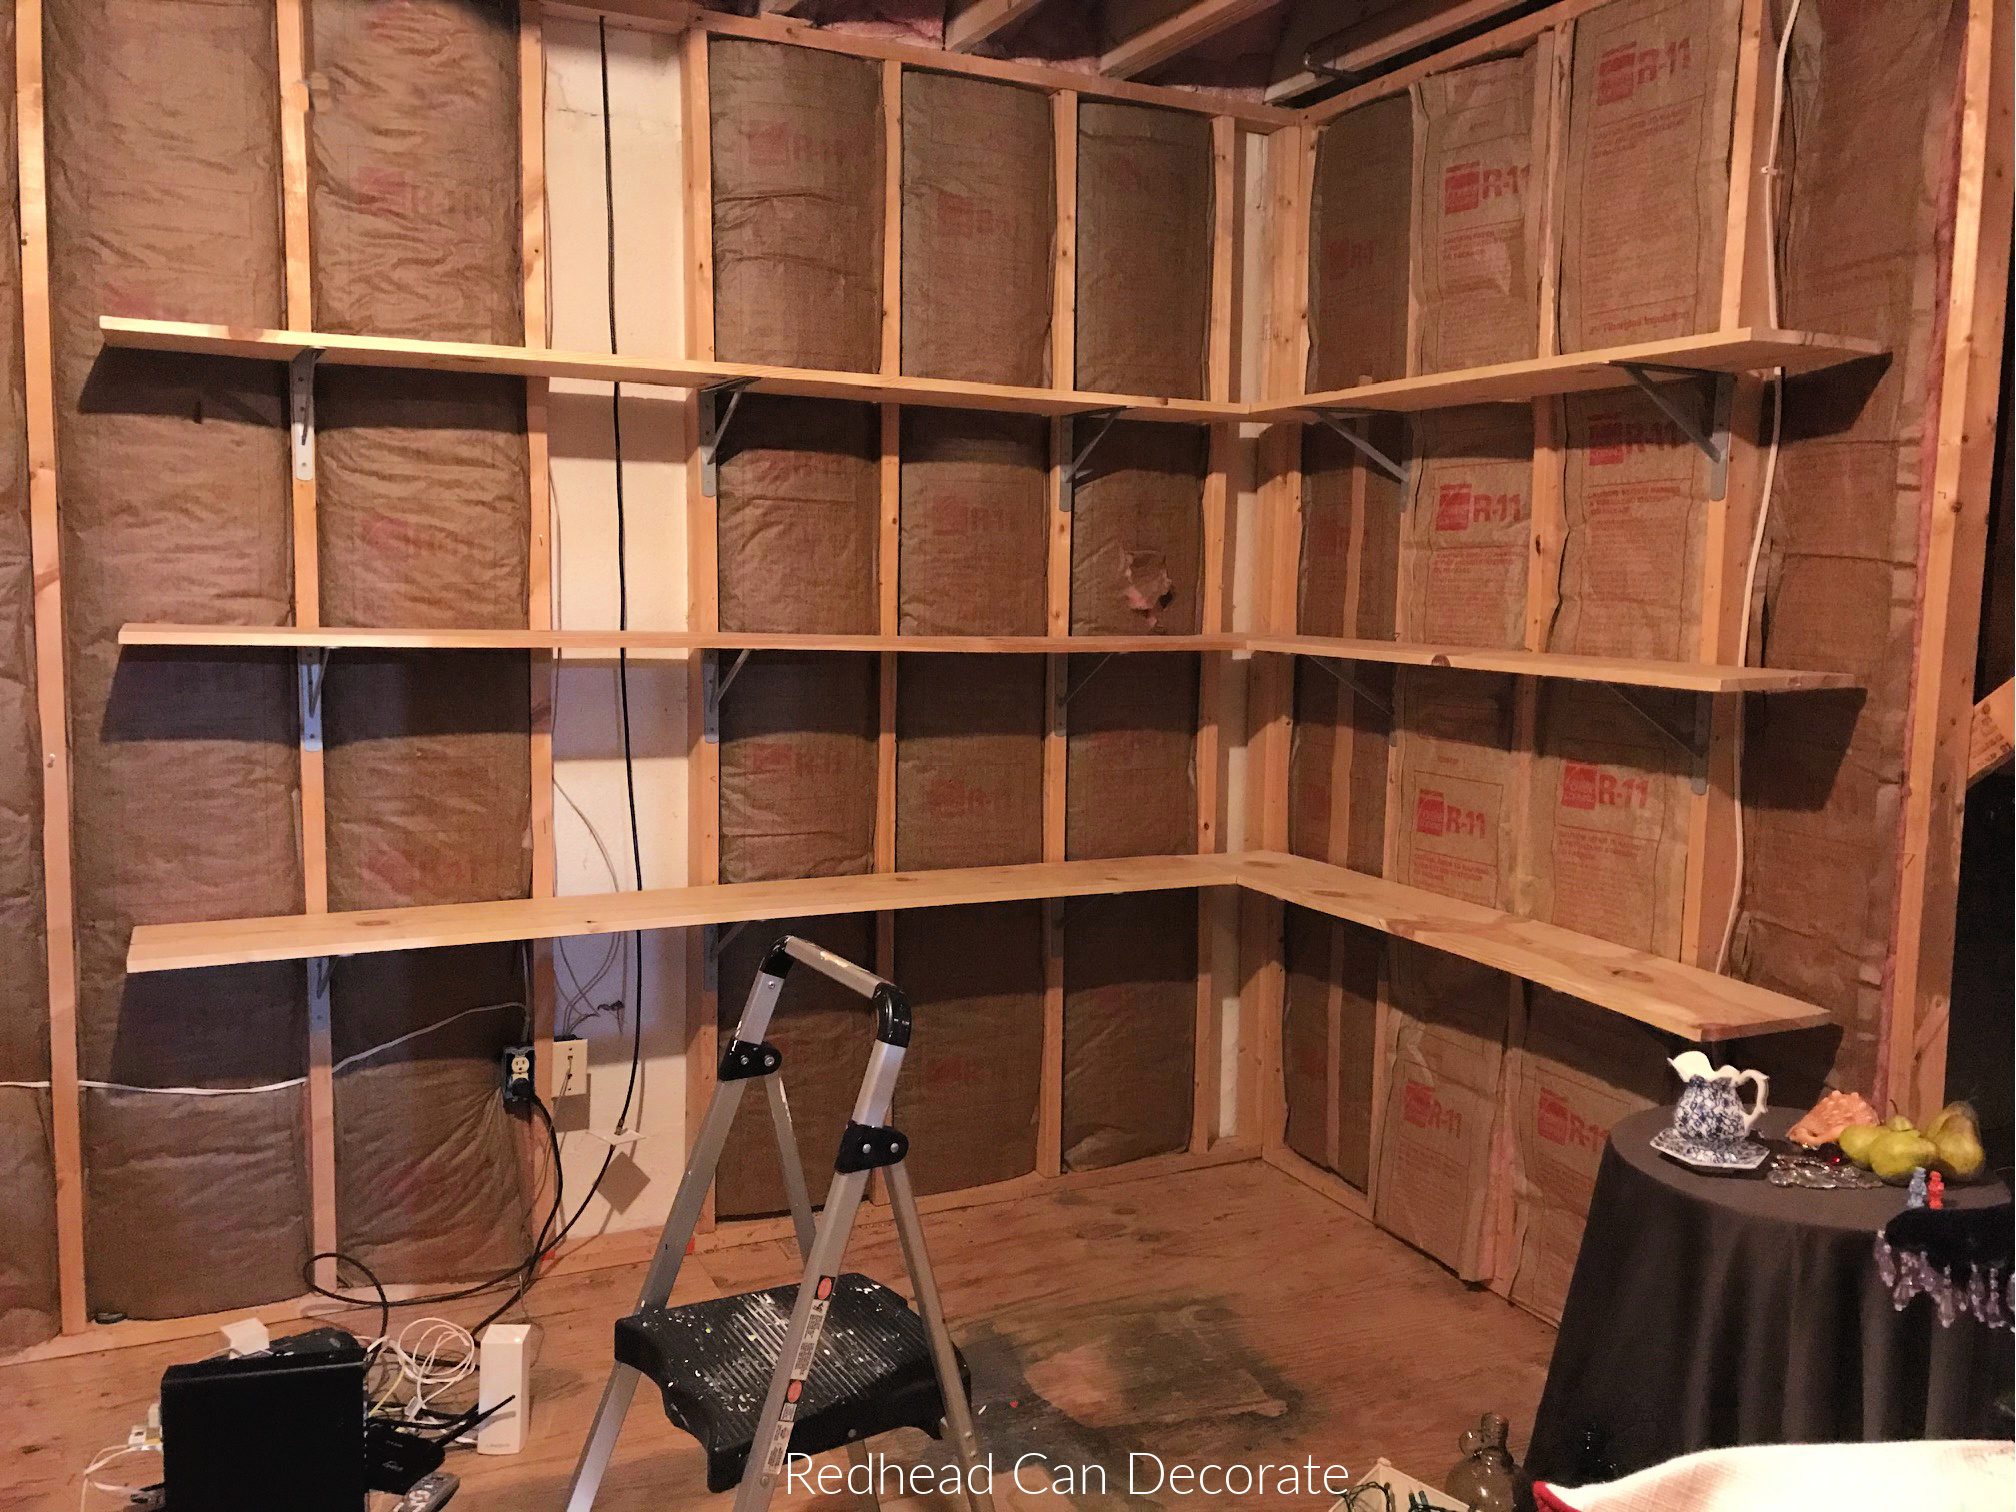
2. Measure the height of the wall(s) where you want to install the shelves. This will help you determine if you want two, three, or even more rows of horizontal shelves depending on the space you have to work with, and what you are storing on the shelves.
3. Determine how many shelves you want to place on the wall then determine the height of the bottom shelf based on your particular needs.
4. Determine the length of the boards you want to use and then determine the number of brackets you will need to support the length you have selected. Smaller shelves only require two brackets. Larger ones may require three (3) or more (we used 3 for each shelf).
TIP: We ordered our Pine boards from a local lumber yard (they deliver!), and we cut them, however you can have shelves pre-cut. Our shelves were 12 inches wide, 6 feet long on the long wall, and 5 feet long on the shorter wall. 15 brackets were used in all.
5. Mark the height of the shelf on the wall studs where you plan to install the brackets, using the screw holes on brackets to mark each stud for reference. Each bracket should be spread equal distance from the ends of the shelf when using two brackets per shelf or spread equal distance across the length of the shelf if using three (3) or more brackets to support the shelf.
6. Start at one end and install the bracket onto the stud with mounting screws. Next, place the shelve on the bracket you just installed and using a level, raise the shelf to the stud marks you previously made to ensure the shelf is level. Make any height adjustment needed and install the second bracket or remaining brackets as necessary.
7. Determine the spacing between the first shelf and the remaining ones you intend to install. Repeat steps 5 and 6 above and install each shelf as desired.
8. Lastly, once your brackets are installed, secure the shelf to the bracket with a screw. Load up your new shelves!

Operation Purge


First of all…. your own stud doing studs…do you know how lucky u are? 😋
Great idea.. so organized knowing where all your goodies are, all in one space. Very lucky lady. Enjoy!
What a great idea! We spent hundreds on steel “self-standing” shelves for my crafts storage. We could have bought shelving boards and hung them like yours! I’m so glad you lend your brain to your followers!!!
Morning Julie:
Didn’t get to reply last week, but read all the articles. Loved the dish soap dispenser idea and I am going to make the Oil & Cheese spaghetti, I will use cooked chicken for me and mushrooms for hubby. What a great idea putting shelves on the studs. I don’t have room for a shed but will pass the idea on to friends that have a basement.
Hope you are all well and looking forward to an early Spring.
Cheers, Bette
This is awesome Julie! As a fellow decor blogger I know the challenge of storing seasonal decor as well as decor that isn’t being used at the present moment. This is the perfect solution!
Julie, it’s been so hard to get your post to come up. I’ve missed getting your wonderful diy emails. This idea is fantastic. We don’t have time this year, although needed none badly. It will not be until next year before even thinking about tackling cleaning our outdoor storage space. Will be using your diy storage shelves for sure
[…] DECORATING SHE SHED […]
[…] DIY Decorating Storage She Shed […]