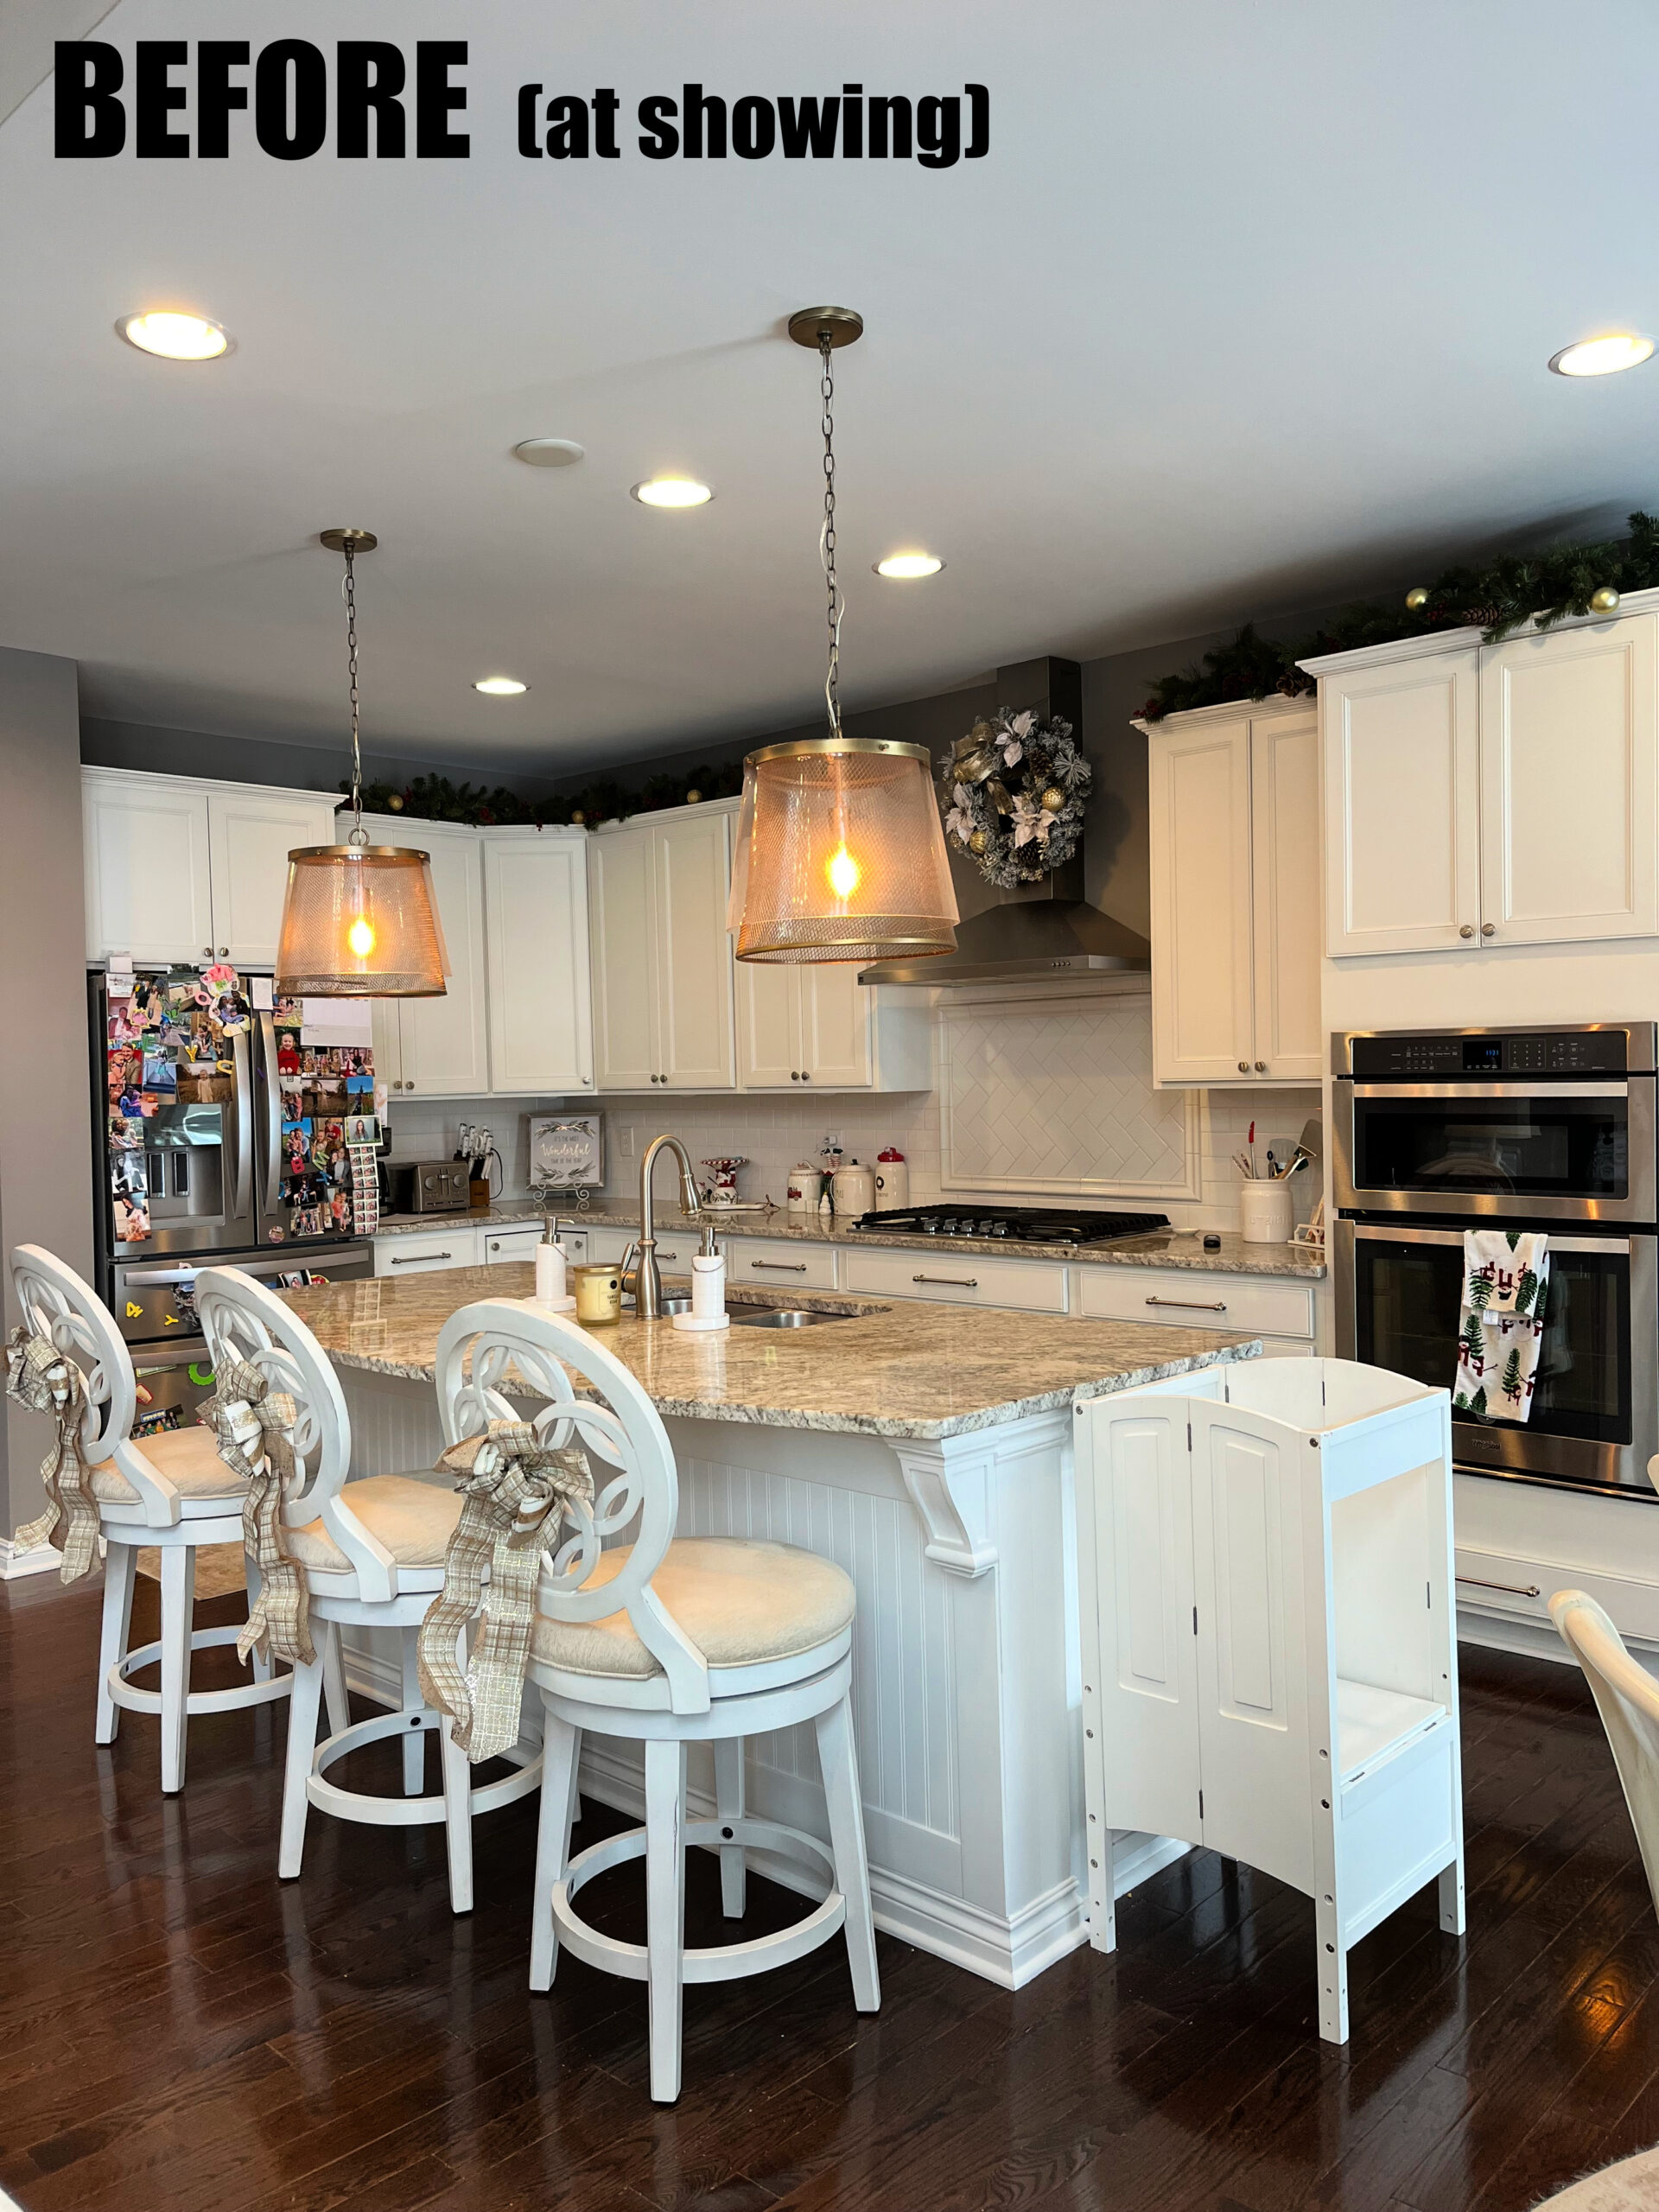
Have you ever wondered what to do with that awkward space above your kitchen cabinets…you know the one that does nothing but gather dust, grime, and look like the entrance (or exit) to a dark abyss 😆? I’m not quite sure why builders don’t just take care of it for us. For me, no matter what house we lived in, it was an eyesore that plants, baskets, even leaving empty can rectify. Well, I finally had enough of it in our new home, and my husband was on board to take on the challenge. Rick didn’t like the abyss either, and we not only took care of that, but we also went a step further and removed unnecessary bulky cabinetry. I hope you enjoy my latest home update: “How to Dramatically Upgrade Your Kitchen with Cabinet Removal/Extensions”….
Getting Started and Figuring Out Our Plan for the Cabinet Removal/Extensions
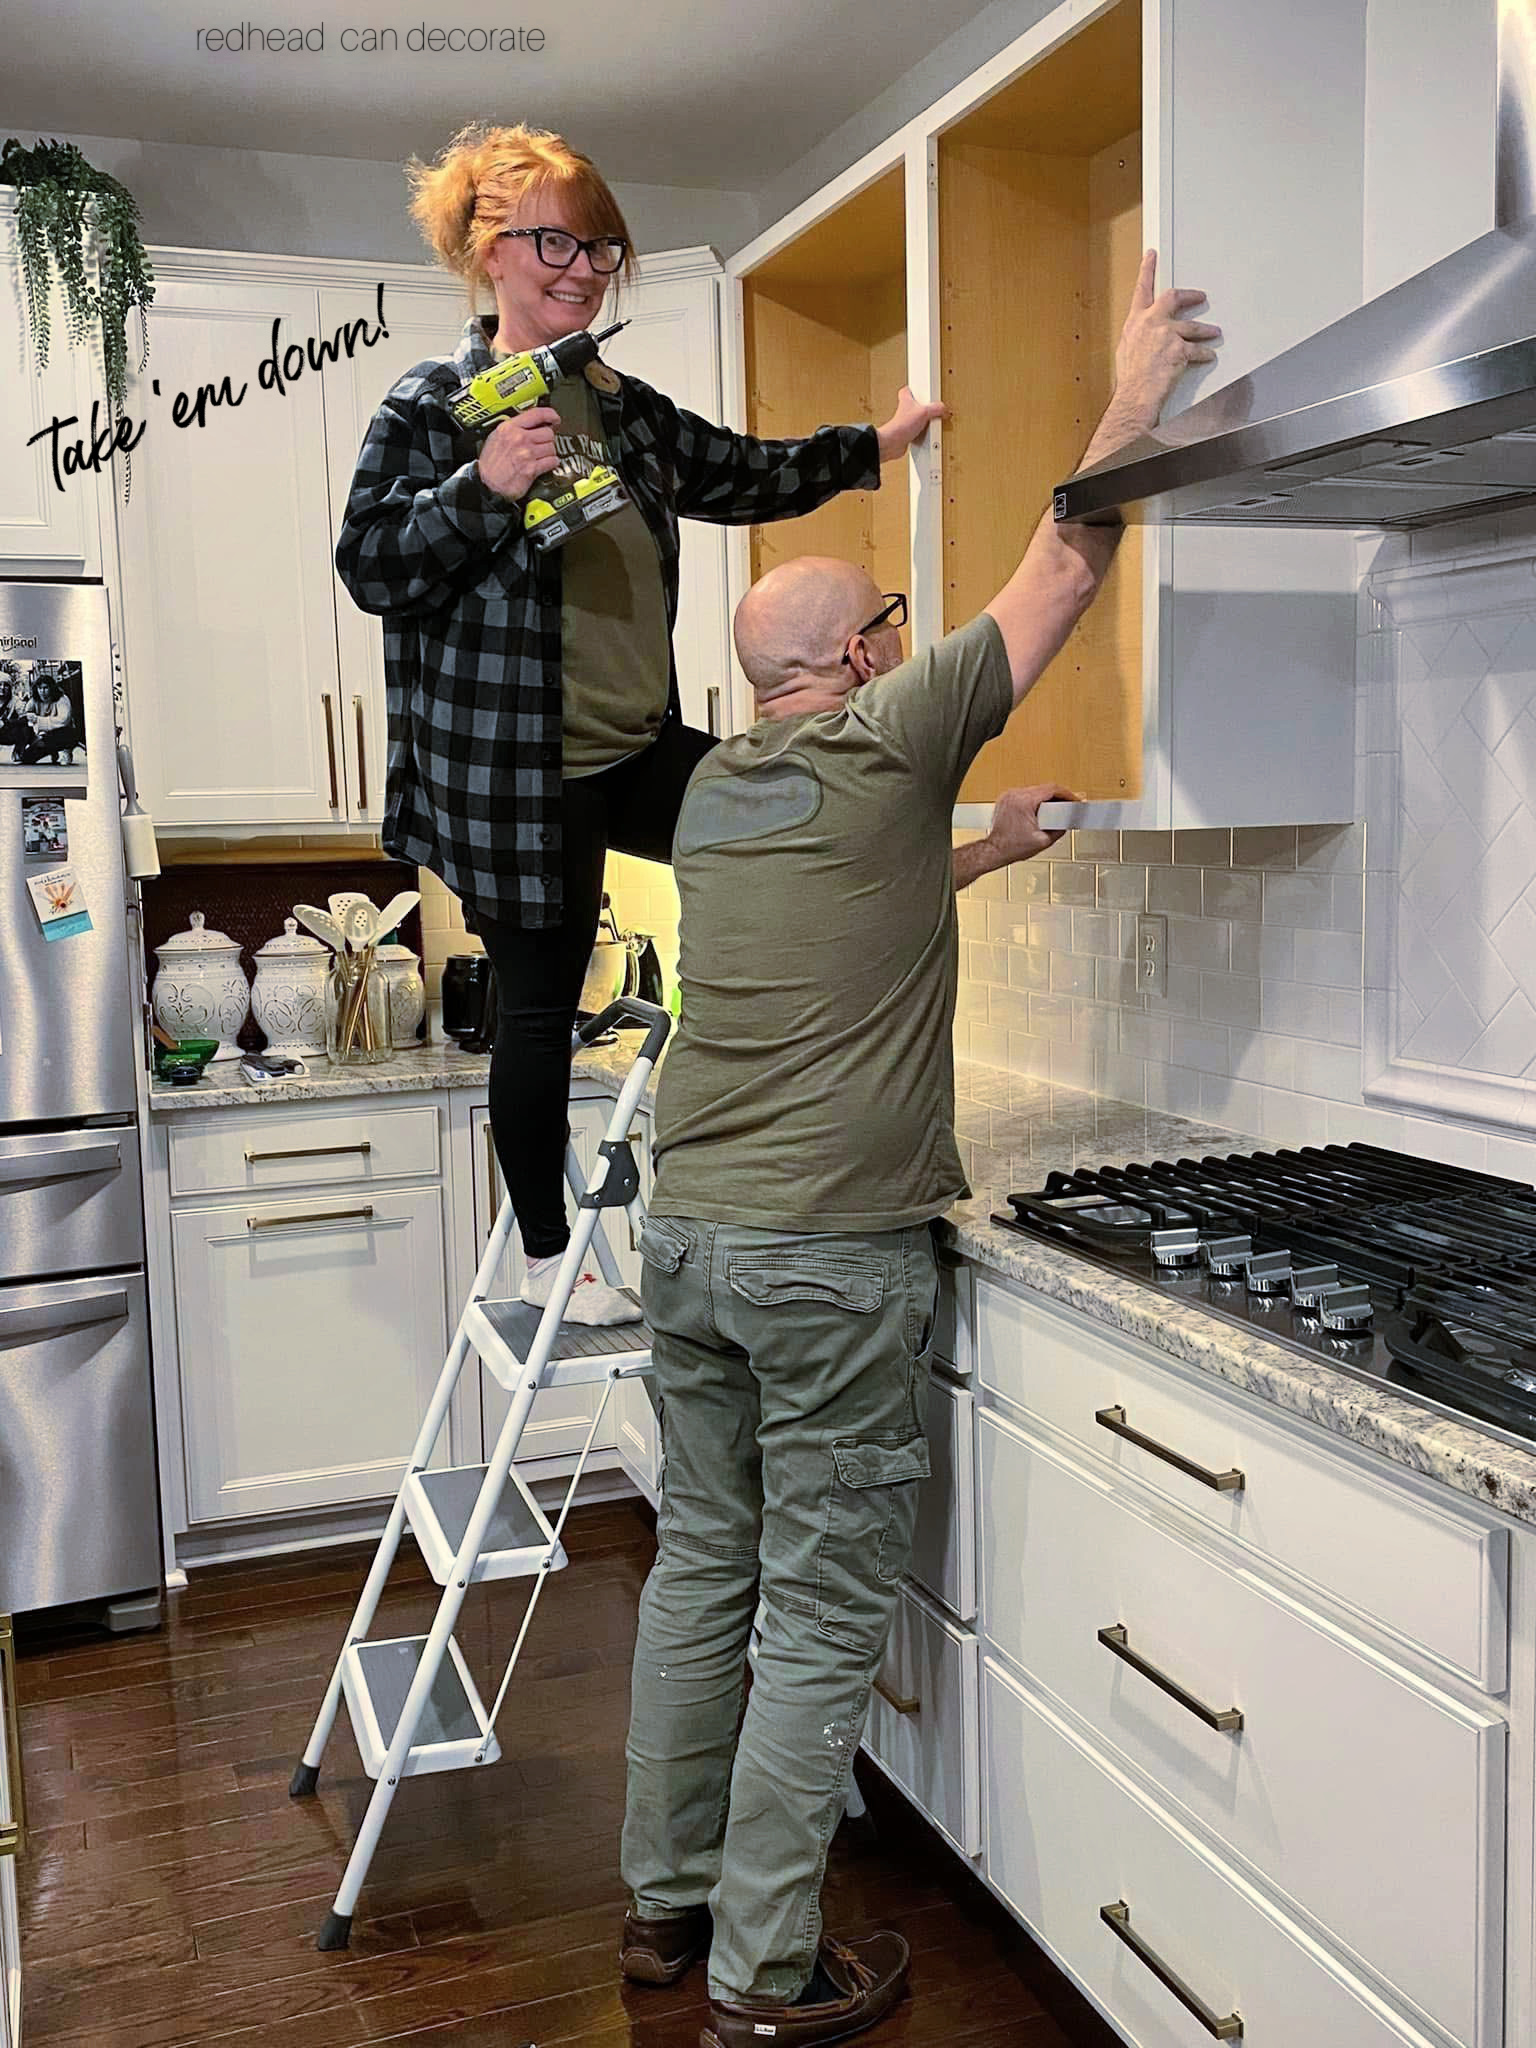
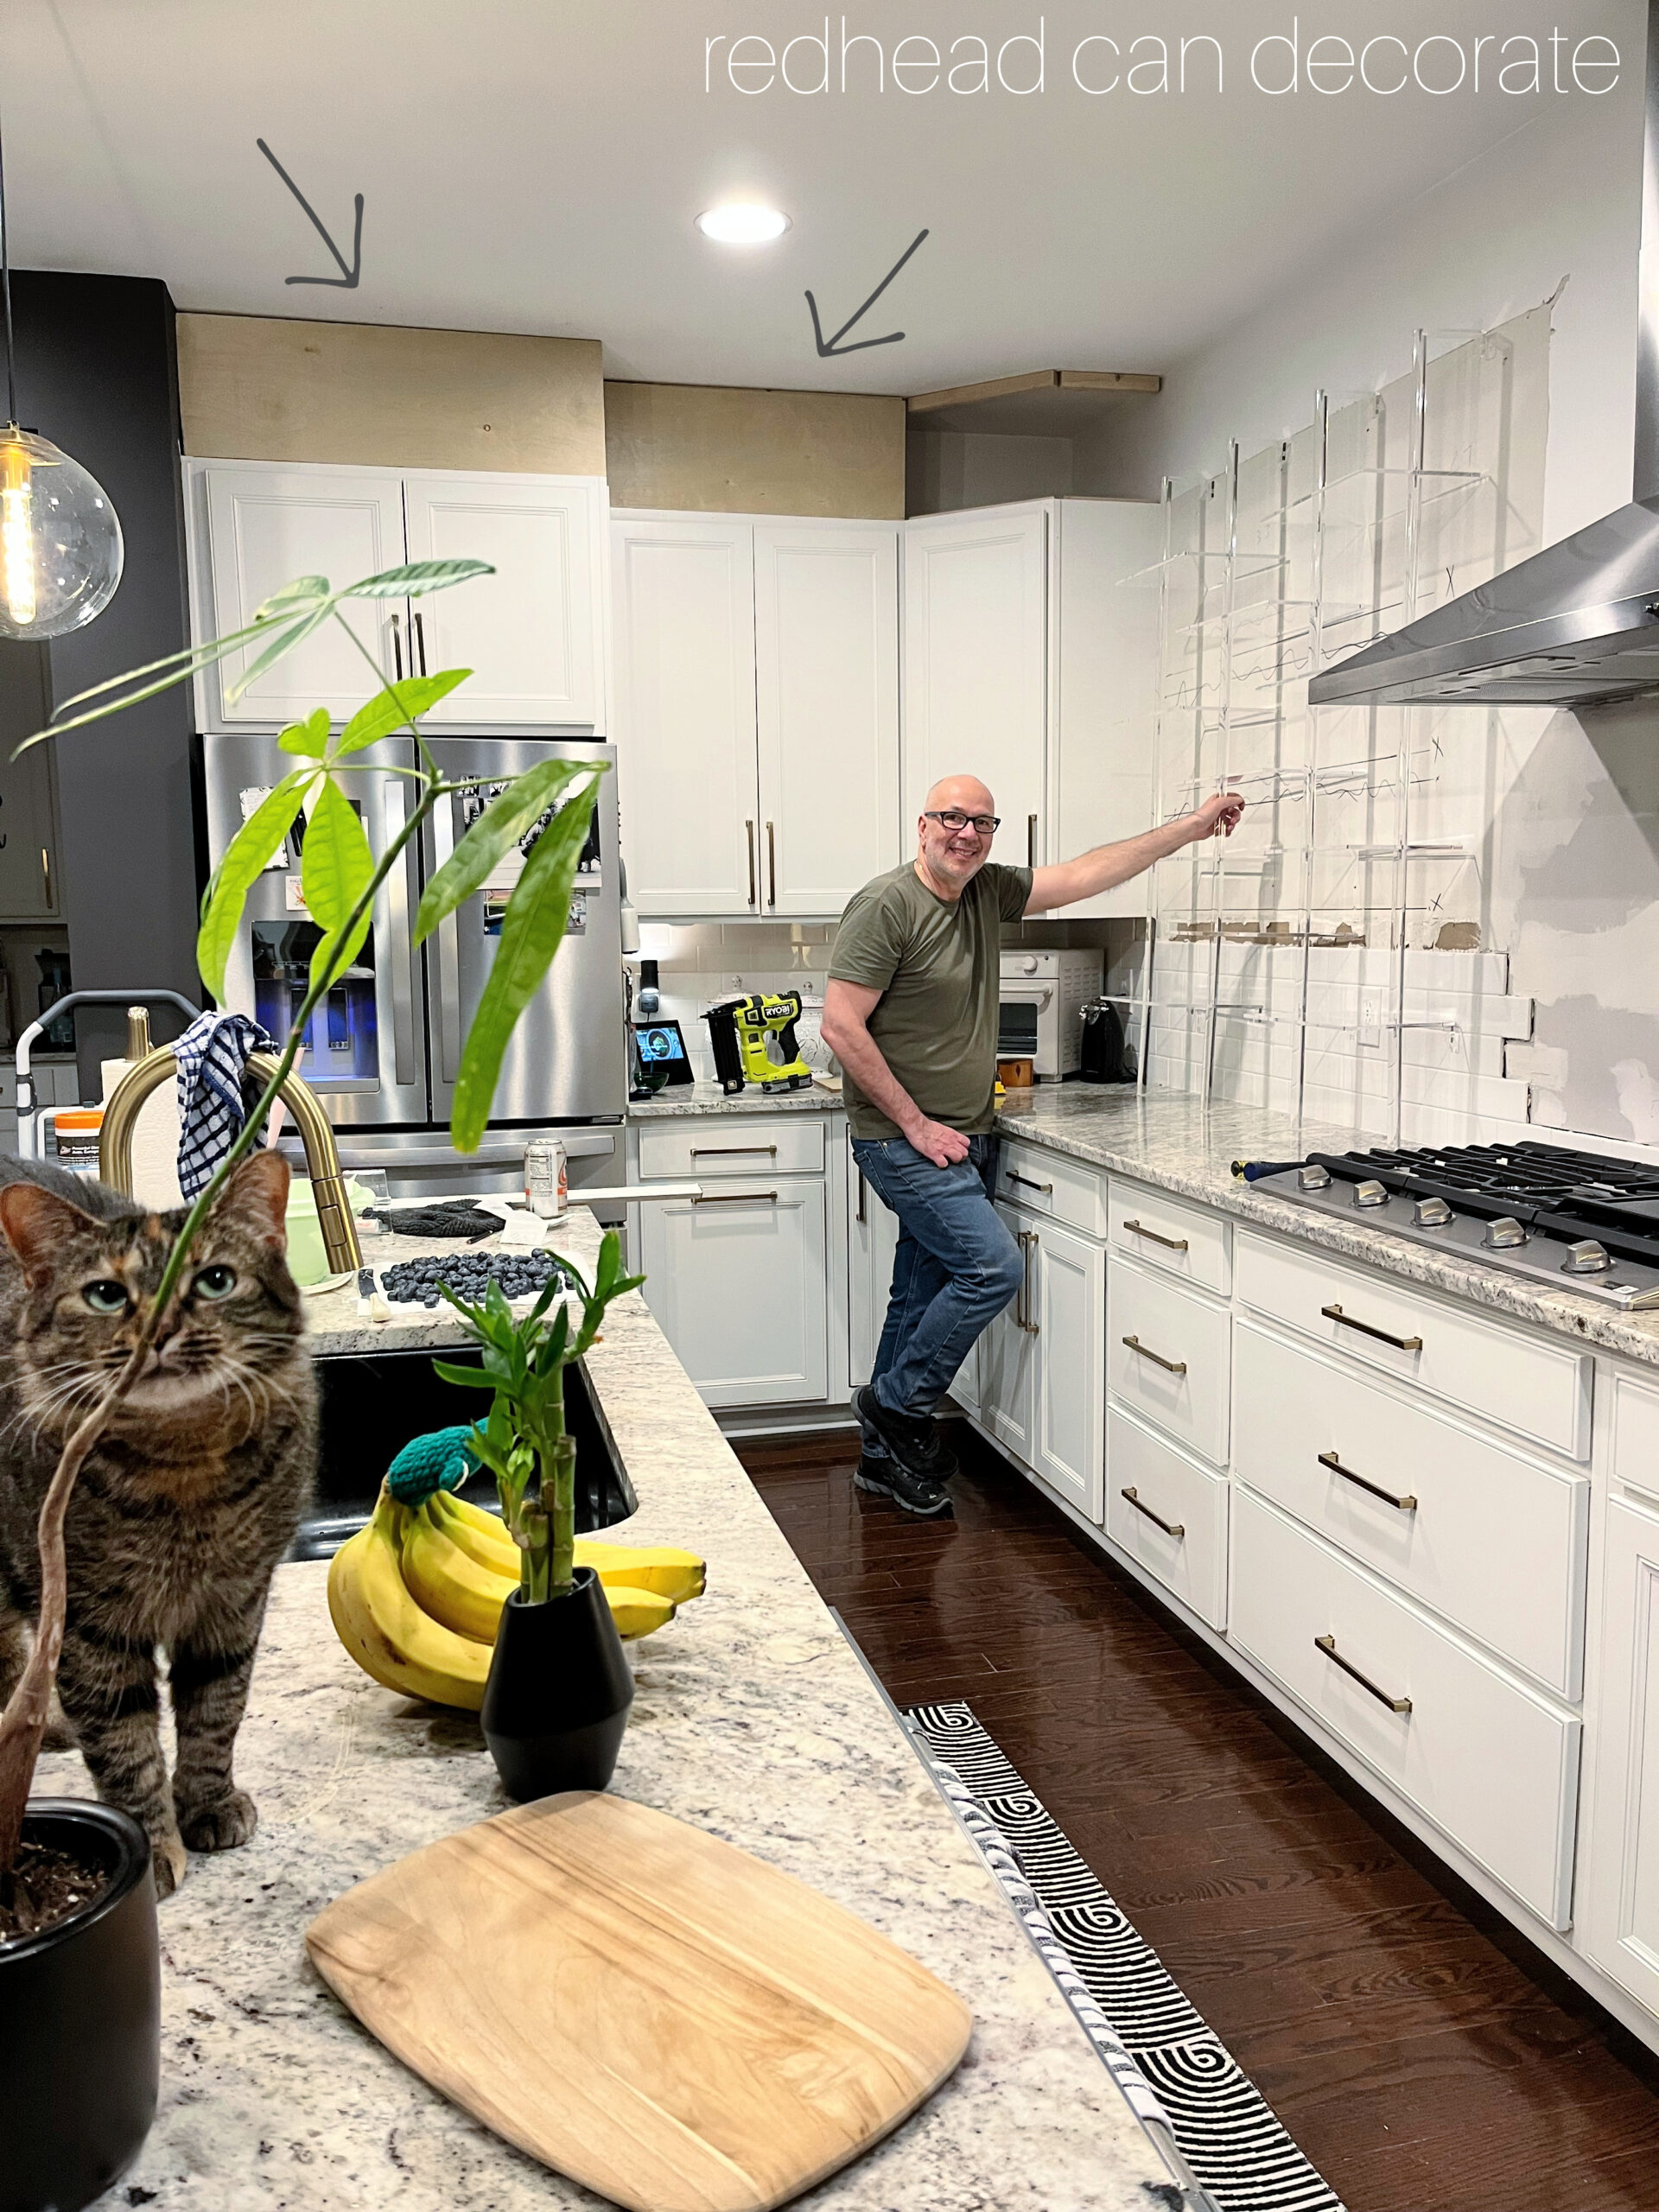
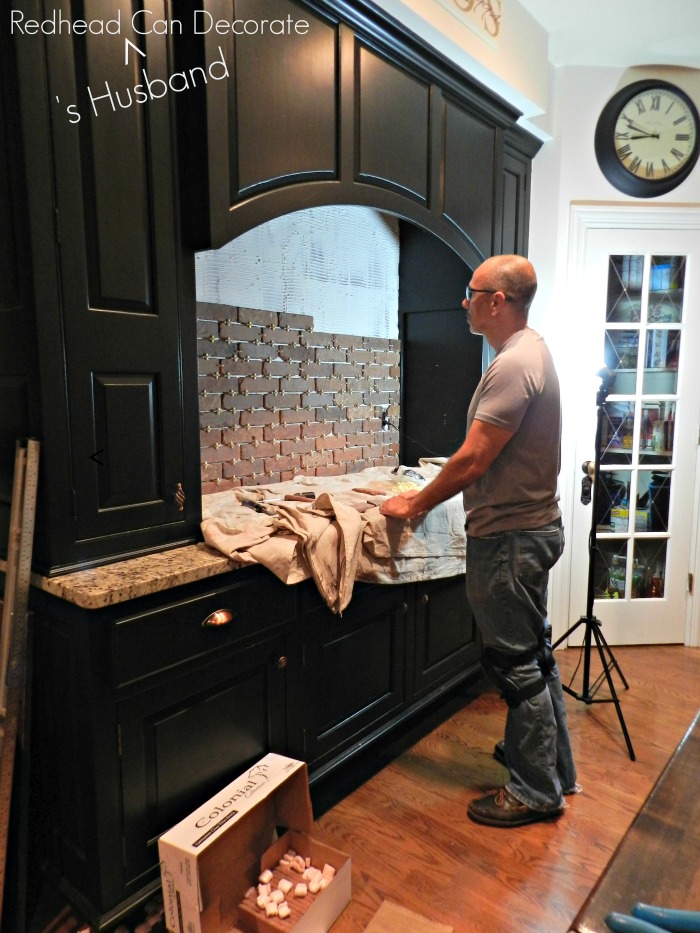
The very first thing we did for the cabinet removal/extension project was take down the cabinets that we did not need, or want. This may not be an option for everyone depending on how many cabinets you have, but this house is over loaded with them. Not only that, we are empty nesters, so we don’t have as much stuff as we use to. I decided that removing the cabinets (which is exactly what you see us doing above) would open up the counter space where I do all of my food prep. This bold cabinet removal would open up options to have some fun, and put shelves there so I could decorate! 🙌🏻
After the cabinets were down, we were able to envision things easier, and figure out our master plan. After we seriously contemplated replacing all of the existing tile with new fancier tile, we realized there were boxes of the original, white subway tile, in the basement that the builder left in 2018. Score! So, we decided to save the money, and energy, and use the tile we already had for the makeover. Next up, Rick worked on extending the cabinets, while I assisted, and searched for shelving.
SEE AFTER PHOTOS AT END
*** Some of the links in this post may contain affiliate links for your convenience. Read full disclosure policy here.
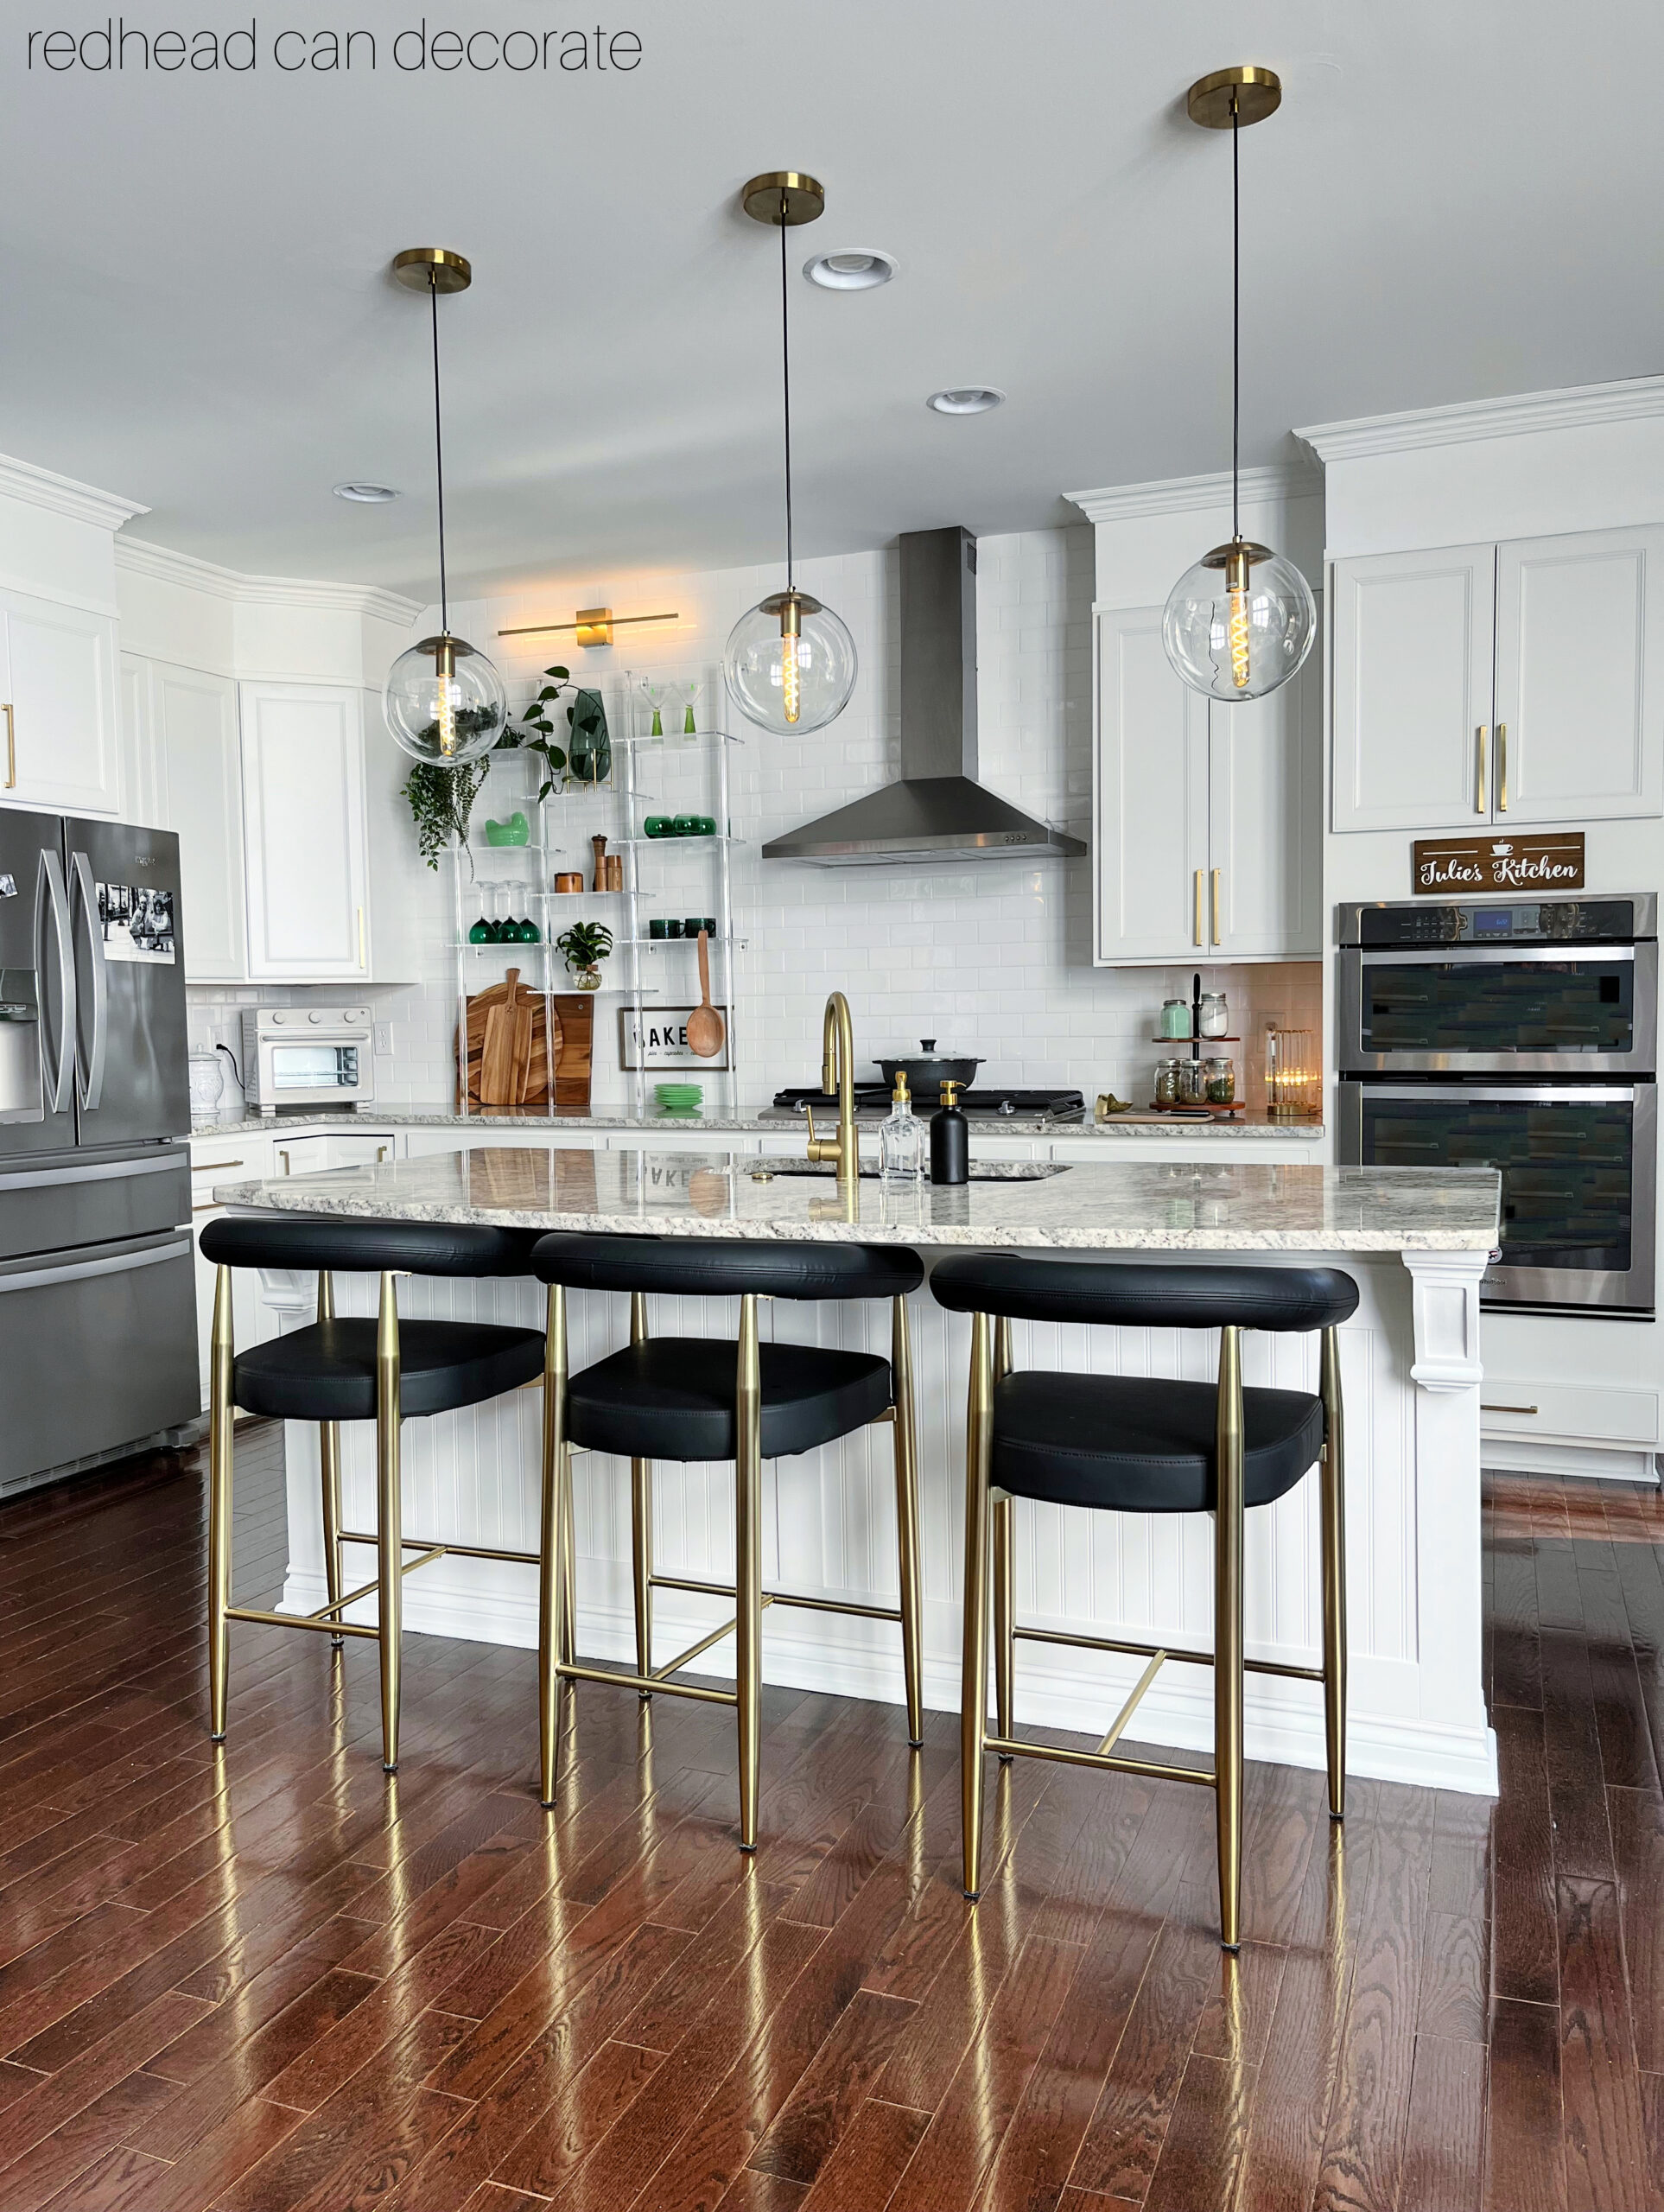
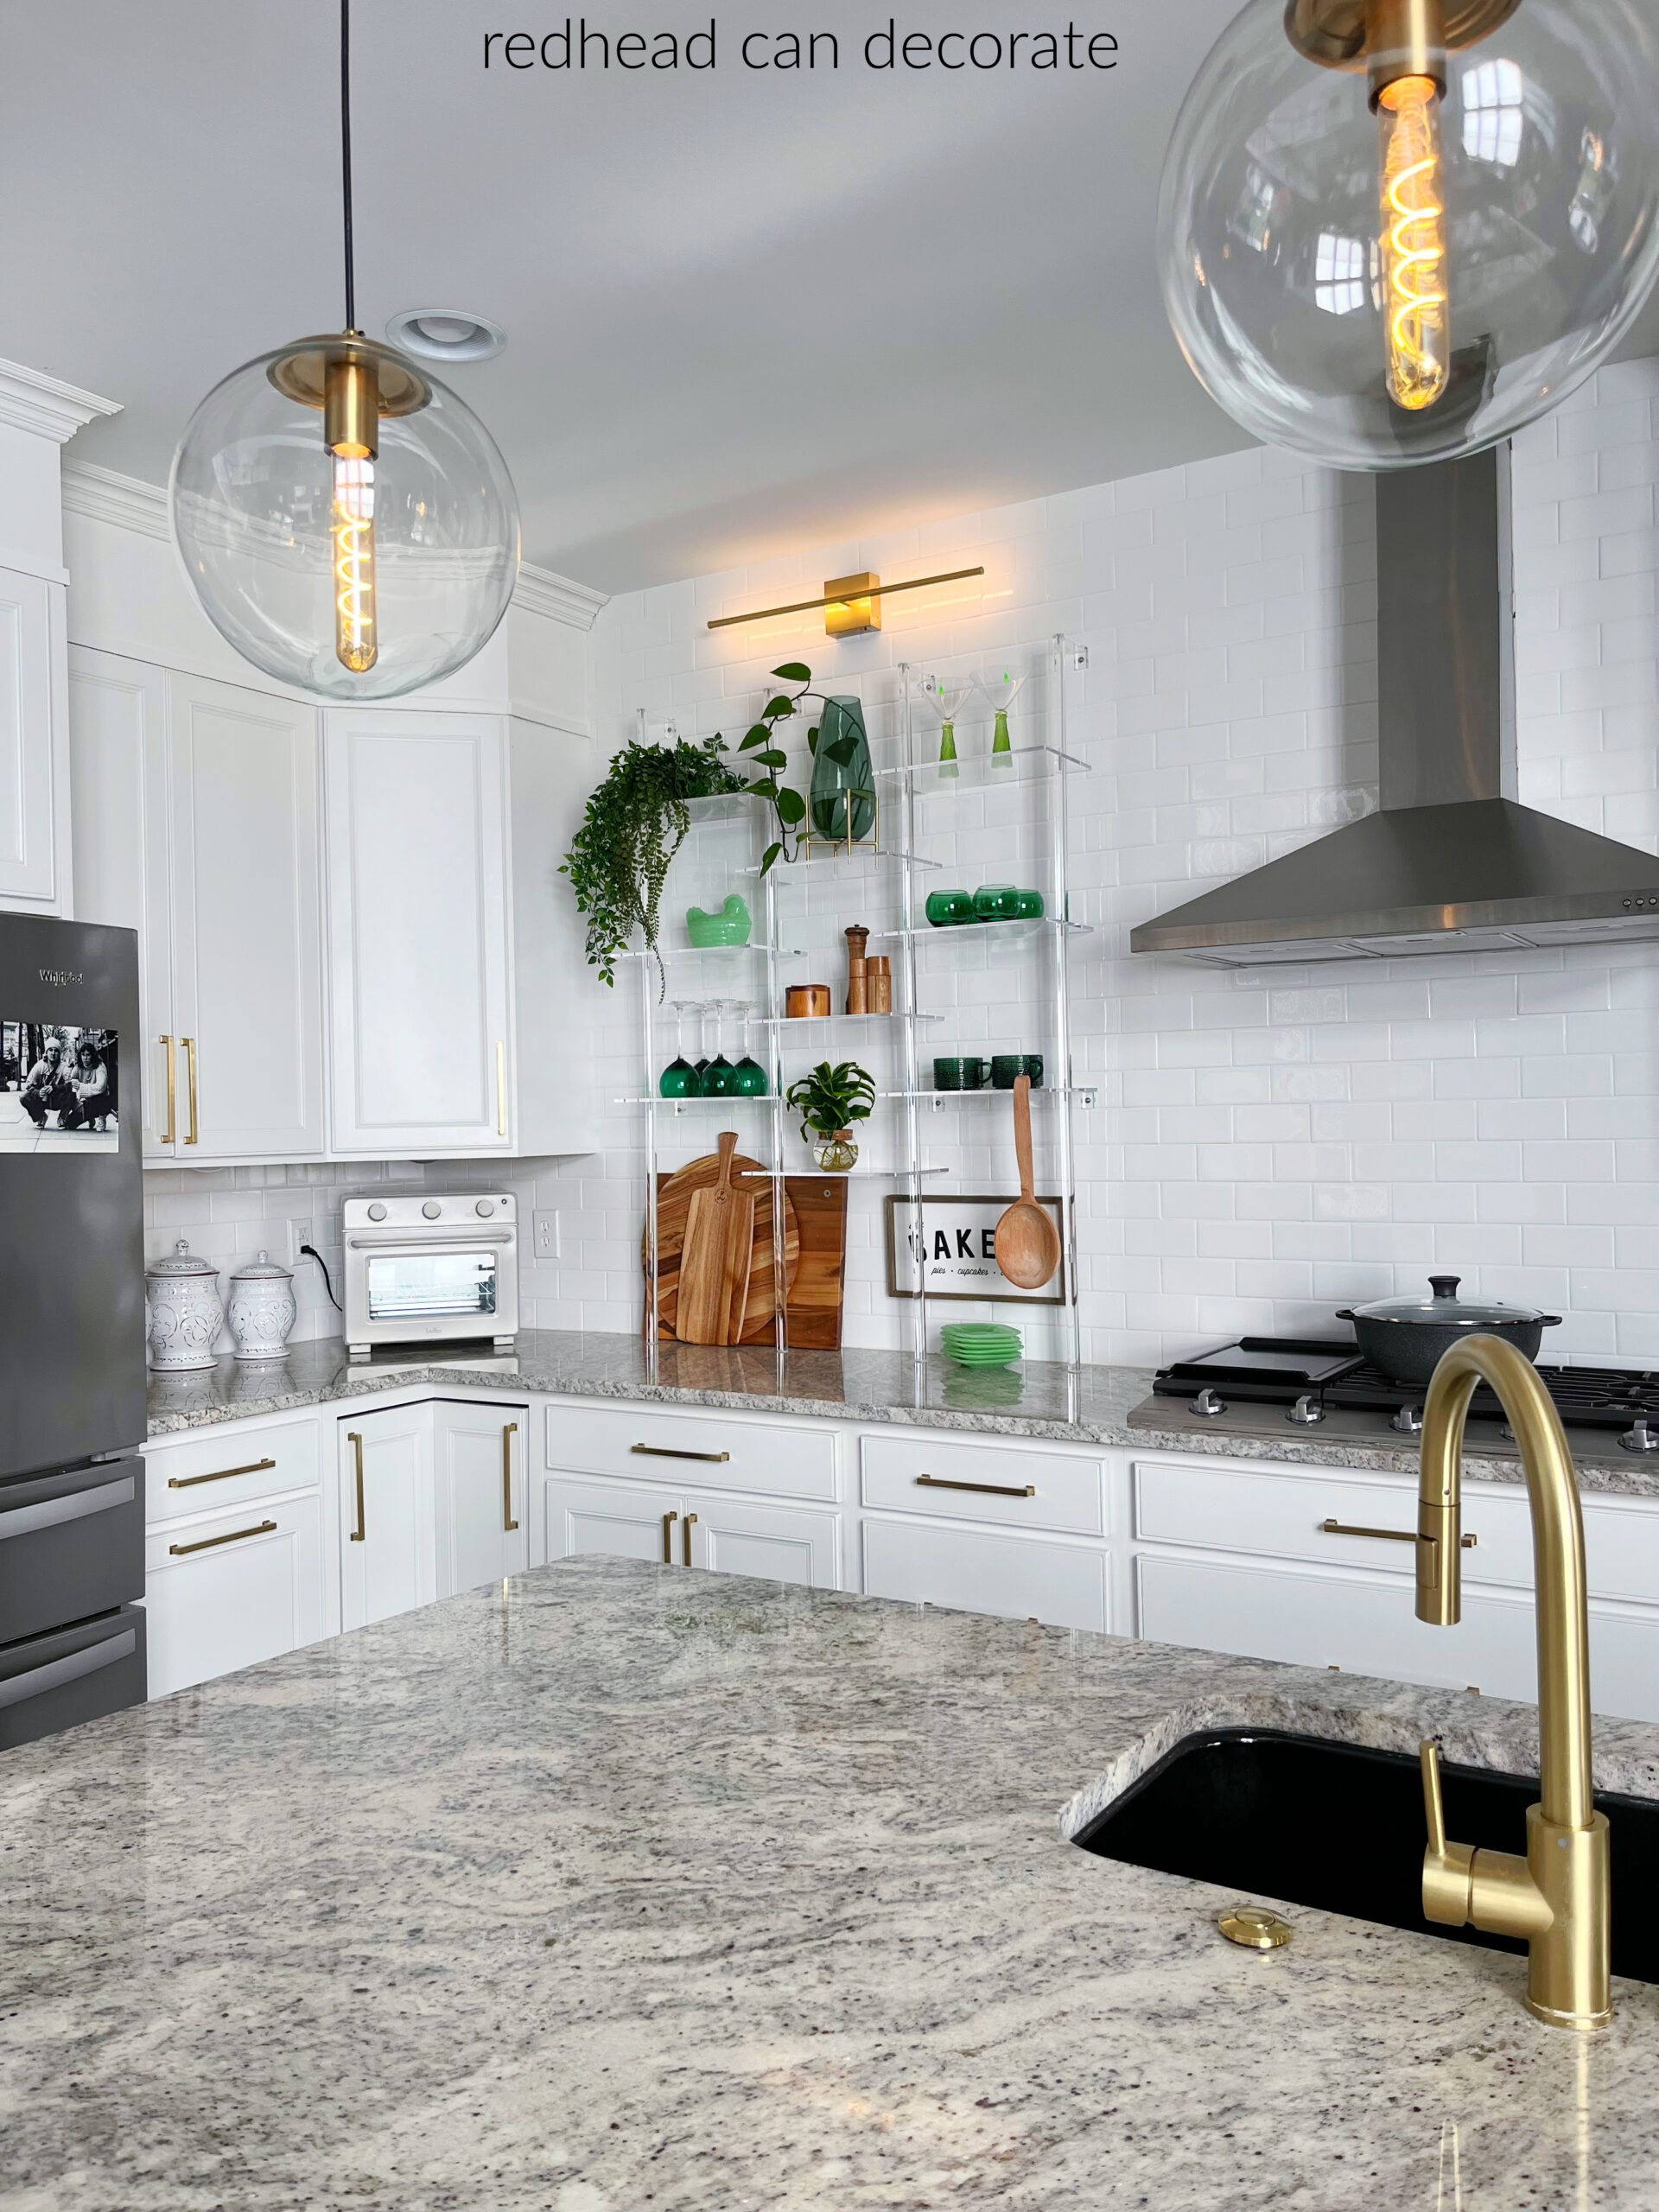
Extend Cabinets to Ceiling to Bring Eye All the Way Up
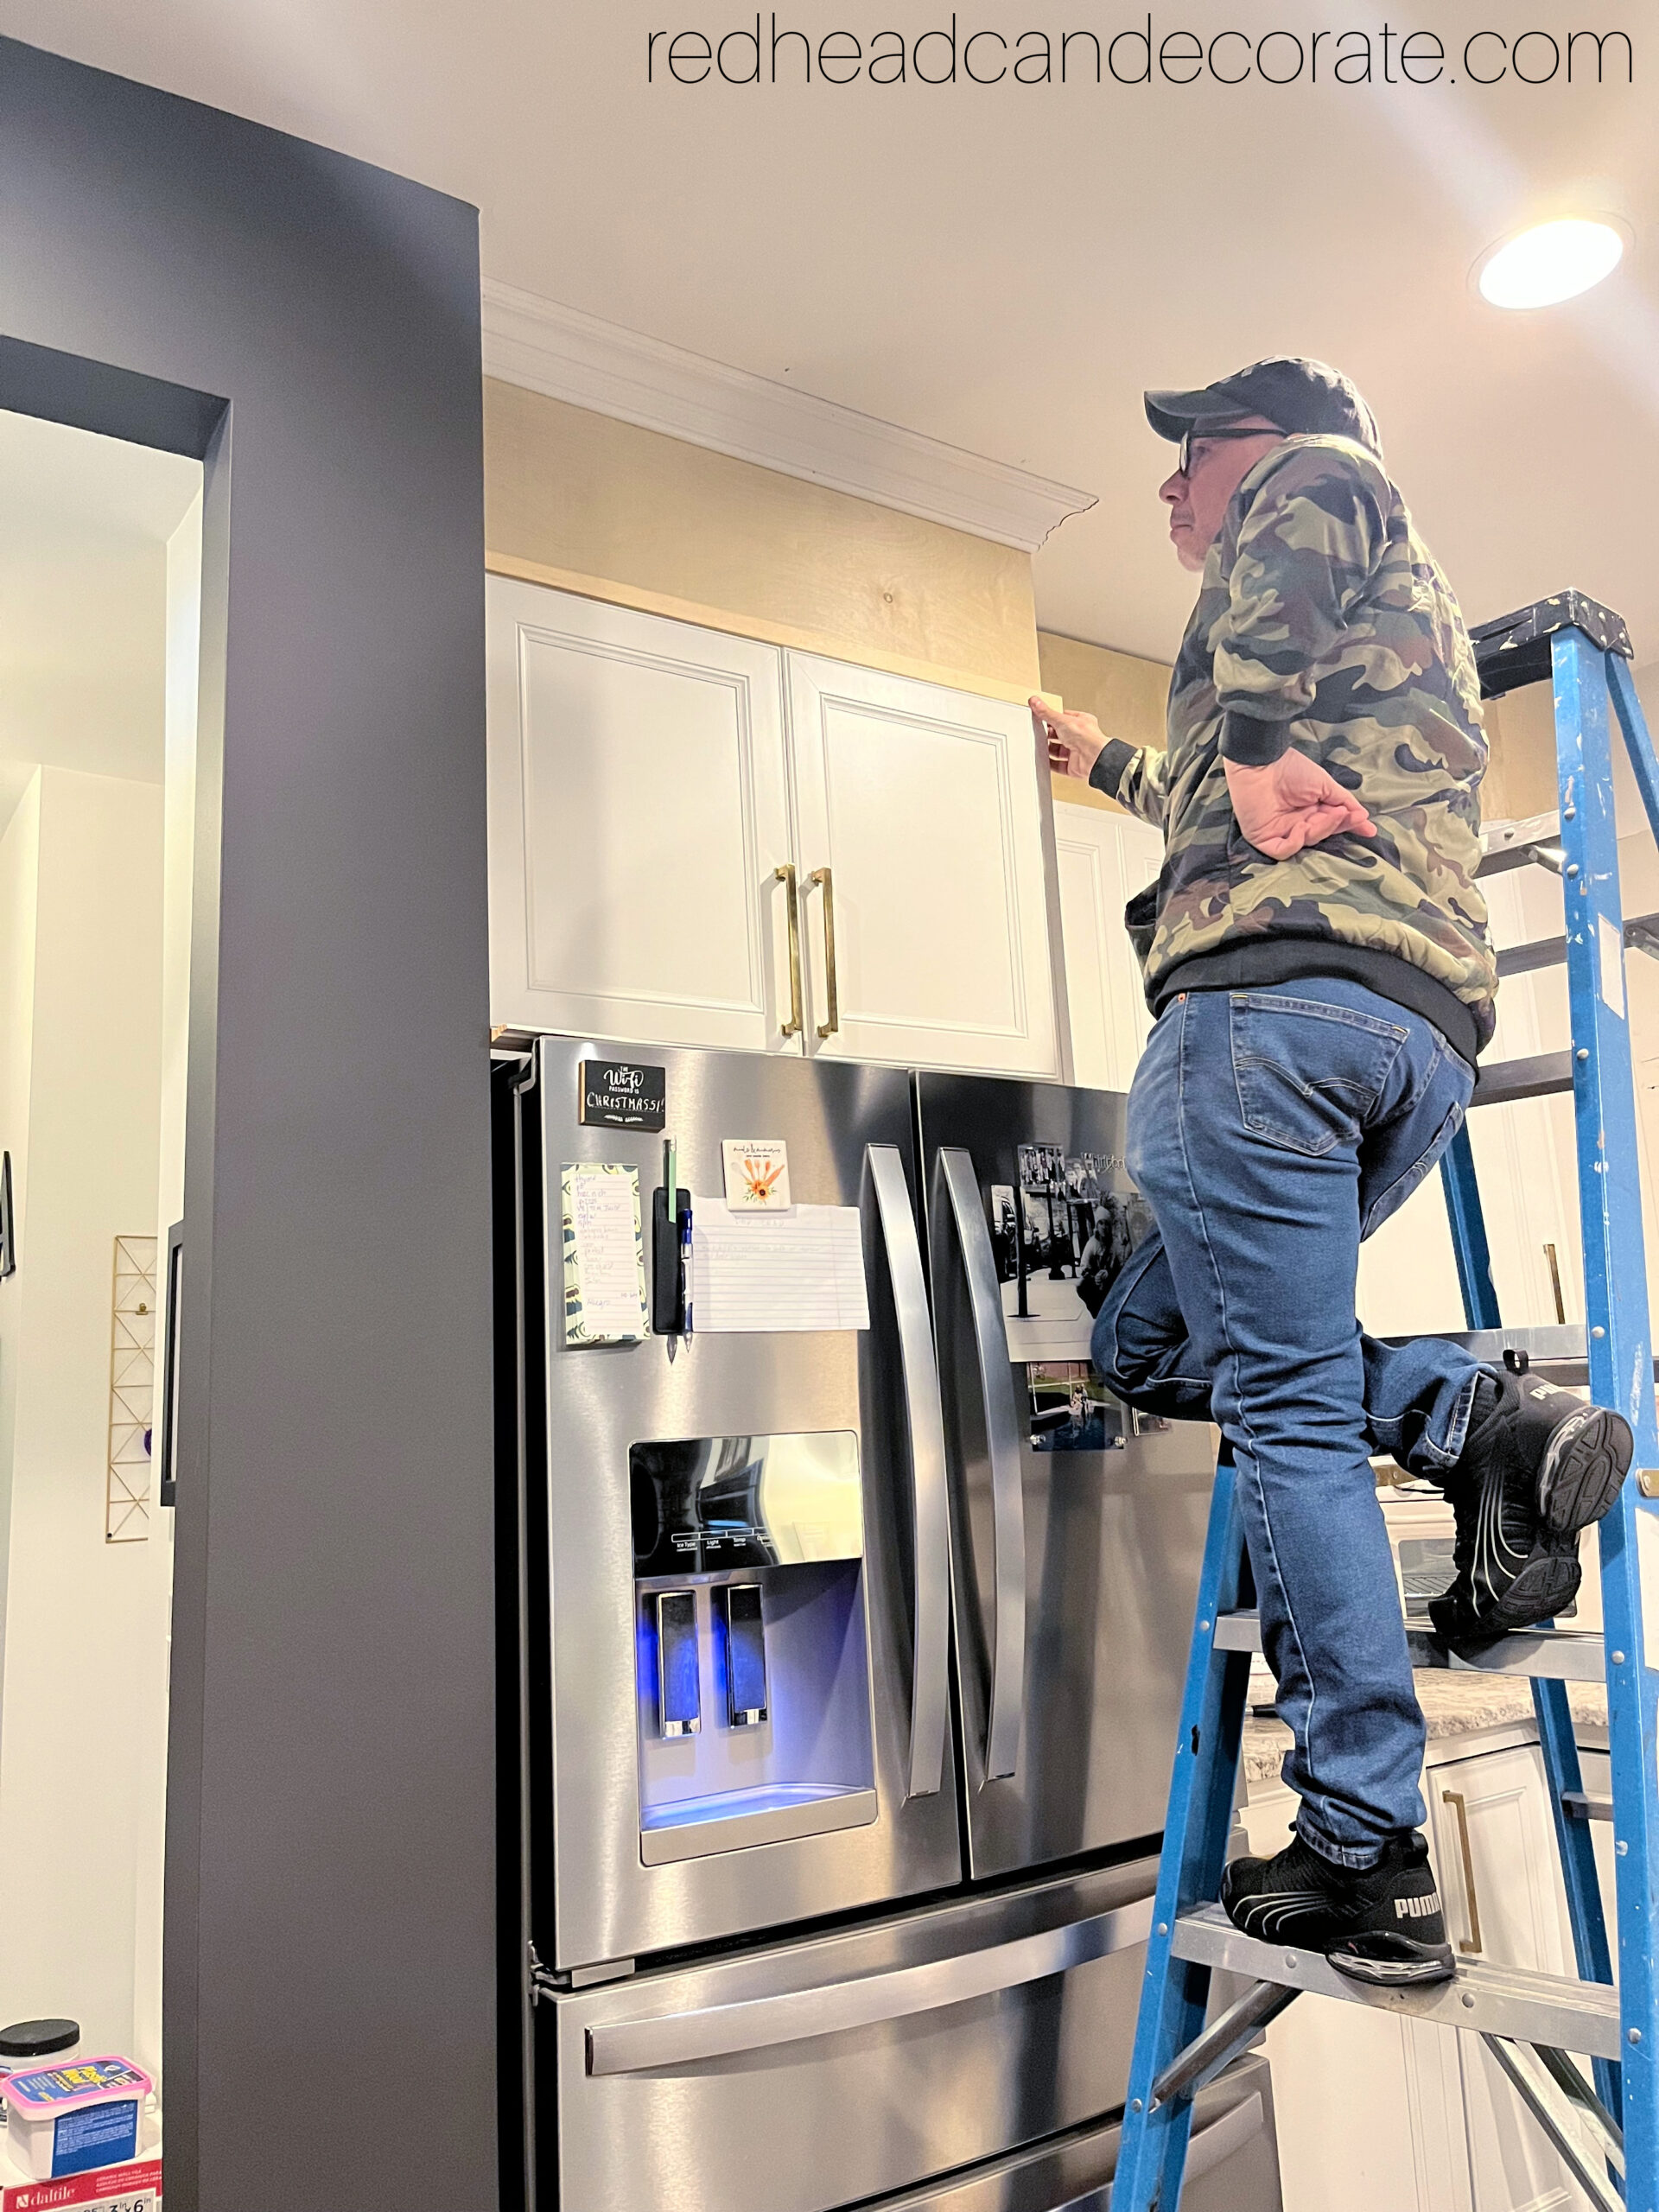
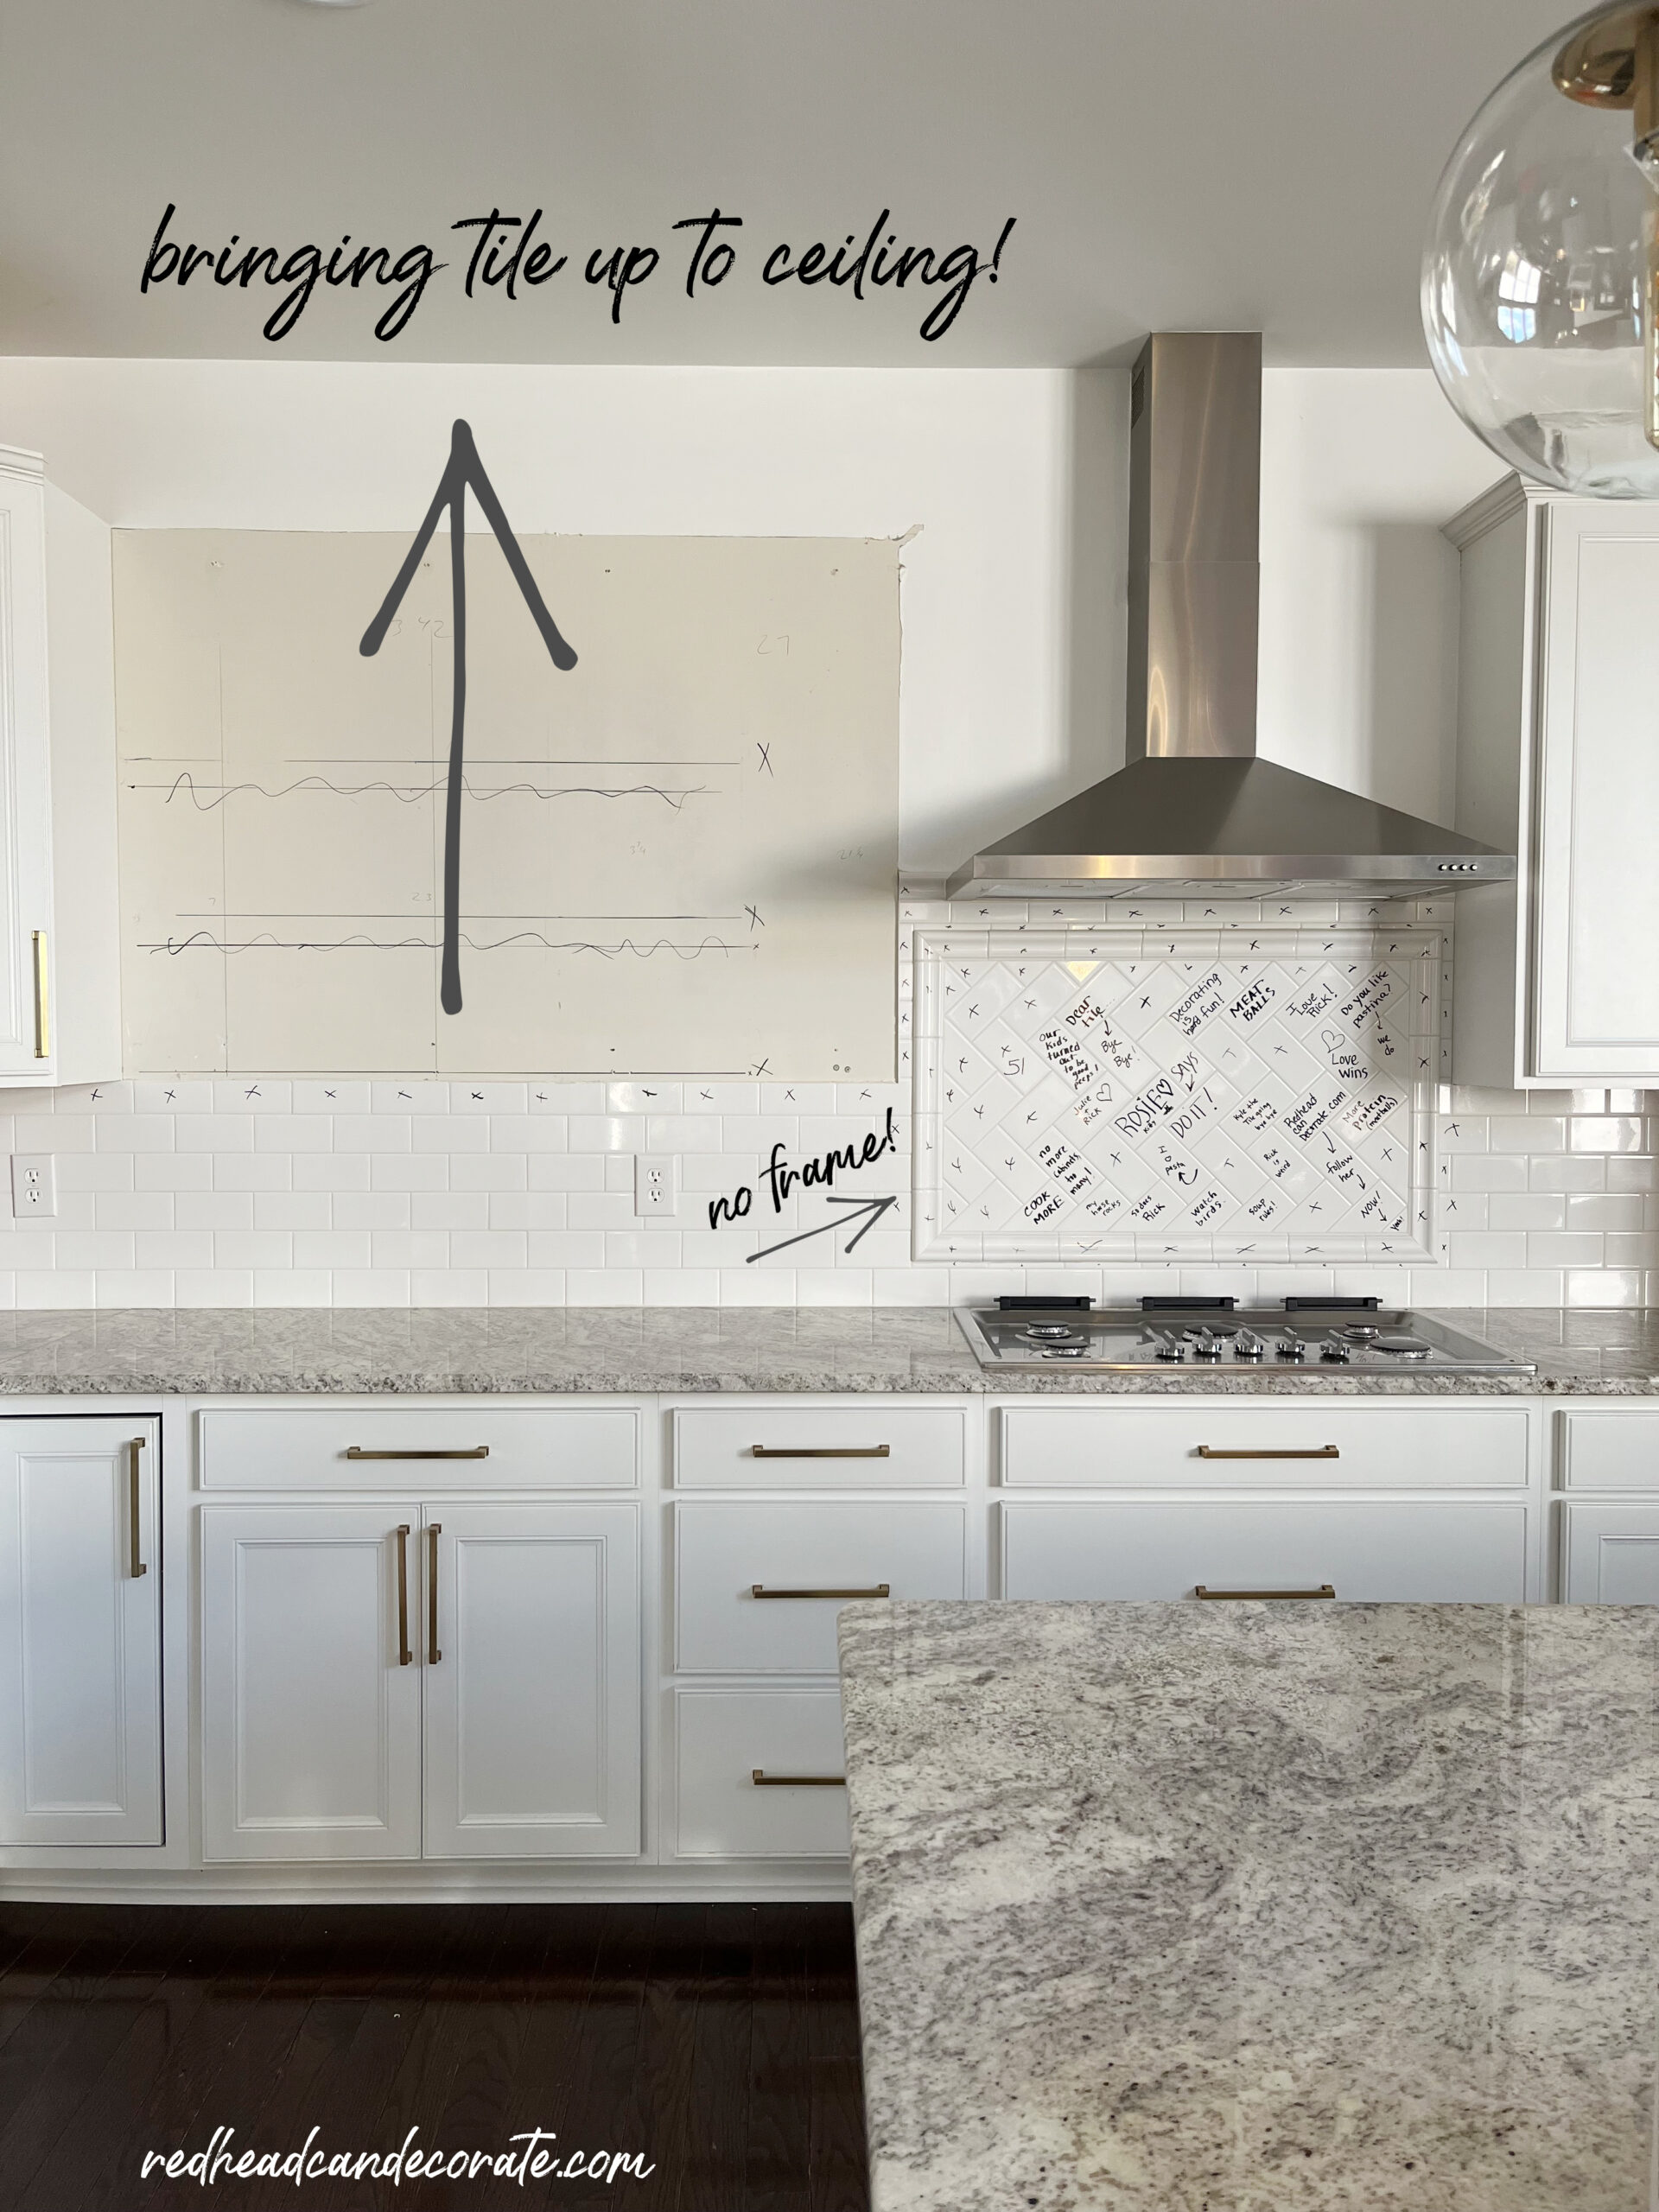
Rick and I both agreed that framing out, and extending the cabinets to the ceiling would not only provide a more cohesive look for our open concept home, but it would make the kitchen look larger by bringing the eye all the way up to the 9 foot ceilings (always think about going up to the ceiling when decorating). The empty space above the cabinets was just gathering dust, and creating a dark shadow above the cabinetry that literally made the kitchen look dated.
Now that we knew what we wanted, we researched the DIY methods for the cabinet extensions, and to be transparent, we couldn’t pick just one. There are millions of tutorials for extending cabinets (click here for my favorite), and also creative ideas out there including a faux cabinet look which we thought would be too difficult. My husband and I ultimately decided on using 1/2 inch Birch wood from Home Depot to frame in basic extensions. The moldings were also purchased from Home Depot, and I should mention that the most difficult part was cutting the angles on the moldings. CLICK HERE for the must have measuring tool for creating the perfect angles for your crown moldings.
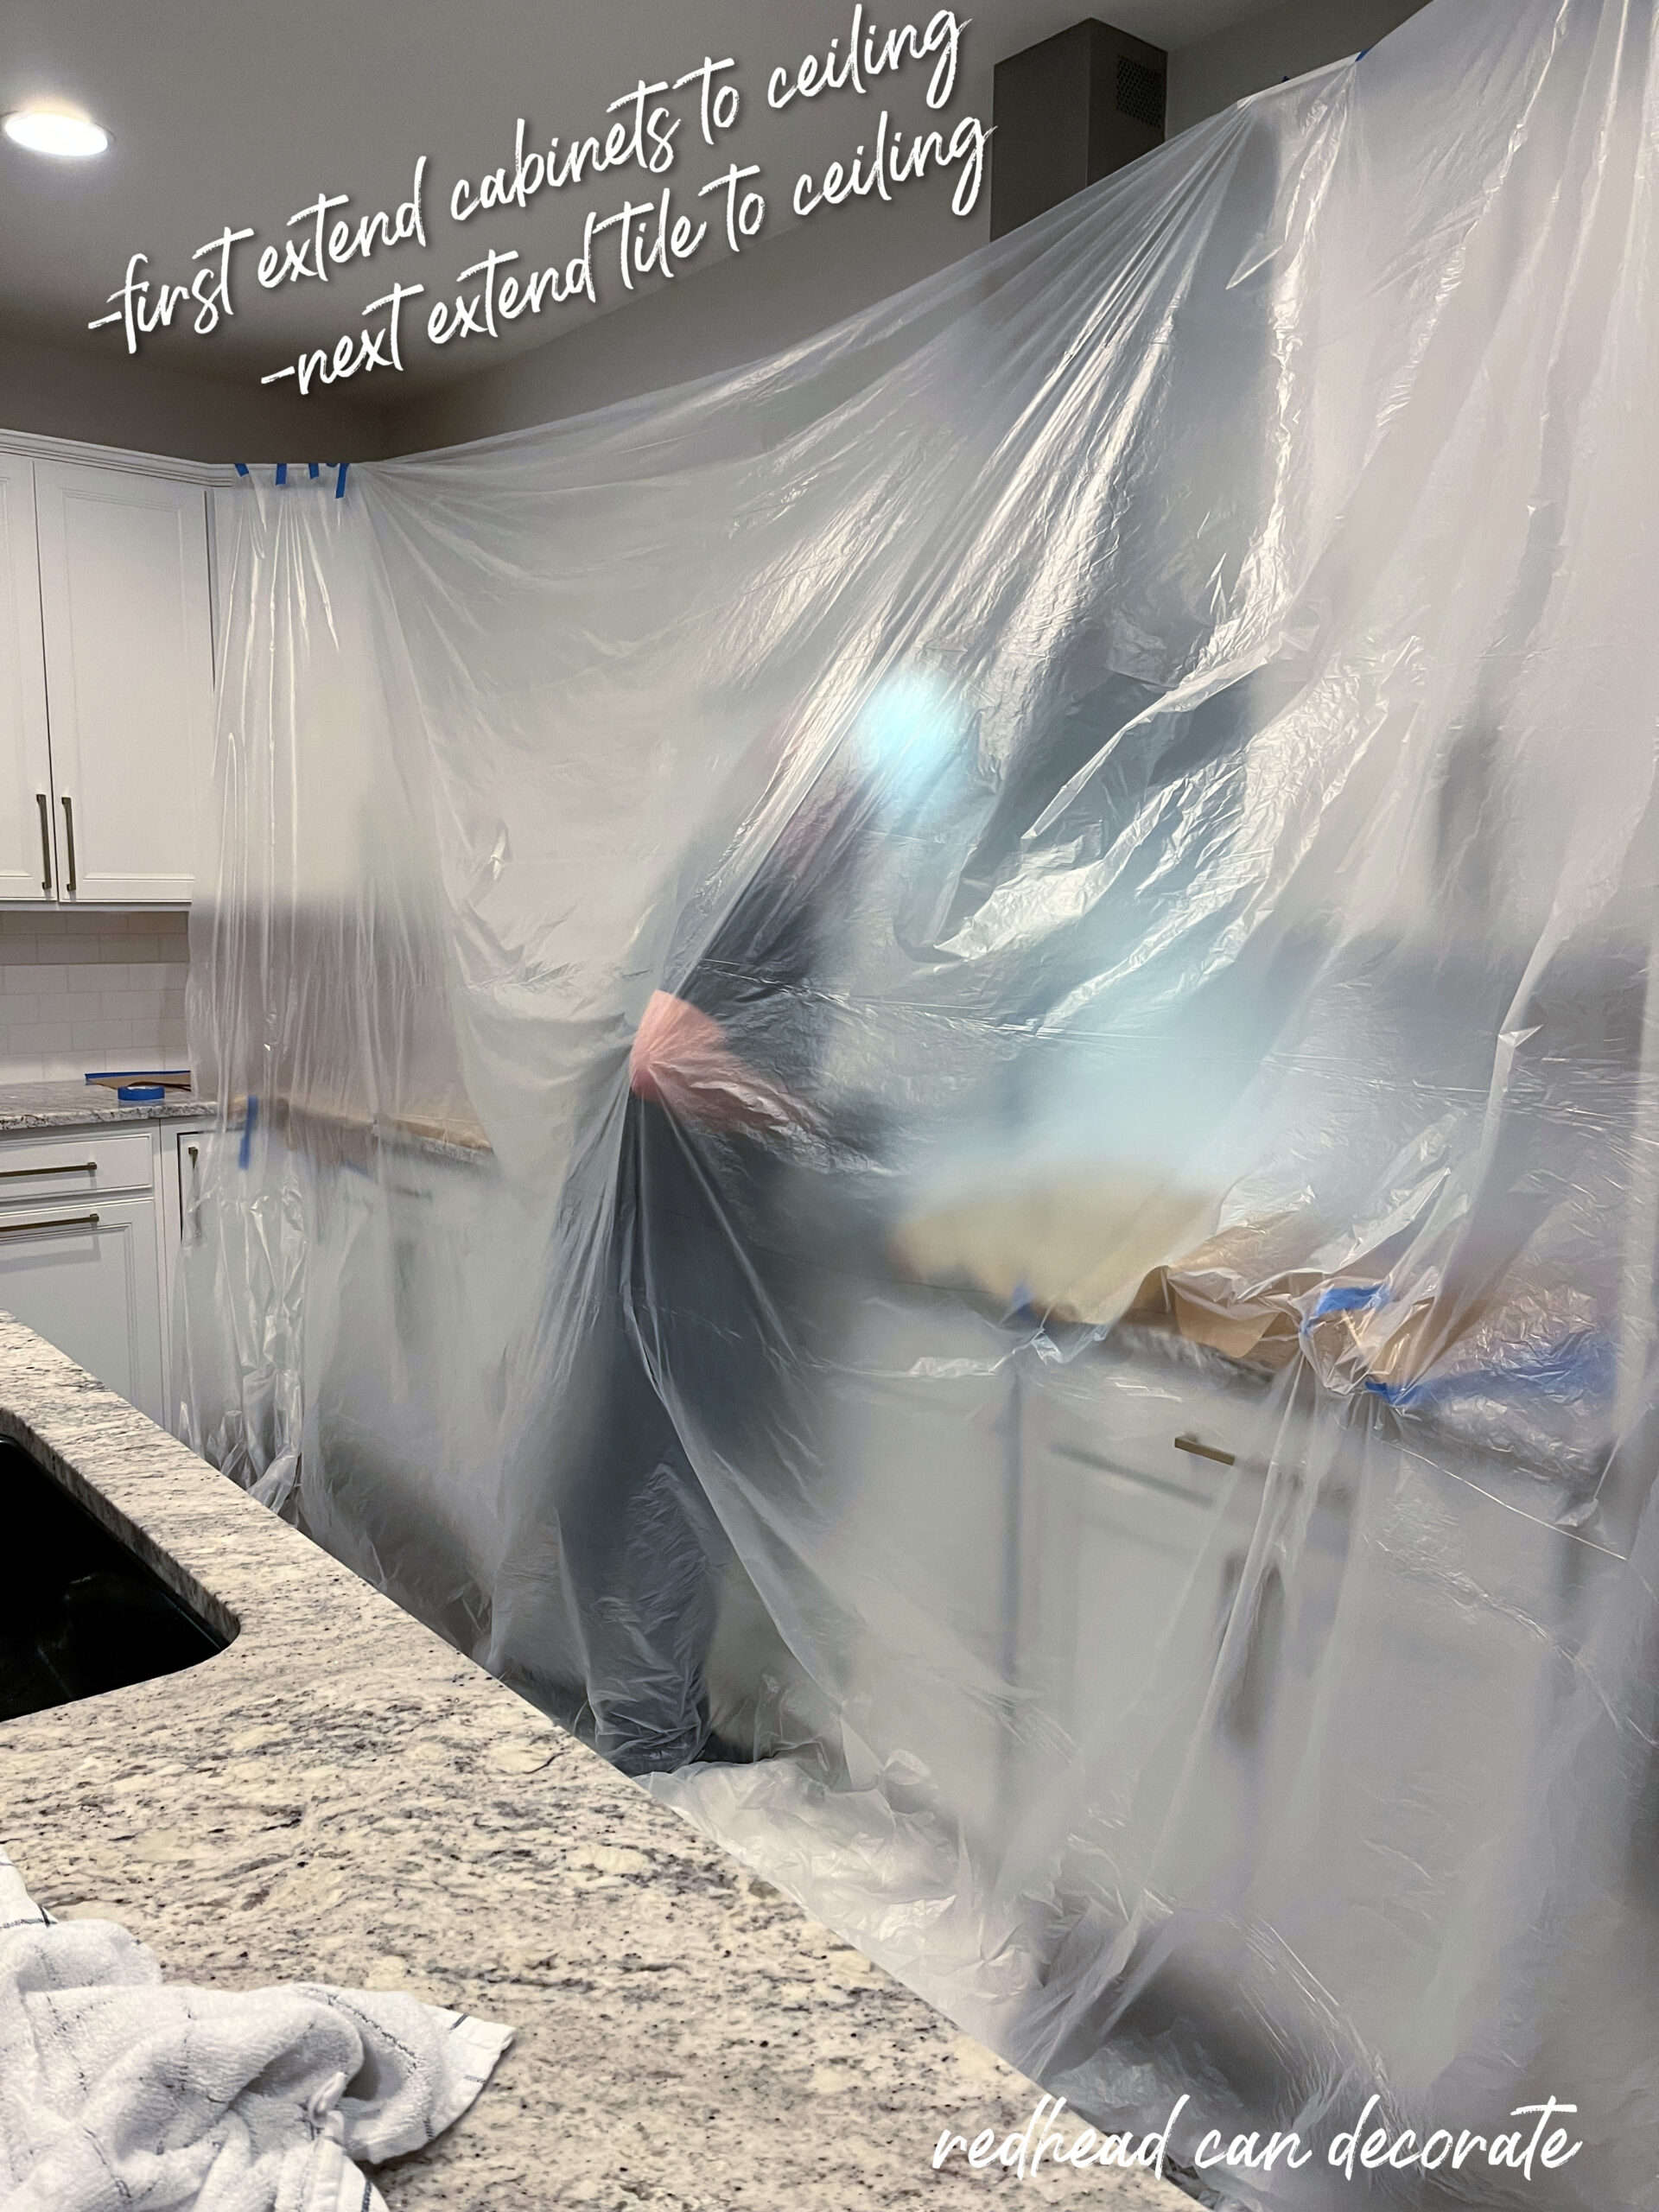
Extending the Existing Tile to the Ceiling to Dramatically Upgrade Your Kitchen
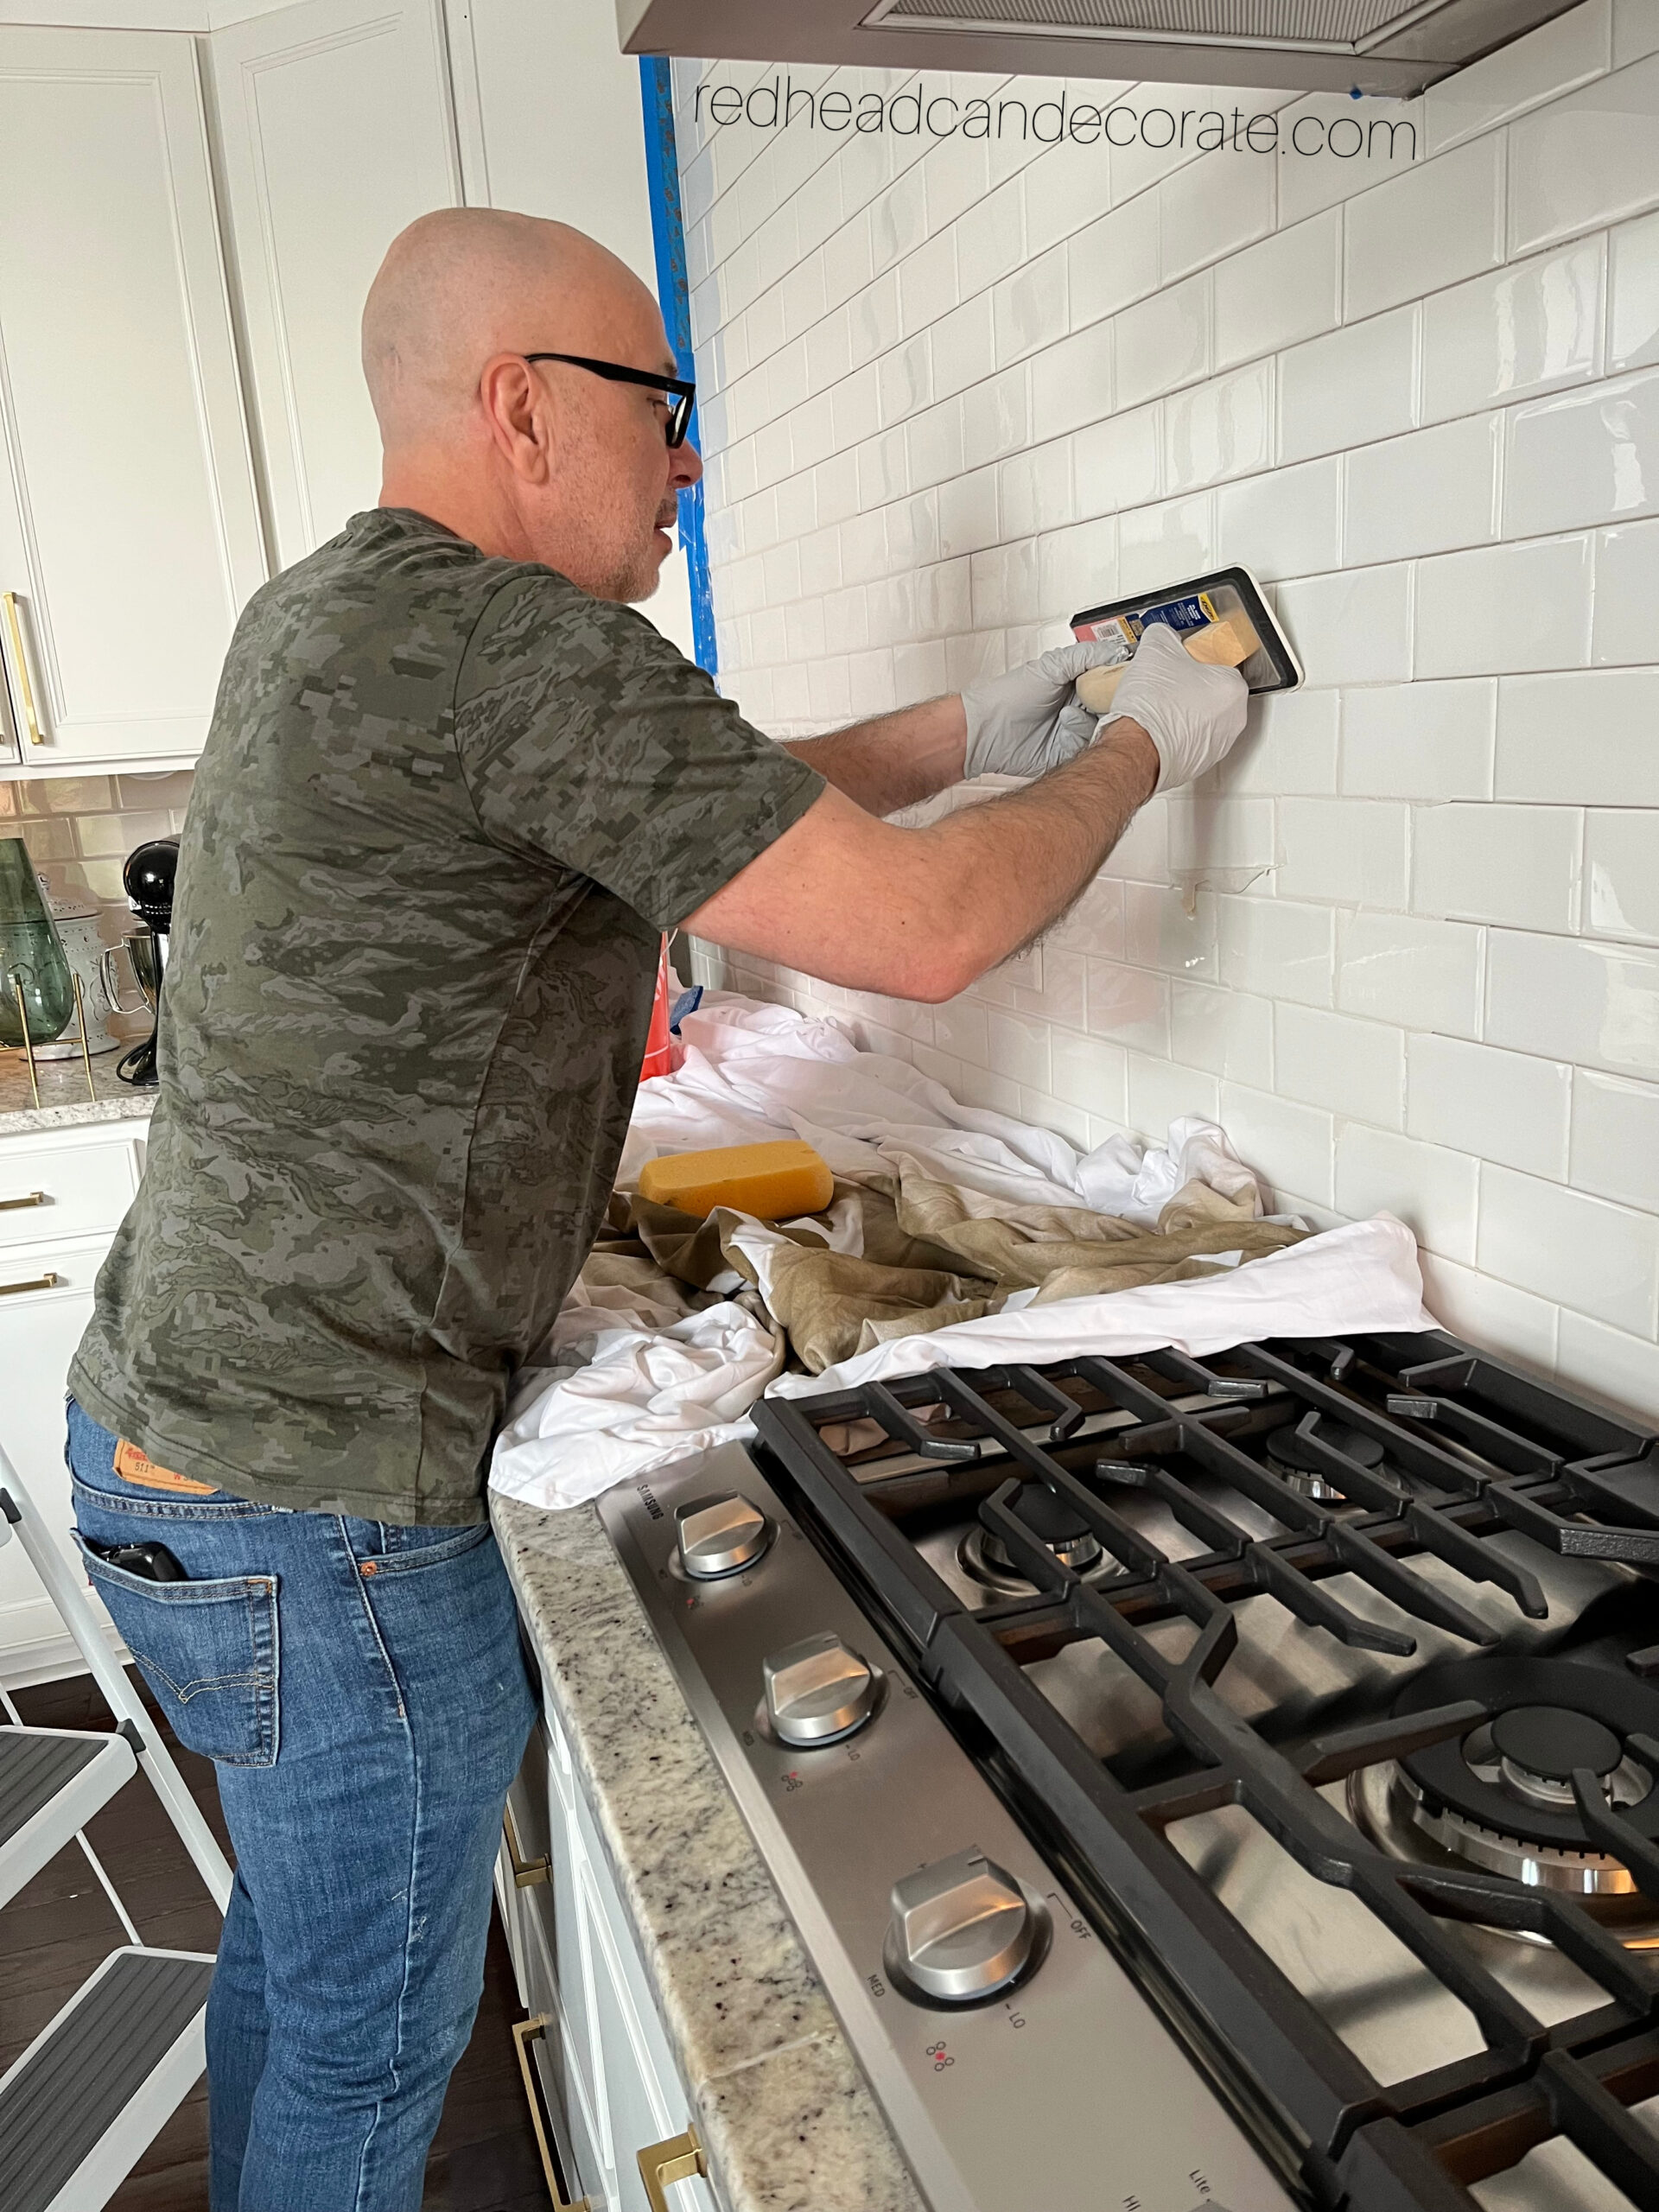
In this post I have jumped ahead a bit to the cabinet extensions, but in actuality after we removed the cabinets we took care of something we had to before building the extensions. We removed the tile we also didn’t want which was located above the cooktop. I mentioned earlier that we were keeping the existing tile, and using the same tile all the way up to the ceiling, however there was one weird area we needed to address. The area I am referring to was an empty tile “frame” above the cooktop that I thought disrupted the flow of the tiled backsplash. Time to go! There’s also a photo below of me pretending I took care of it, but my husband did all the tile removal-I was just the cleaning lady. Here’s a great photo of the “weird” framed tile that was going, and you can see where the tile would be extended upward…(I had a little fun with a marker prior).
SEE AFTER PHOTOS AT END


shelf I found on line- CLICK HERE FOR INFO
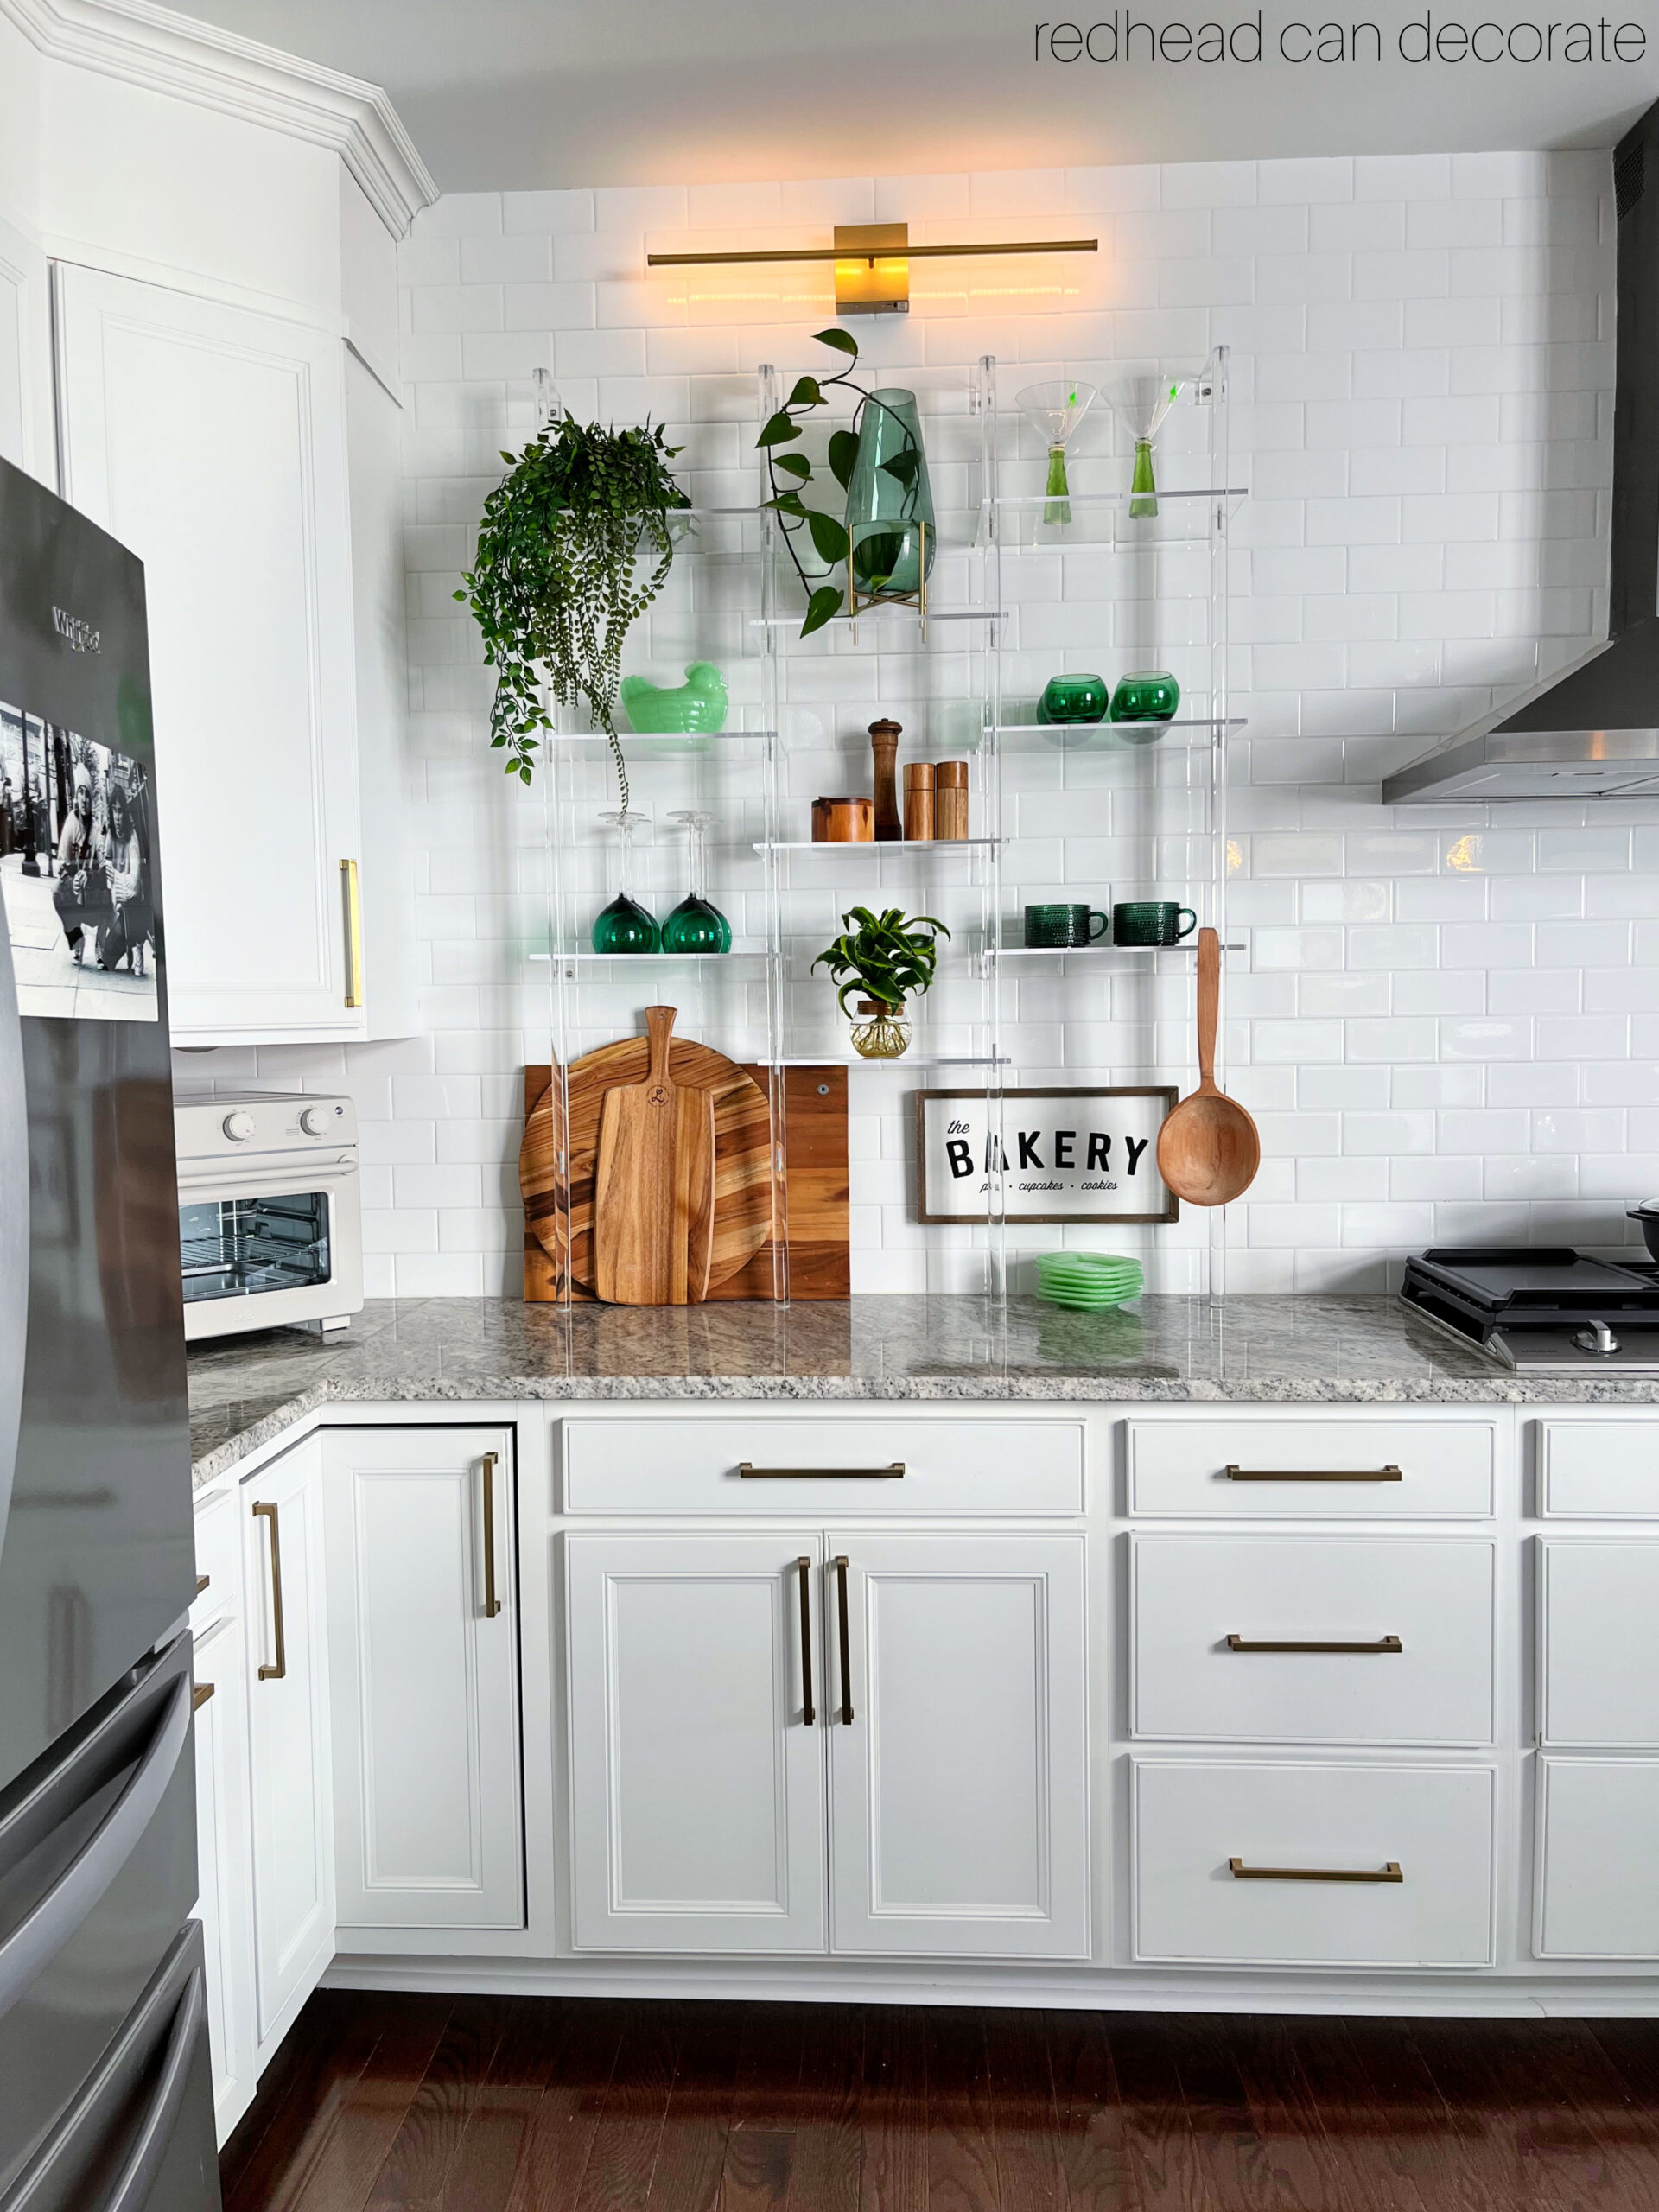
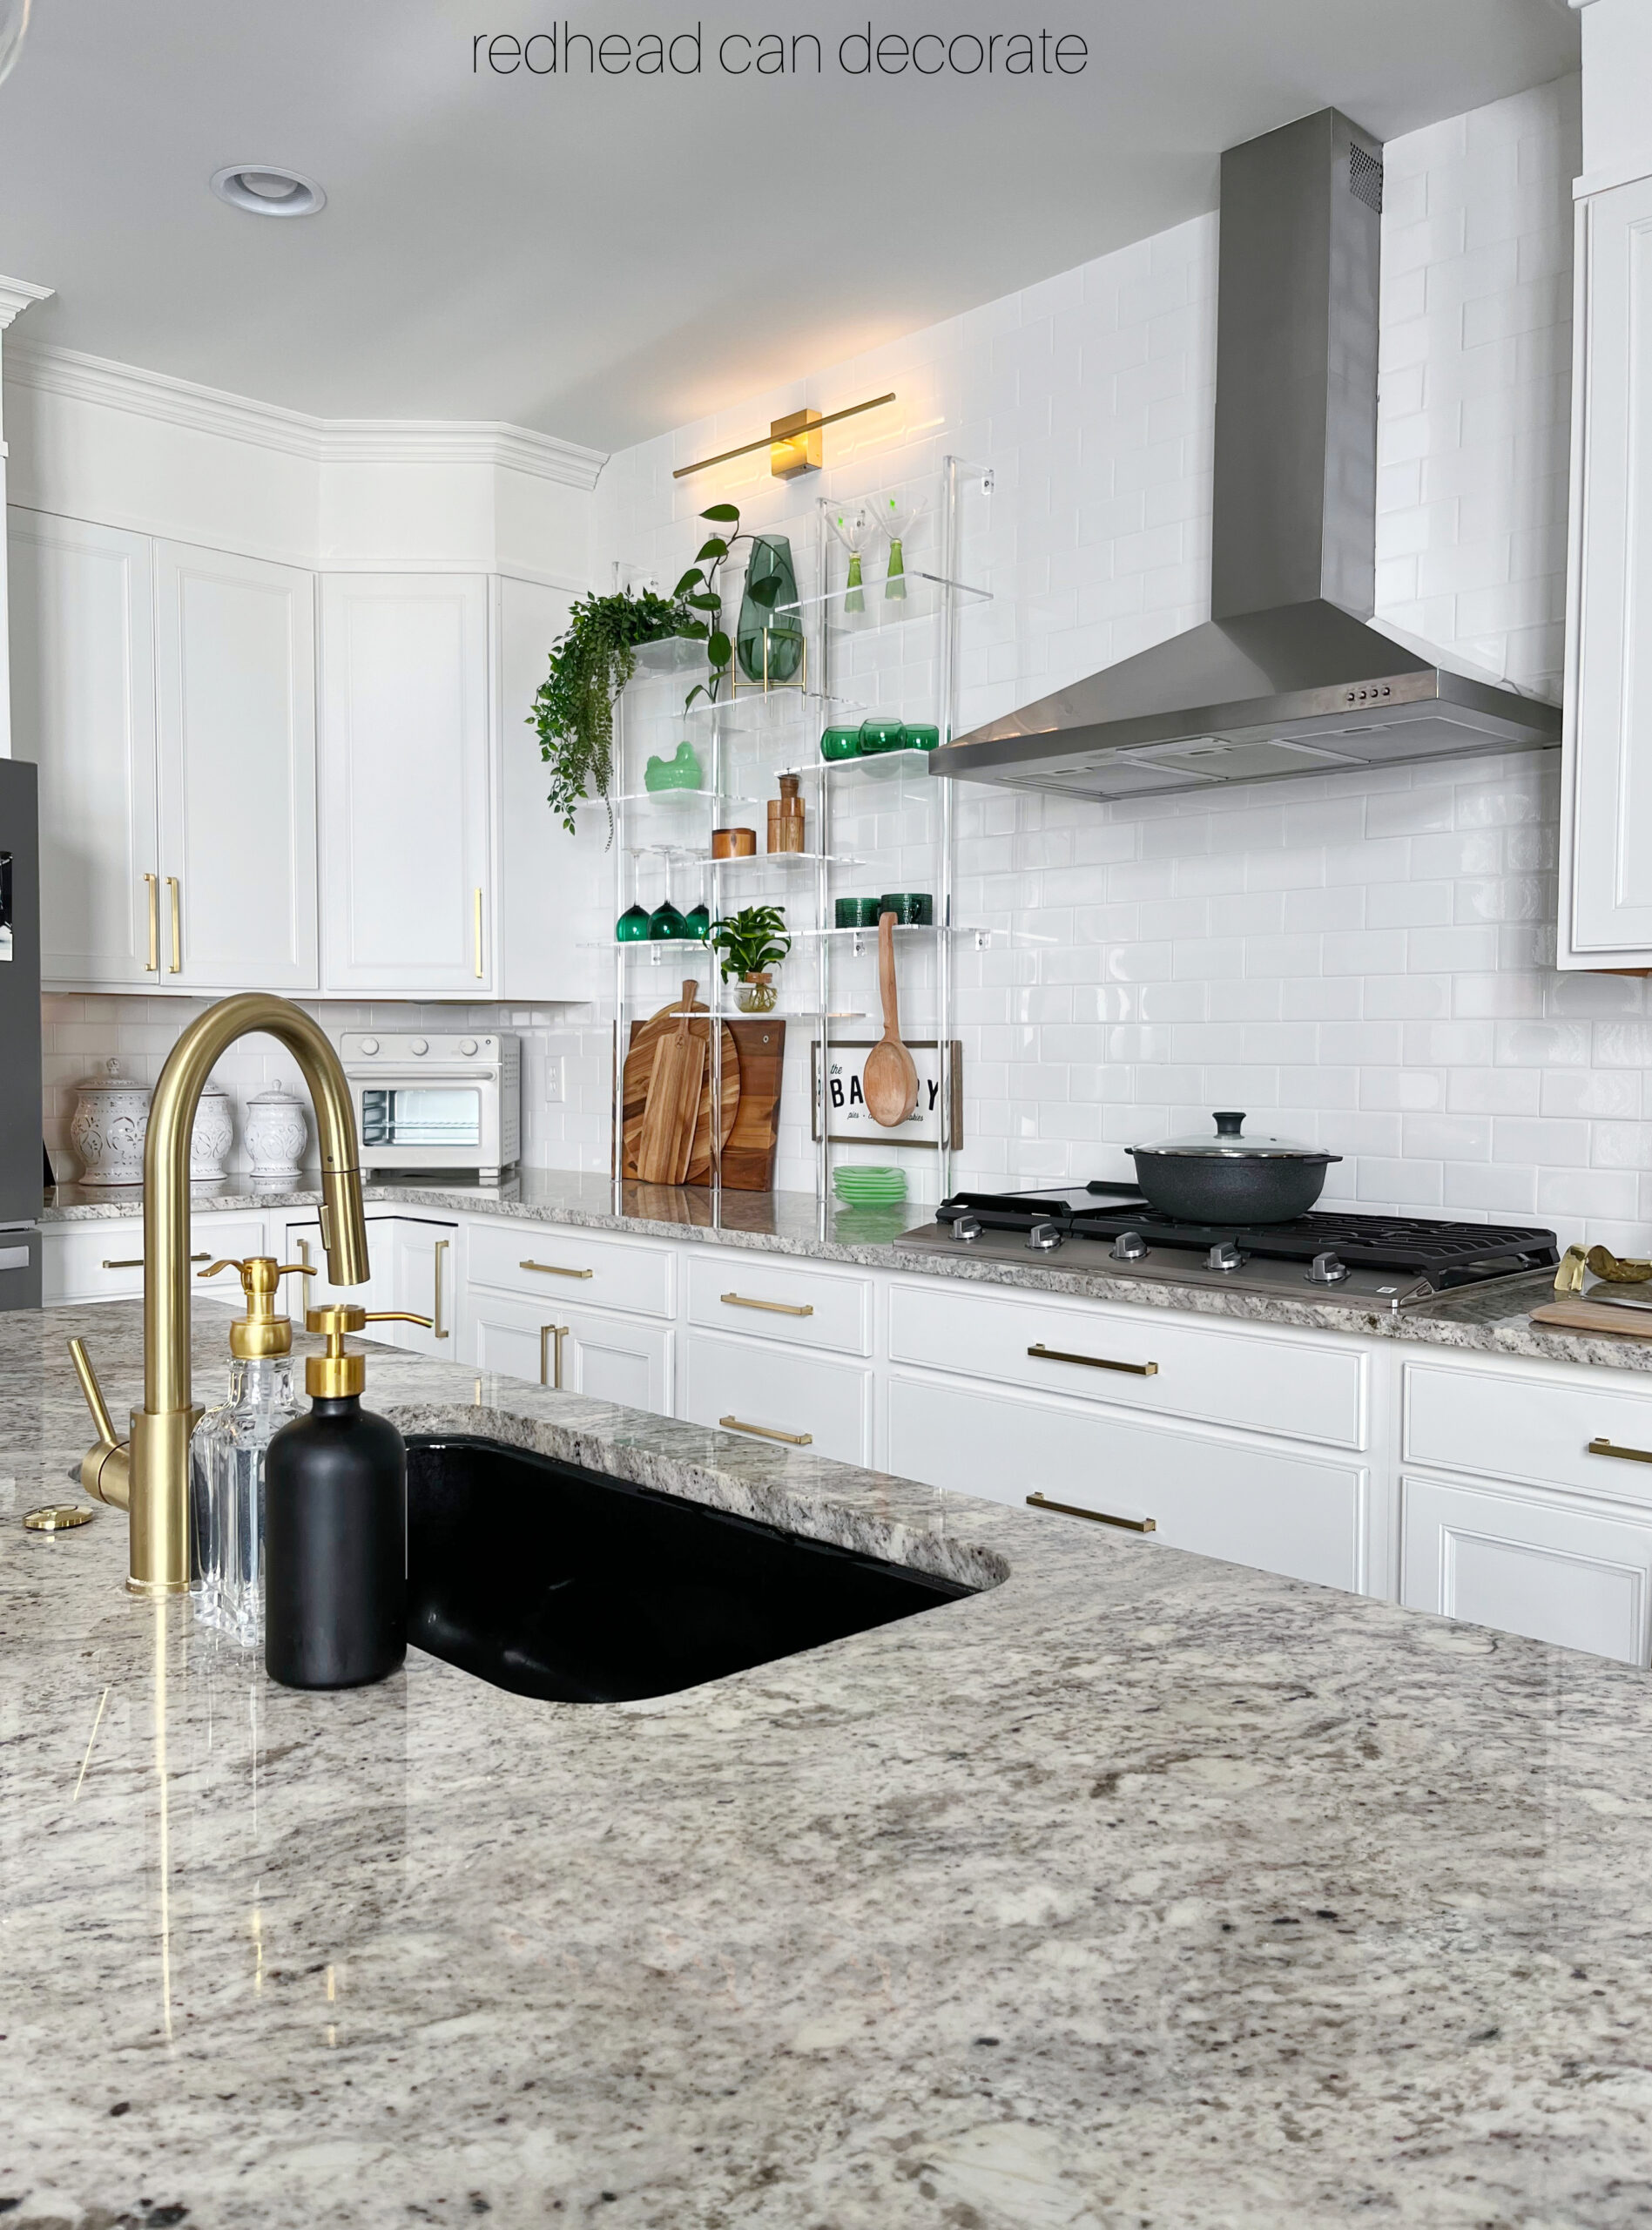
Choosing Shelving for the New Tiled Kitchen Wall
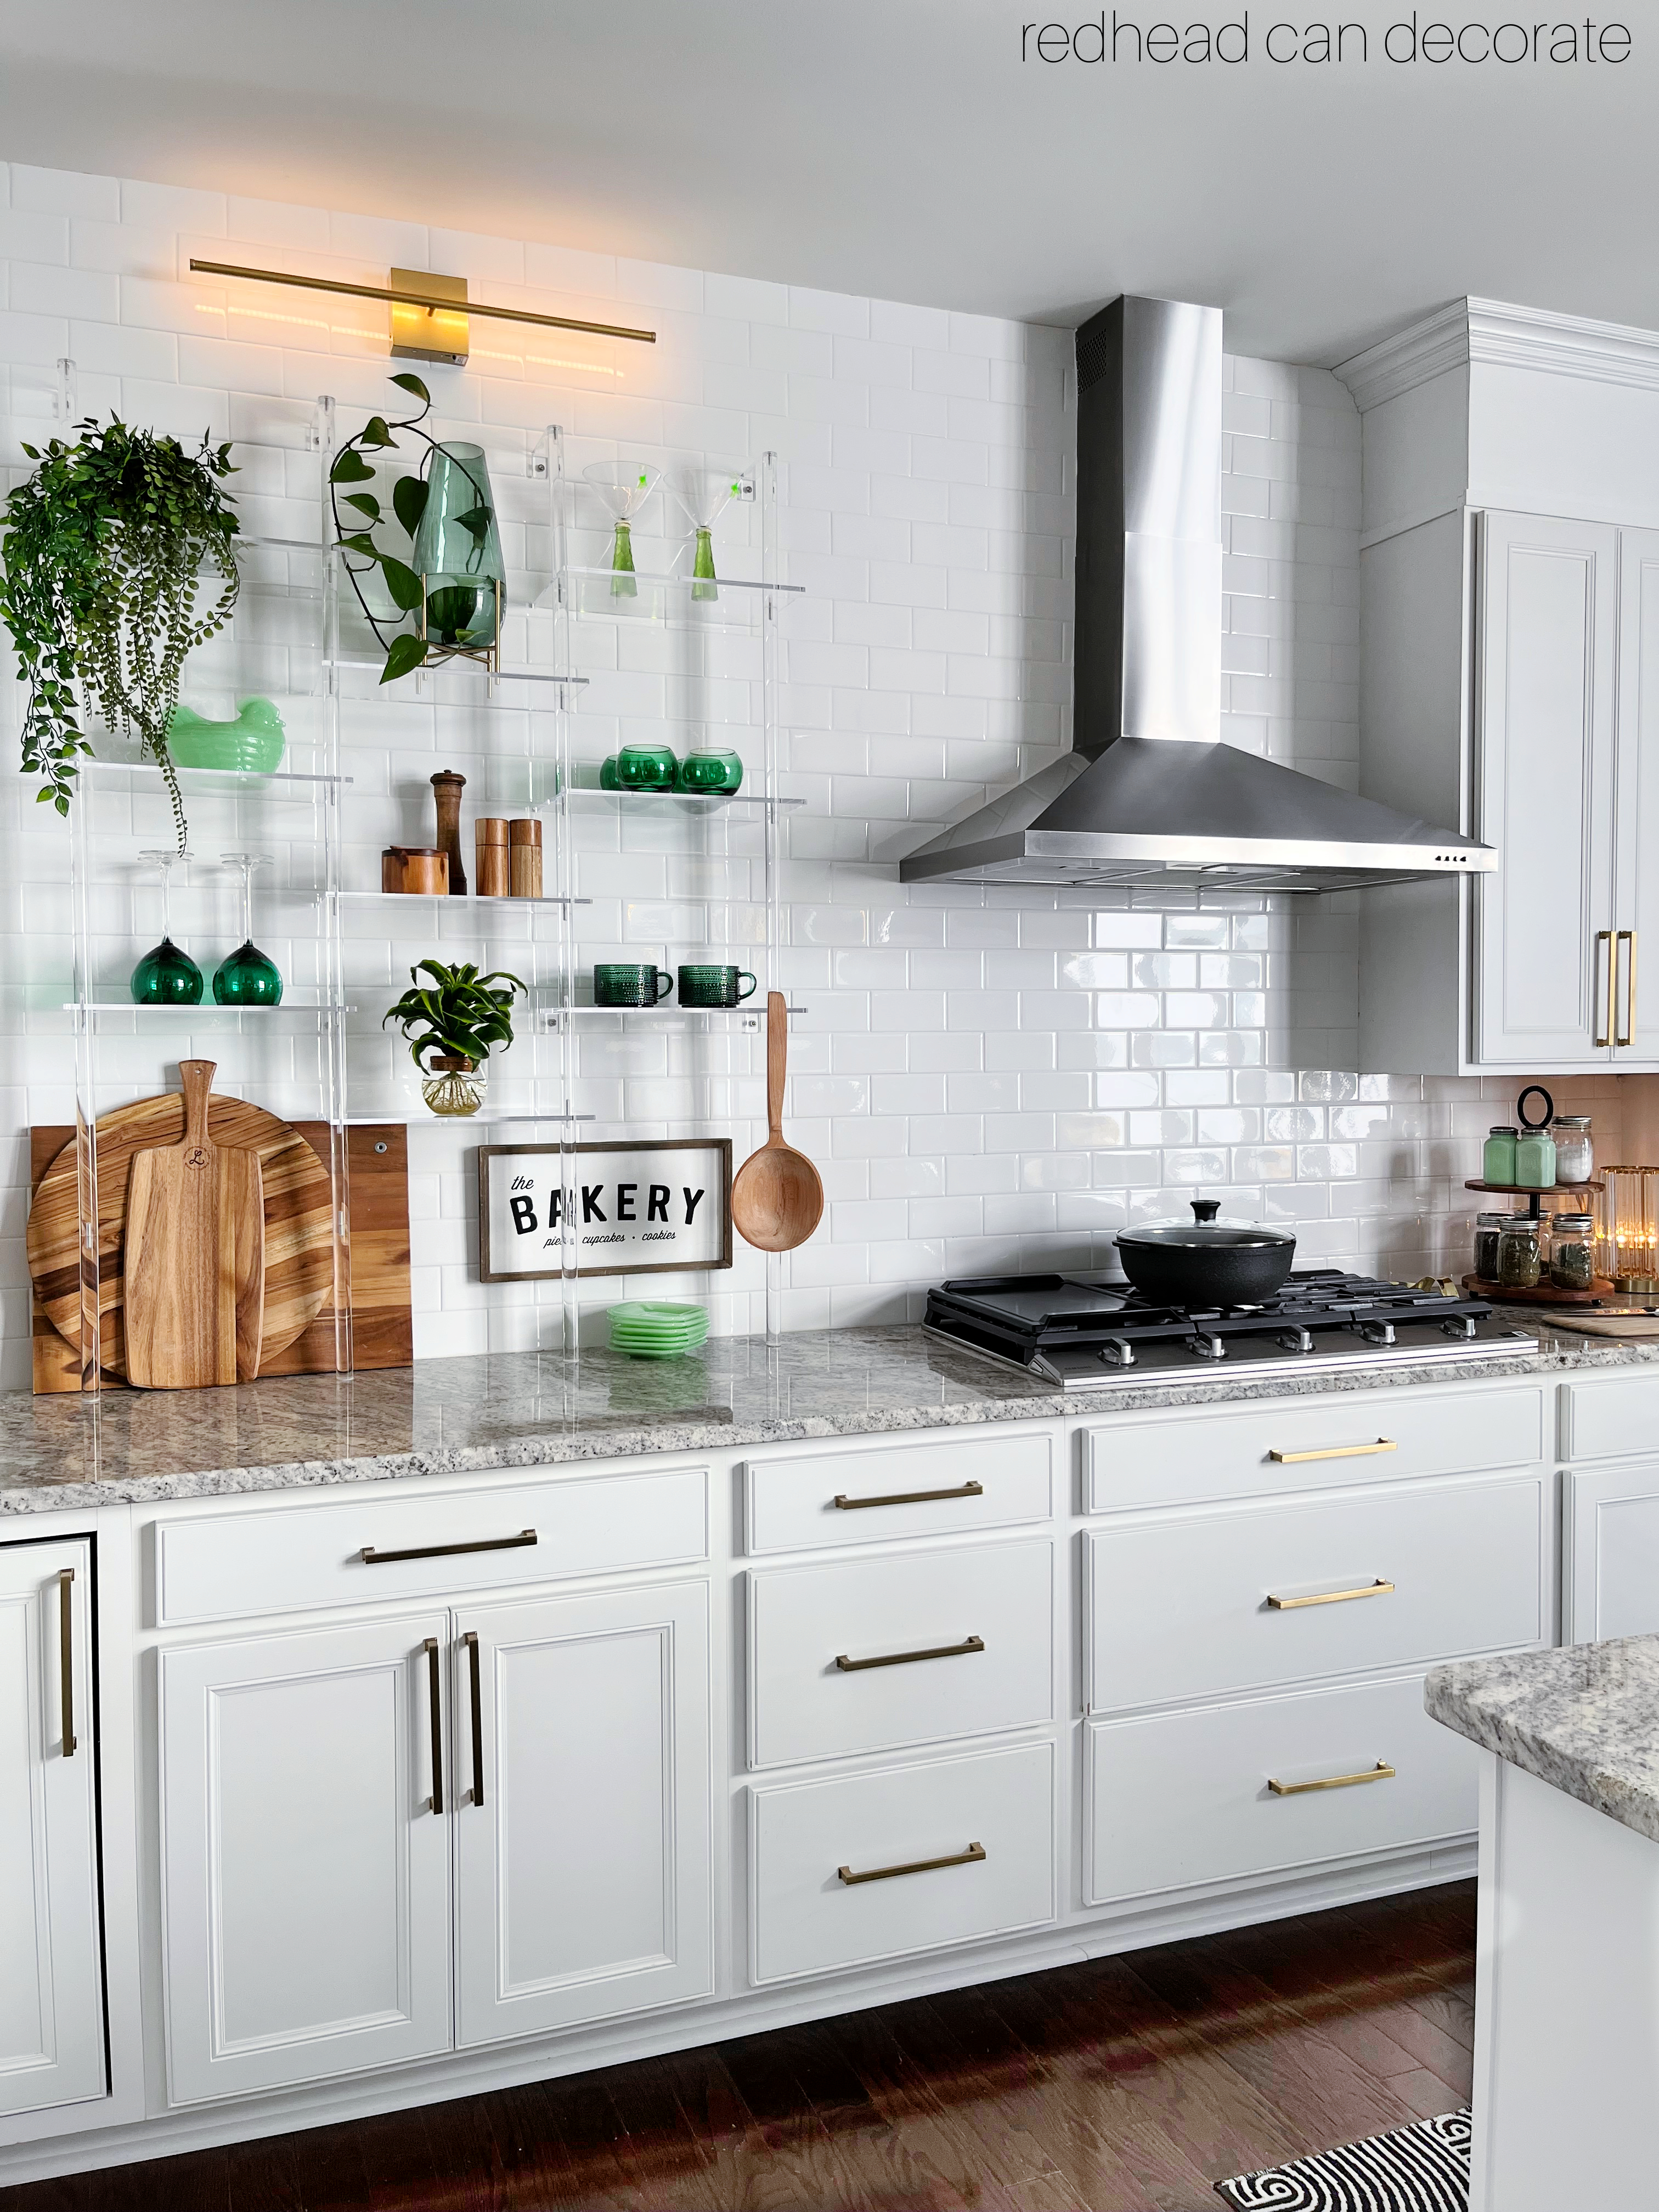
If you have been following me here at redheadcandecorate.com over the years you know that this was the best part for sure, well almost. I actually made a mistake and ordered brushed brass shelving that extended from the ceiling, but it arrived and it was a very yellow brass finish. I lost a little money in that process, but ended up with something that was so much more us, but less expensive. I chose an acrylic shelving unit that looked so cute to me I just could not resist. You see…I carry a bit of acrylic through our entire home with just a few touches here and there. We have an acrylic coffee table, dining chairs, and my toilet paper dispenser is acrylic. I have a love for sprinkling it throughout my decor I think because as a child my precious mom had a clear glass art piece that I use to look through as a little girl. This clear “glass” shelf has ended up being the perfect personal touch, especially since I can decorate it seasonally 🤩 (ps: this shelf would make a beautiful plant shelf in front of a window.)
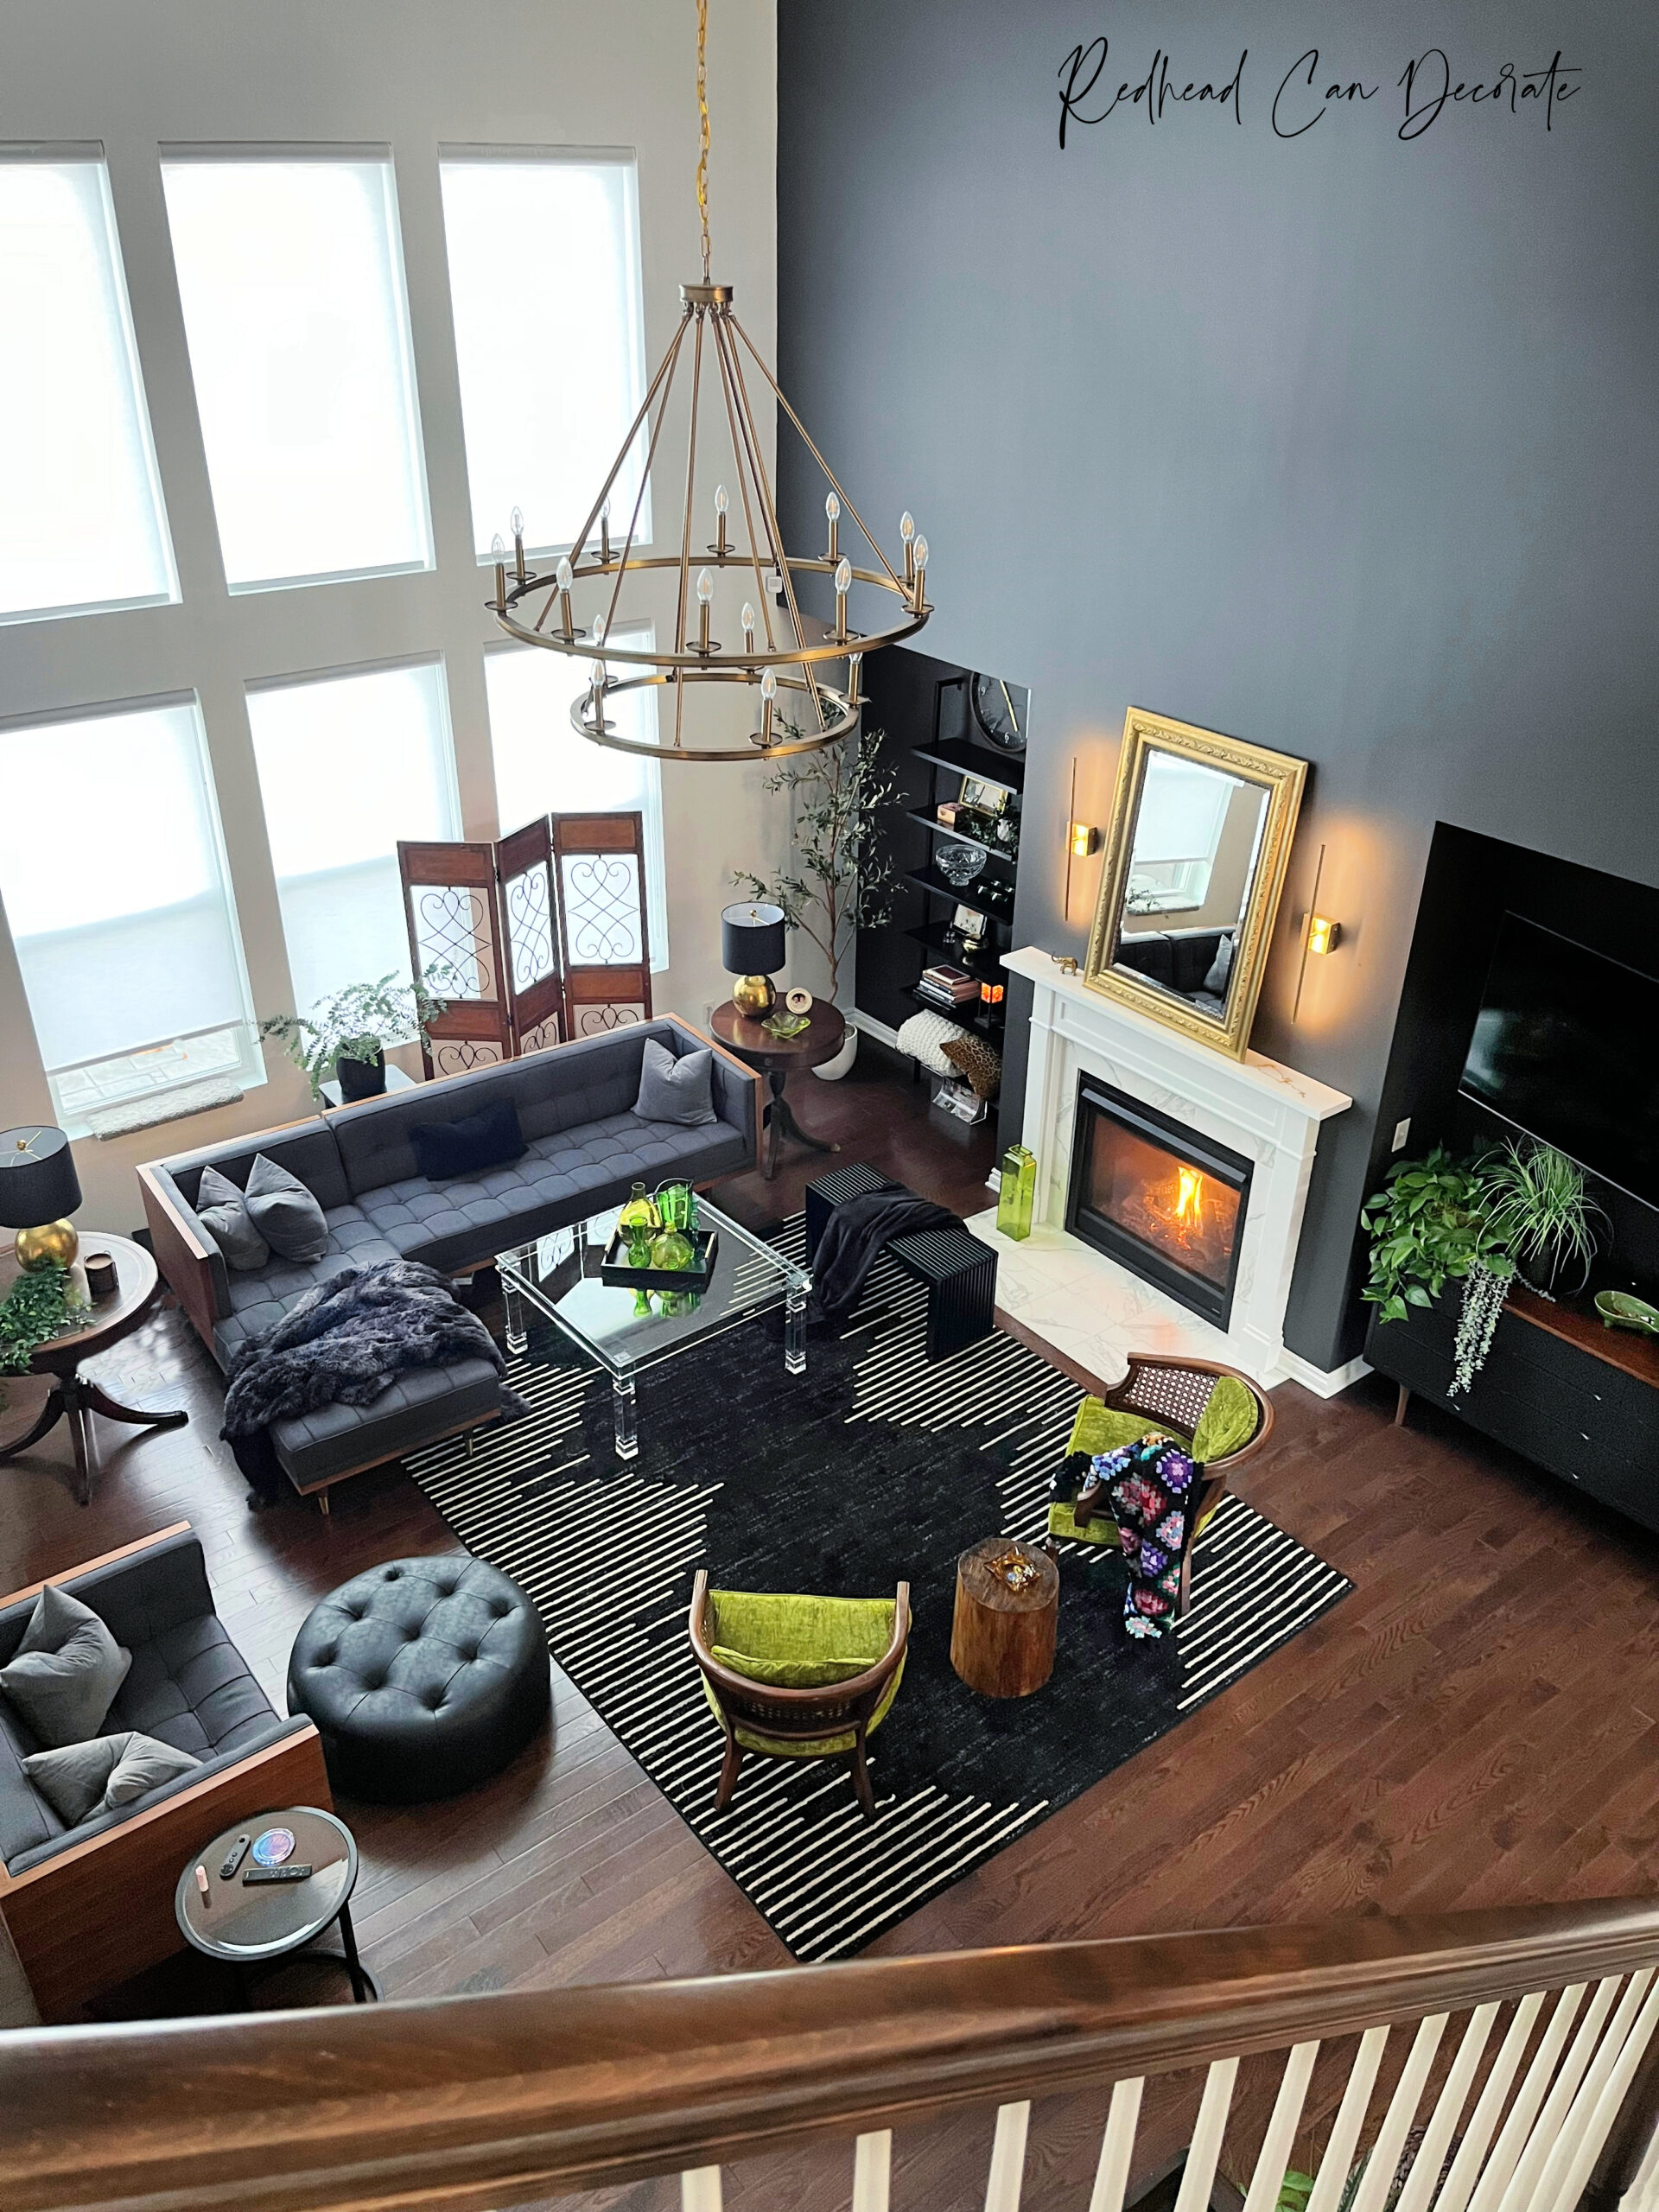
Final Reveal Tour of Our Dramatic Kitchen Upgrades with Cabinet Removal/Extensions
I hope you enjoy our new “custom Italian Rick” cabinetry finished product…I know I sure do😉. My big sis recently moved here from New York with my dad, and the first thing she said when she walked into our house is…”This is the best thing you have ever done.” Well, thank you, Diane…I think I agree.
Next up is a complete before and after tour of our new home that will give you much better access to the makeovers that interest you the most. I’m also sharing my chili recipe because this kitchen was made to be used 😊
Decorating the Acrylic Shelving Unit for Our Kitchen Makeover After the Cabinet Removal/Extensions
Decorating the acrylic shelving unit I found on line, was a little bit nerve racking at first. Putting it up was the easy part, but decorating isn’t always as easy as you anticipate. I had originally planned on using a few plates, and things just didn’t seem to look like right. I think I was too overly excited, went too quickly, and got a little mixed up between farmhouse and glam. Luckily, I asked my son for a little help, and boy did he hit it on the nose. All he said was, “Put he green chicken back”😆…
The “green chicken” tied in the jadeite plates, and then all the green I had envisioned came to fruition. Enjoy the rest of the tour and I will see you next time…


DIY Real Brick Backsplash Full Tutorial
Dark Accent Wall for Your Family Room


The link for the measuring tool is not working. I tried both links, it takes me to the main Amazon page but not the speciific product page. Can you give me the product name and I’ll look it up? The crown moulding made a huge difference and gives the room a high end look. I want to try it in my bathroom, but I have no idea how to measure and can’t afford a table saw. Thanks!!
Thank you for letting me know! Here a fresh Amazon link for you to the protractor
https://amzn.to/4m6UZDq
Gorgeous, Julie!
Thank you, Mickey!!!
The kitchen looks marvelous. Yes to the green chicken! Really my response is in regards to your sister and dad. how is he doing post move? It is not easy to begin again at any age. I hope with the comfort of family close by he is content.
He is doing ok… you hit the head on the nail. He had a rough start, but doing better now. He is s tough cookie!
Fun ideas…
WOW ! WHAT A GREAT IDEA.. IT’S SO NICE TO SEE SOMETHING OTHER THAN WALL TO WALL CABINETS ! IT REALLY DRESSED UP THAT ROOM !
Hi Julie:
At long last! So good to hear from you. Wow have you & Rick been busy. The improvements are stunning.I knew when you said you were getting a new house, it had to be one you could make over in your style. Good om ya!
Did you get my reply thanking you for the cute card? Joe and I are doing pretty good and hanging in!!
Hugs, Bette
Hi, Bette!! Yes I sent you a message I hope you get it!
[…] what these homeowner’s did to their kitchen after removing a few of the upper cabinets. (open in same […]
The acrylic shelving is like jewelry!
That’s a neat way of looking at it!! Thank you, Heidi!
Very unique, kind of reminds me of a nail salon! Cute.
As I am sitting here at a nail salon!!! Never thought of that…or a department store which my mom would take me too often as a little girl!
I absolutely love everything you do but please let me say…I don’t prefer the clear shelving nor to boxing over the cabinets. I’d add smaller cabinets on top with framed but glass centered fronts with lighting. My son-in-law did that and it really elevates the room. On the clear shelving next to a stove top/range, good luck with cleaning. I was constantly cleaning the shelving and items tat close to a cooking area…I mean constantly. And the look does not fit in my taste. To each his own, but this one was the only time I would disagree with your choices. I’ll wait for the next posting!
I mentioned in the post that we have too many cabinets. We extended the others, which was a bit pricy but putting in glass cabinets on top would definitely be pricy. This extended the existing up to the ceiling to add a high end look. The shelving cleans instantly w windex and a paper towel. I don’t fry a ton of food so I don’t have to worry about that. I am more interested in decorating these open shelves for the holidays.
Looks great, but I have to ask what and where did you put things you had in those cabinets.
I mentioned in the post how we have too many cabinets. When we moved in, we left these empty knowing the plan to take them down. Why in the world is everyone so obsessed with so many cabinets? Too much stuff!!!