It was just time for change 🙄 . That’s the only reason I have for why I felt the need to take down the original “Thrift Store Silver Platter Wall“. I just simply grew tired of looking at the same design day after day, night after night. Especially such a “busy” one. Often, I would find myself fantasizing (sometimes stopping right in the middle of the room) about what I could hang in our foyer instead of the popular silver platter wall. When I first took the old wall down, I felt fresh, clean, and I tried a few ideas, but nothing compared. What I finally figured out is that I missed it. I missed the “Silver Platter Wall”.
*** Some of the links in this post may contain affiliate links for your convenience. Read full disclosure policy here.
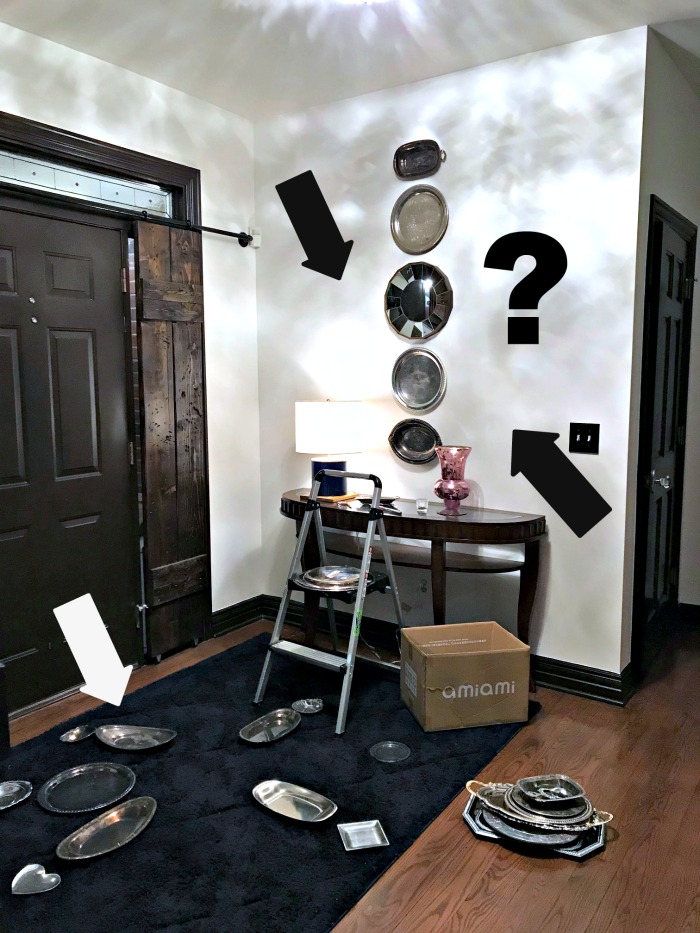
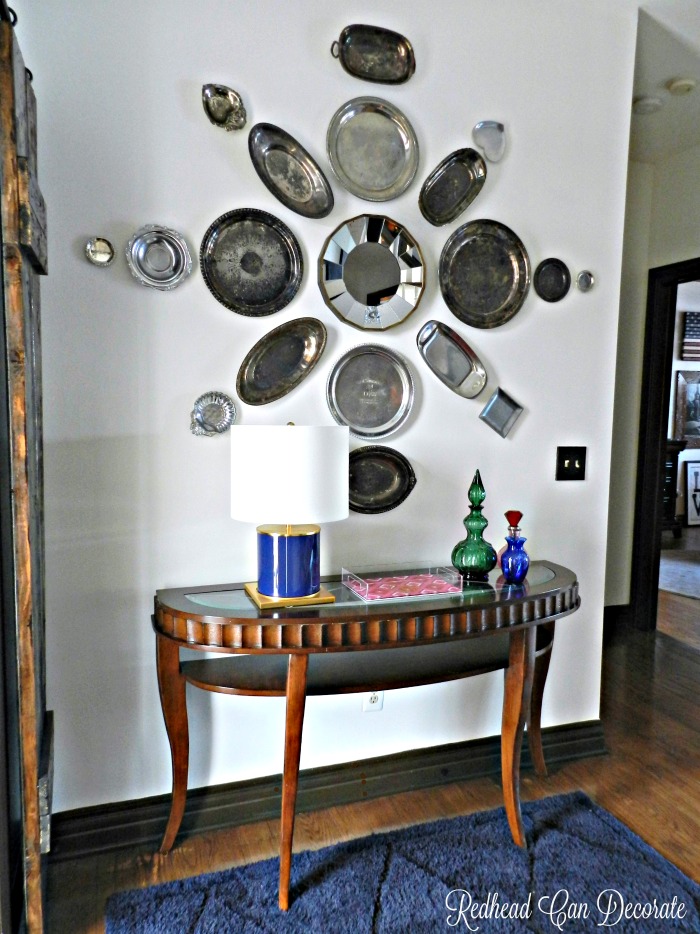
So, I decided to start over. A fresh new fun design was just what I needed for the new year. Our dark navy rug became my canvas and I played musical platters on the rug for about an hour. I wish I could explain how this process happens, but I’m actually not quite sure. I remember thinking that mirror should definitely be in the middle because it’s a mirror, not a platter. That was the first step (see how I hang the platters below).
I also knew I wanted to leave out several of the previous pieces, and I didn’t want it to be so “busy”. After the mirror was up, I added the 2 on top, and the 2 on the bottom. Then I added the 2 to the left and right side of the mirror almost to make it look like a cross.
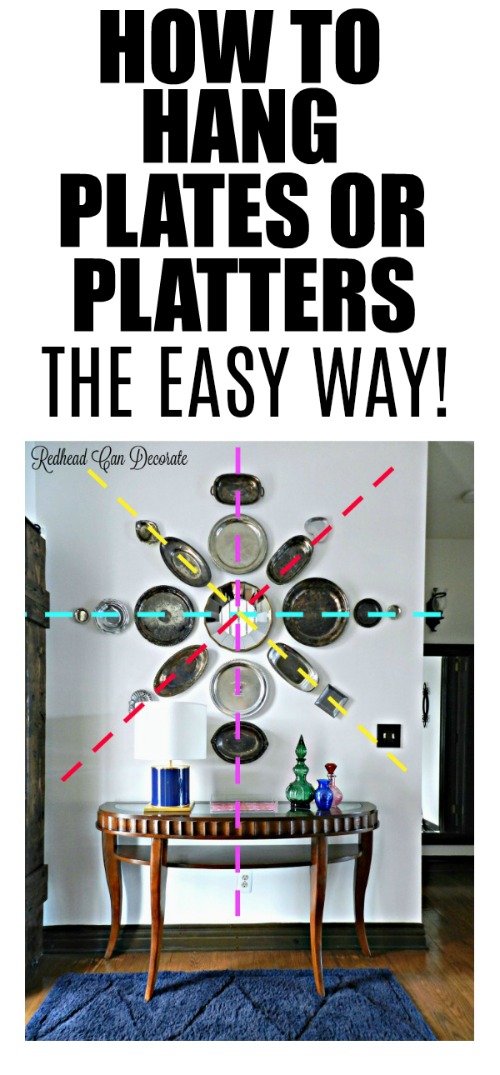
CLICK HERE TO SEE WHAT I USED TO HANG EVERY SINGLE PLATTER EASILY!
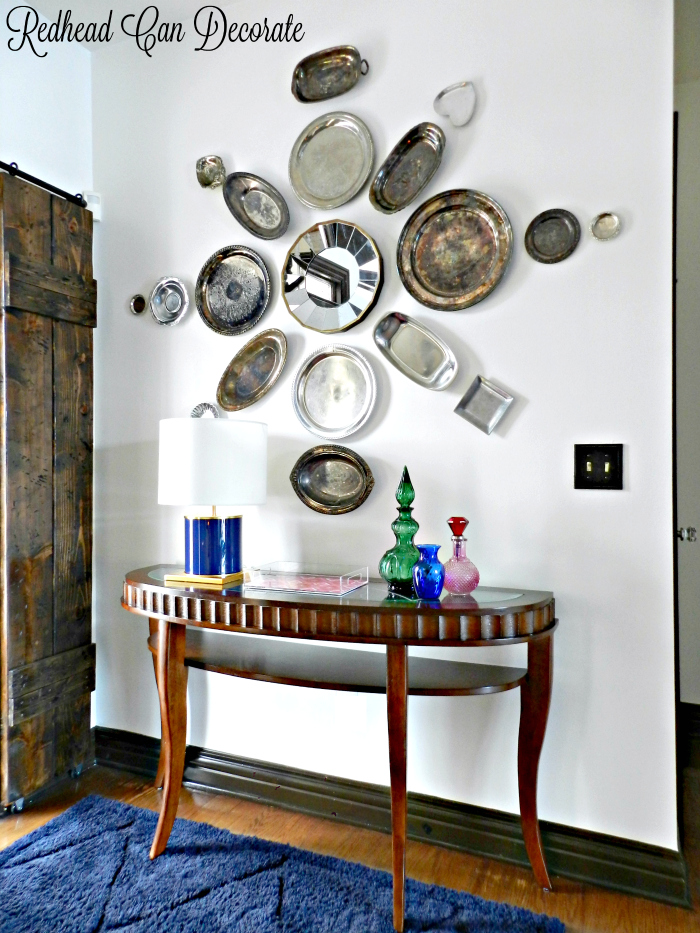
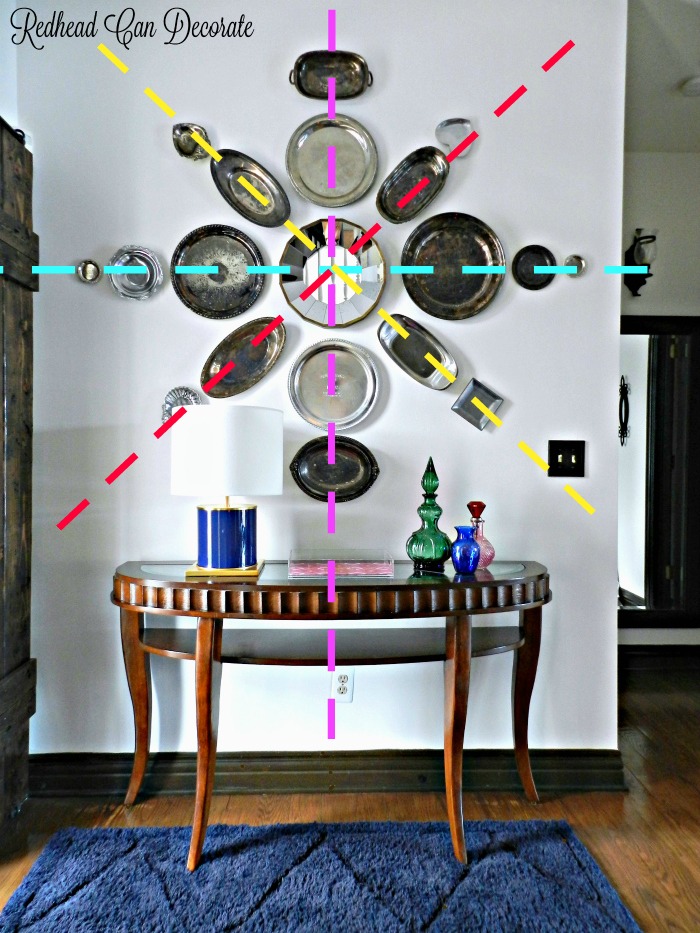
Once I finished my Mom juice dug a little deeper into the pile of left over platters I realized I had 4 similar longer sized platters that I thought might look cool on a diagonal “shooting out” from the middle mirror. This gave it a “star” theme, or as my daughter called it…a “snowflake effect”. She is so brilliant, I would have never thought of that. So yah, let’s just go with “snowflake effect”.
Just incase you forgot what the old silver platter wall looked like…here it is. We had to say bye bye to the black console. It had several problems with the doors not working and to be honest, I missed my beautiful curvy console table.
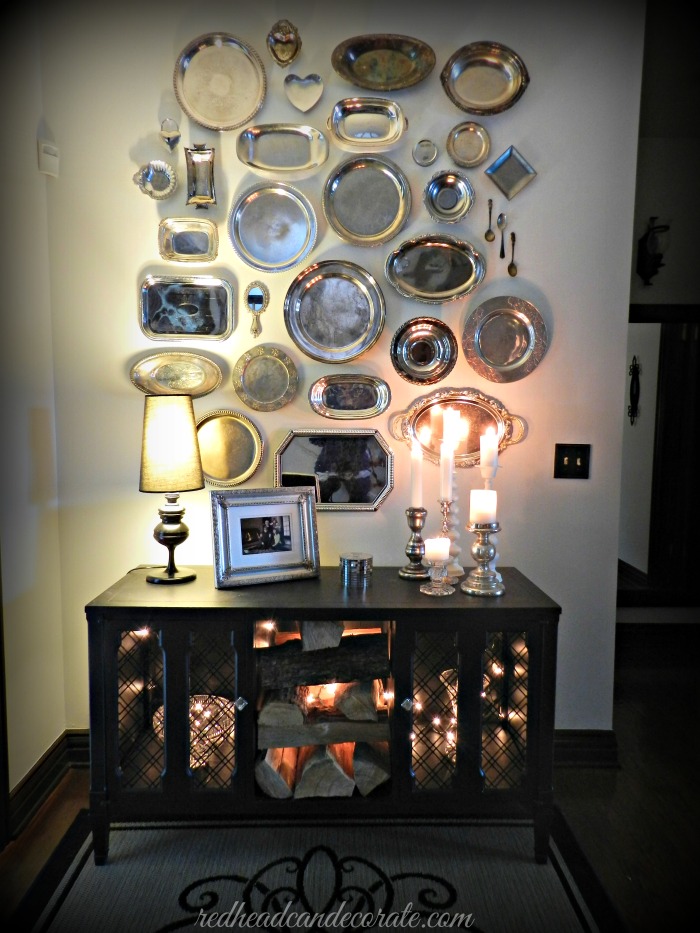
NOTE: If you look at the entire design above as a whole, you can see the shape is a vertical rectangle. This updated look below is more of a circle.
Once I got the snowflake theme in my head, I added the 2 hearts, the square on a diagonal, and the shell (behind lamp shade). Those helped elongate those rows just like you see on a snowflake.
Try not to laugh when you spot me in the mirror 😯 .
Lastly, I wanted that middle horizontal row with the mirror to extend just like I made the other rows extend. I ended up finding the cutest little silver platters I have ever seen. It was pure luck and I couldn’t believe I found them at the thrift store no less. They almost resemble coasters, but they are too small, so I don’t even know what they are, but they worked perfectly.
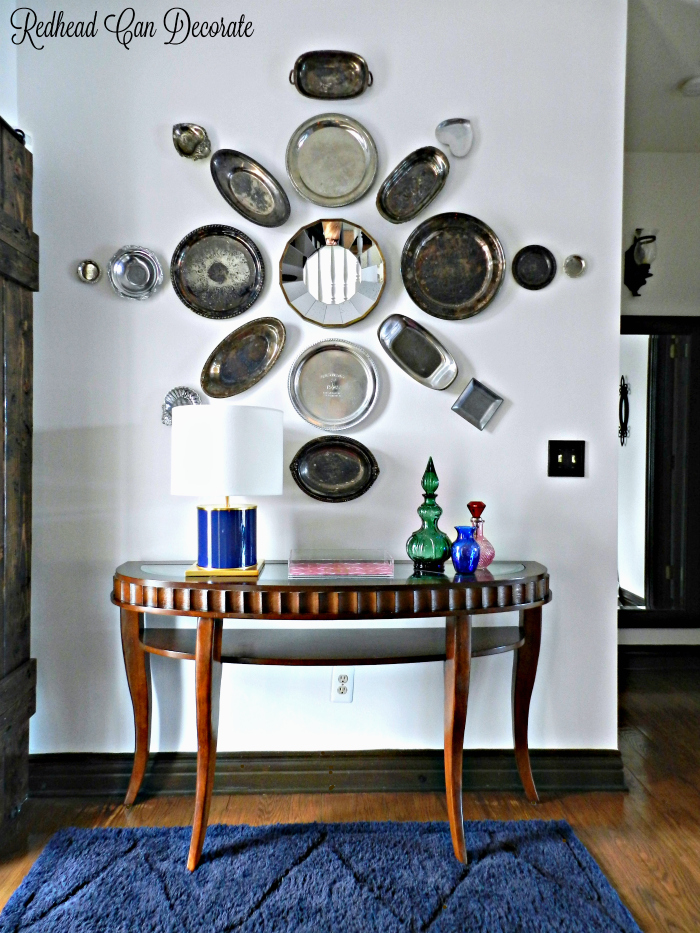
Maybe this diagram below will help if you are planning to try this. I was sure to focus on each row individually and tilting your head helps to see the “row”. That made it easier to know where to place the platters. I didn’t use any measuring tool. I just spaced them all the same distance apart (roughly 2 inches). Do it on the floor first.
So, what do you think? Do you want to try it?
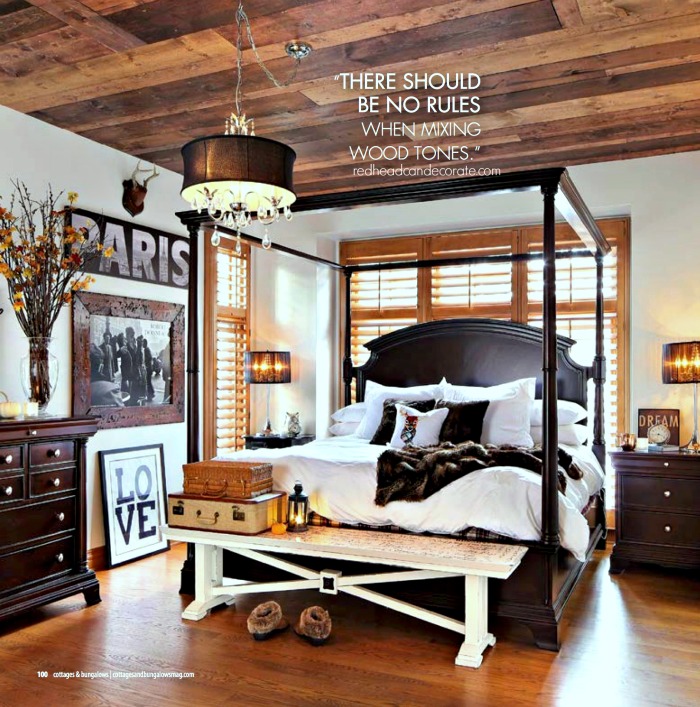
Stay tuned for February…I’m working on some very large projects. I’m in the middle of painting our built-in shelves in the living room and it is a shocker because they were dark brown like our moldings. I also have tons of colorful decorating accents to share and a fun giveaway on Valentine’s Day!
CLICK HERE TO SEE WHAT I USED TO HANG EVERY SINGLE PLATTER EASILY!


May I say you did good, love, Dad in NY.
I love the wall. I am so anal, though, I would have to clean them all before hanging them. I admire you for not doing it or feeling the need to do so!
Well I tell you, I like it, yet like the other way better……..what are you doing with those other platters that were not put to use here?
Thanks for your honesty! I am selling them.
I love it !! I love how the circle design softens/ complements the look of the table. Good job.
Hi…I prefer the New Design, however, the Curved Table with the Design….for some reason seems Cold to me. I don’t know why, but I don’t find it welcoming.
Oh wow! That table is gorgeous.
LOVE the new wall!
Thank you ?
I love your new design with the silver platters and the curvy leg console. This does feel lighter and fresh. The other felt busy and heavy compared to what you have now. Great job!
Thank you, Melanie!
I like the new design. The console lightens the room, although I think a big basket with a throw/pillow (or perhaps a small ottoman) would balance the visual weight of the platters above the table.
Thank you, Ann!
Like you, sometimes I just need a change. I liked it before and I like it now but it is different and sometimes different is good.
I have a funny question for you though 🙂
Why do you have a black switch plate cover on that wall ( or is it a mirrored finish or something that doesn’t show up well in a photograph? When I look at that beautifully decorated wall I’m afraid my eye goes straight to the switch plate cover – – the switch plate cover doesn’t even match the 3 switches for the different lights ( or fan or whatever)which are white. Personally, I’d switch that baby out to white so fast, or at least match the switches to the switch plate cover. ?
I know this is a minor thing to bring up – – I love everything you do!
Hey Shelley! Good question! We have dark brown (oil rubbed bronze) switch plates throughout the house, in one room I have gold, in our bedroom I have mirrored. White would stand out to me there now, but I see your point. If you saw the room as a whole with the other dark switch plates and dark moldings it would probably blend better. I’m going to look at it today you can bet ?
Opps, its 2 lights, not 3.
Please change that for me!?
Well done Julie. Love the new ‘snowflake’ design.
It looks more organized and looks less cluttered.
Using command hooks on the wall to hang but what did you put on the back of your platters for them to hang on the command hooks?
The colored glass on your table gives it a nice pop of color there.
I’m sure you could come up with ideas for your extra platters.
Great job.
Thank you, Colleen! I used command strips, not hooks. One peice sticks on the back of platter, and then you add the other peice on top of that (they have a cool plastic velcro fiber). Then you peel the back off the top one, and it’s ready to stick on the wall anywhere you want it.
I’m sorry to say but I think it’s too much being over a small console
No worries, Bev! Glad you are honest and give your input!
Oh, gotcha. Thank You
How do you hang spoons?
Same way Virginia! Just cut the command strips small and place on round spoon part.
I like how you use objects that usually get lost in a drawer. Wish I had more wall space!
Thank you, Kyle! I sure need the cabinet space ?
Love the silver. Can you tell me where you got the navy rug?
Hi Ellen! I got it here: http://amzn.to/2DEw4Cm
Looks sooo good! Love the table too! It looks like it feels so much airier there now!! Awesome!
Thank you, Amy! I feel fresh and ready for SPRING!!! lol
i like it. the other one was busy but i liked it too. i had one in my house years ago and always loved it. not as big as yours.
i understand about needing a change we all do.
While looking at your plate wall I noticed you have a small sliding barn door across the front door. have you done a past tutorial of that? If so can you direct me to it? Thanks,
Here you go Gina: https://redheadcandecorate.com/2016/07/diy-sidelight-wood-shutters/
[…] “Silver Platter Wall“ […]
Do you have too take the silver down and clean it every once in a while
No! I love the different “pantinas” that develop.