
the space I live in.Once we were able to get into our first house it was as if a tidal wave of inspiration and ideas flooded my heart.
I became passionate about decor and found it very rewarding to go with my gut and try new things.We were just starting out…me as a substitute teacher/nanny, and my husband as a painter/law school student.
Funds were tight, so we learned how to make updates on our own to save $.
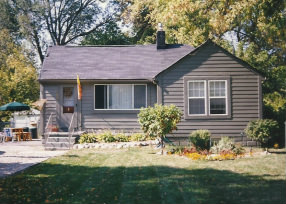
Here we are many years (and experiences) later in a home that has so much charm, but still needed lots of love.
Even though I have shared our kitchen previously, I decided to give it another shot since I have more experience with the camera.
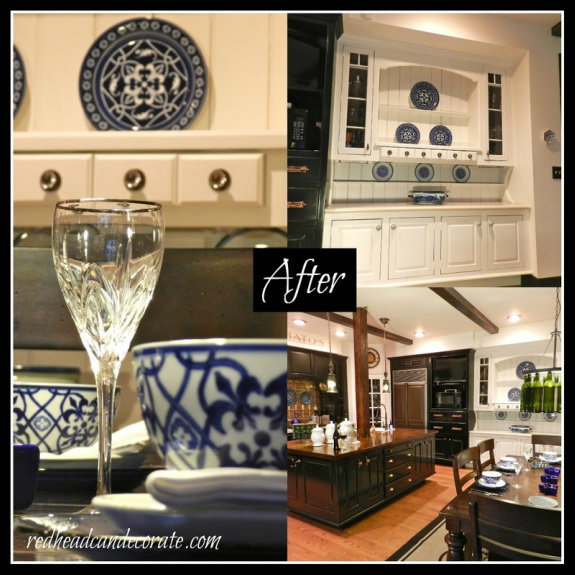
I hope you will feel inspired after you read about the easy, affordable, and sometimes innovative ways I decorated our kitchen!
…
The kitchen is where we spend the majority of our family time.
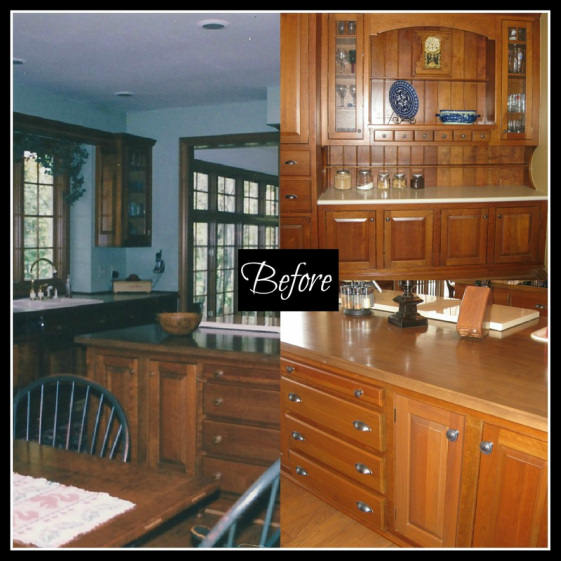
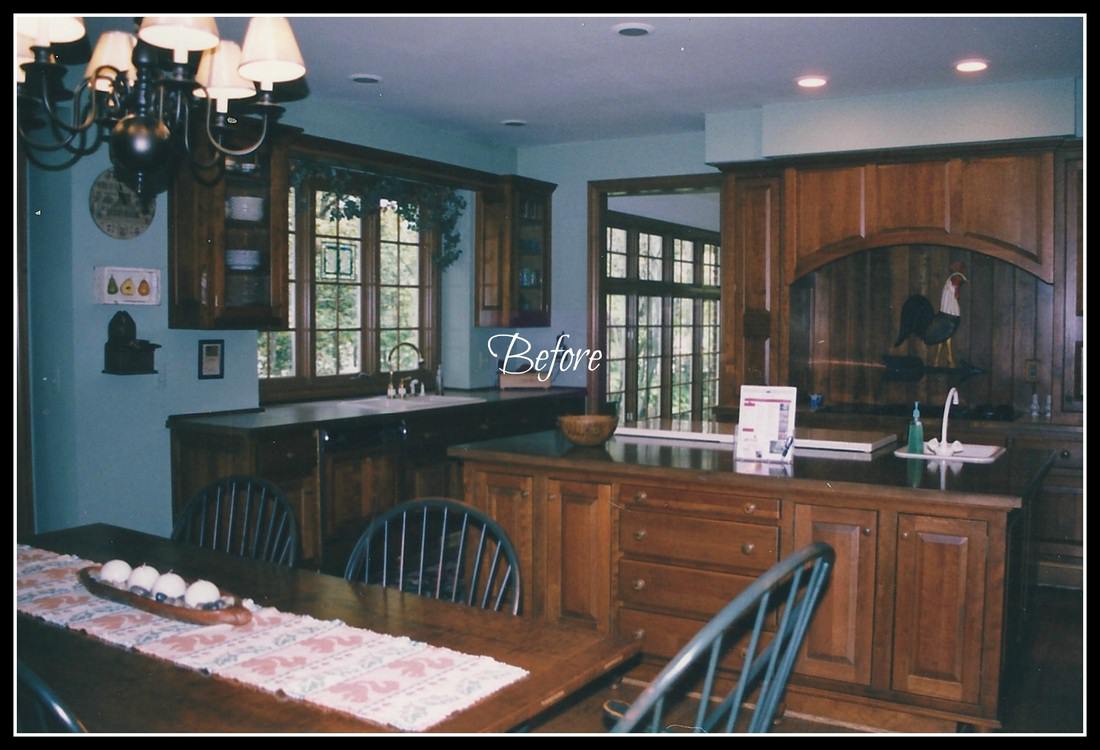
When I look at these pictures now, I am in shock at how orange the kitchen was, and to think we still wanted this house!
I was drawn to it and must have had some decorating fairy waving her magic wand over me…

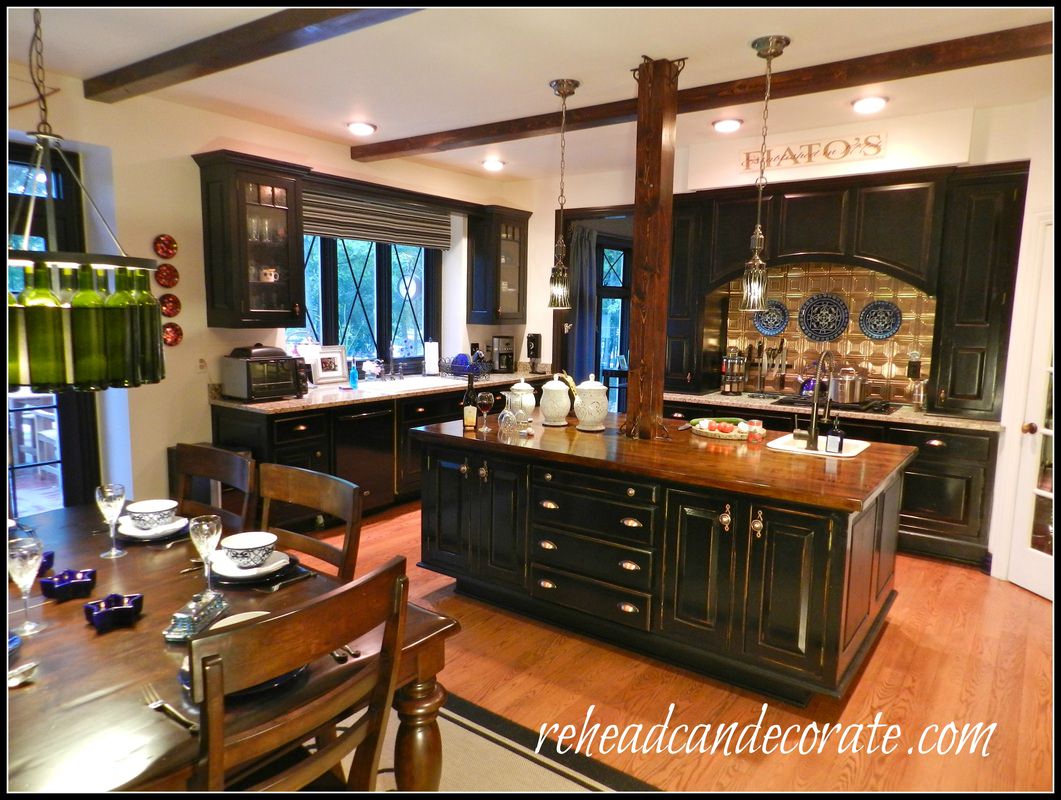
Is you guessed it…paint.
I have learned that to get the most out of life, you have to take risks…
Don’t be afraid, I promise you painting the cabinets is not that difficult. I am not a professional painter.
I was in my pj’s standing on a chair when I did most of this kitchen makeover.
I got out the brush, got the paint, put down a drop cloth, and just went for it, and I did not remove the doors.
We used black Polyshades, by Minwax, but I now know I could have used black paint with primer in it called Behr Ultra that you can find at Home Depot.
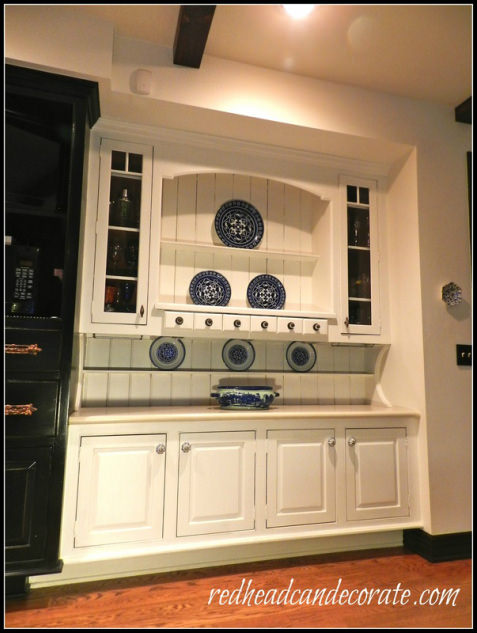
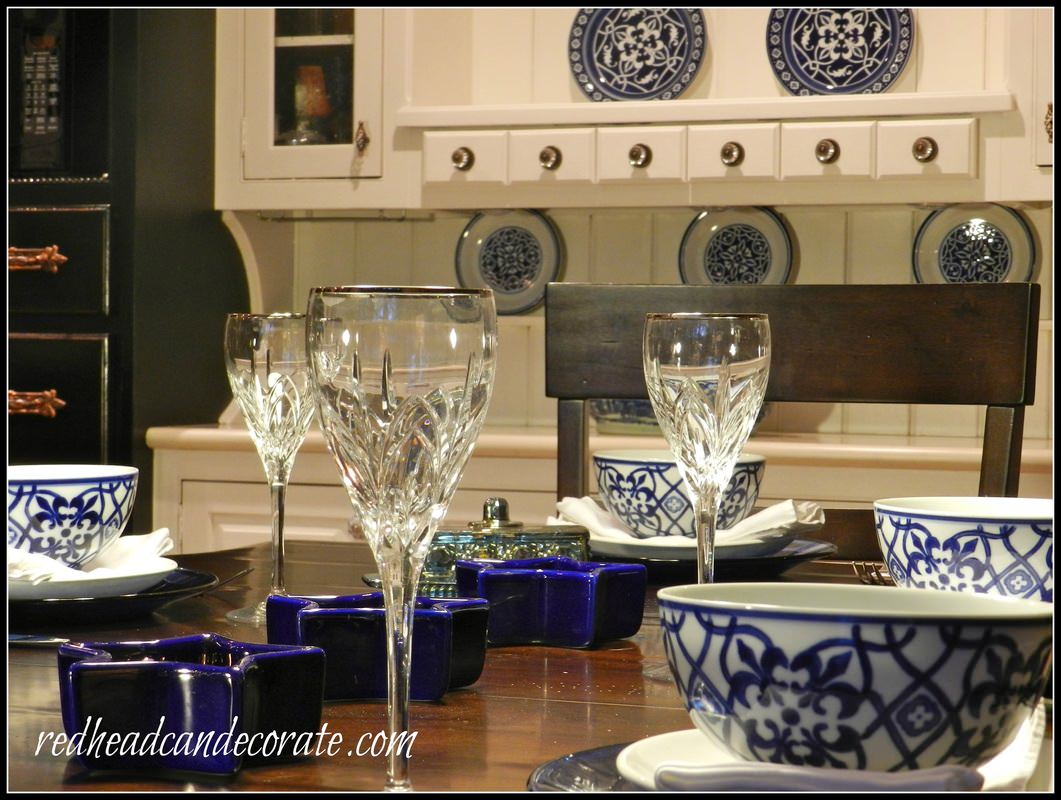
I used Behr Ultra in Swiss Coffee for the white buffet, white pantry, and white shelves along side the fireplace..
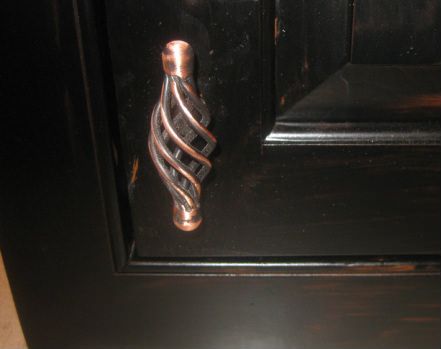
I also decided to distress the edges of the black cabinets with sand paper to add some edge.
No pun intended.

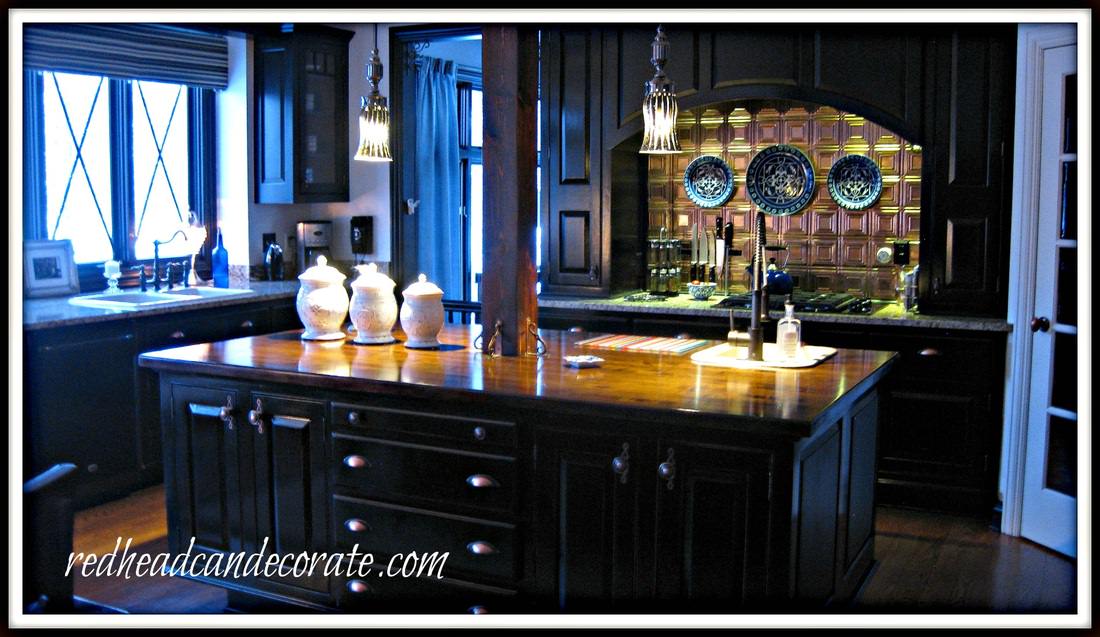
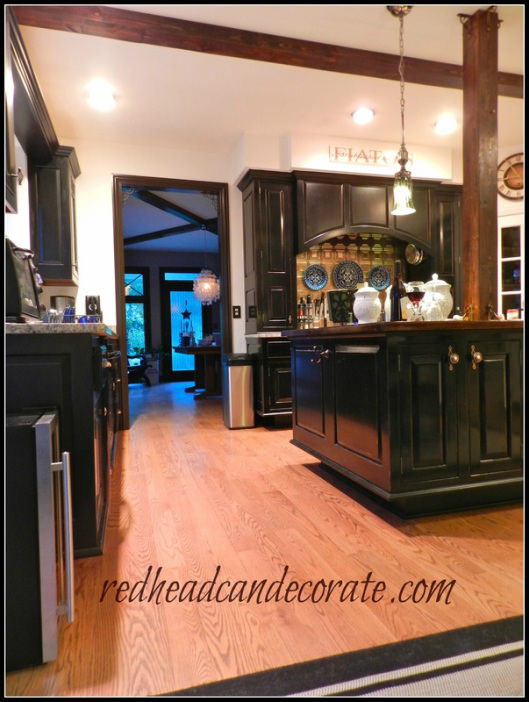
is the island.
I said…”ok!”
We knew there was oak under all of that weird plastic coating.Rick stripped this with a non-toxic orange stripper and then sanded it down to the original oak (not fun).
My little ones and I decided to distress it a little with a hammer & screw driver…you should have seen Rick’s face! My only regret is that we didn’t put our initials in it.
We then stained it with cherry to match my dining room table and polyurethaned it.
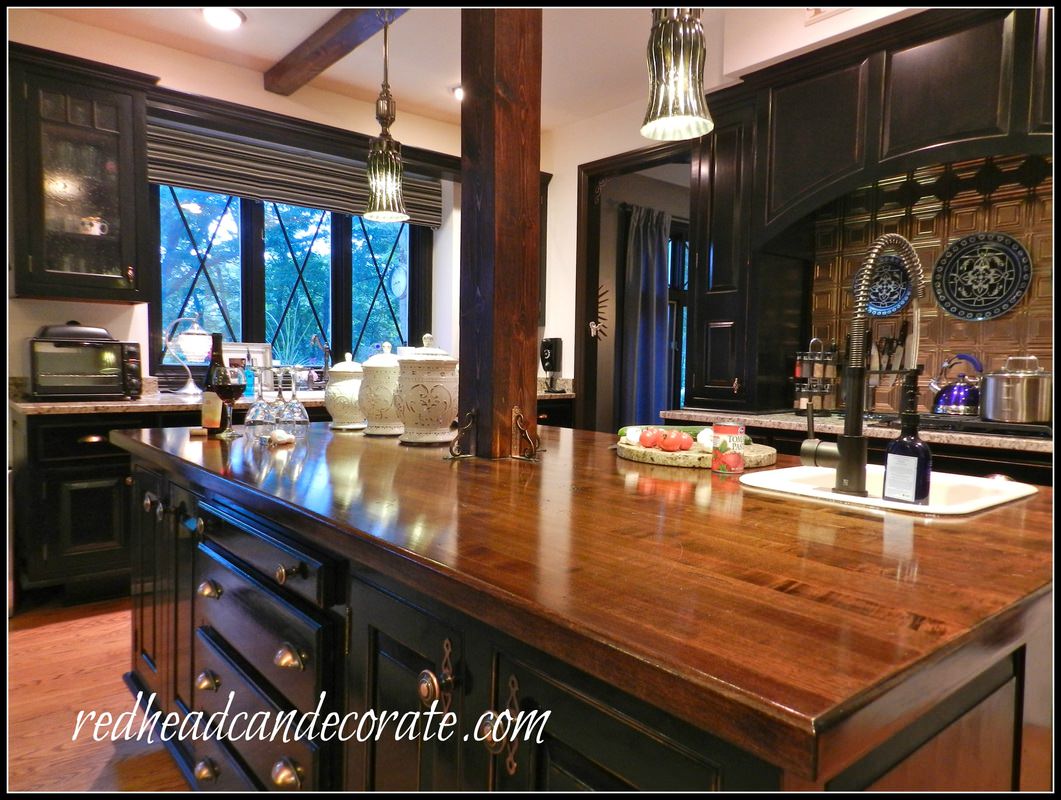
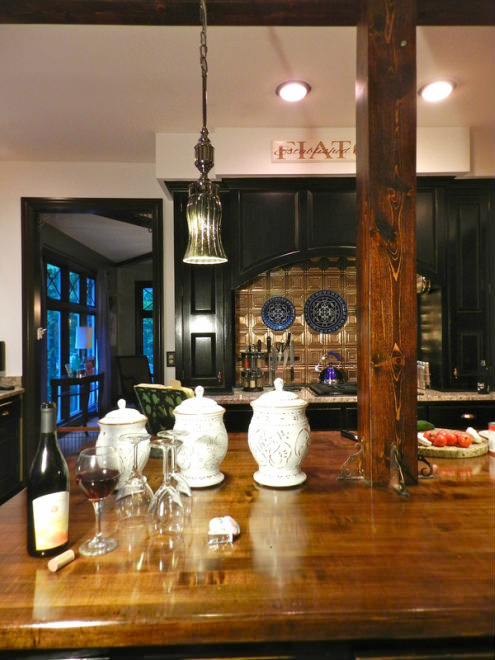
After the painting and staining was complete I had visions of a column in the middle of this huge island!Rick thought it was a bit crazy but I told him it will be ok!!
Ha! I was terrified and had no clue if it could really work!
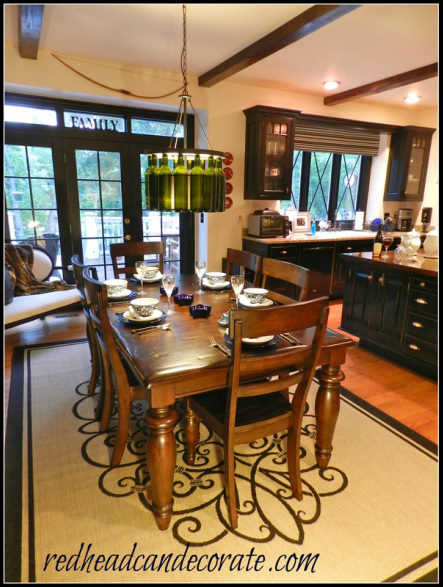
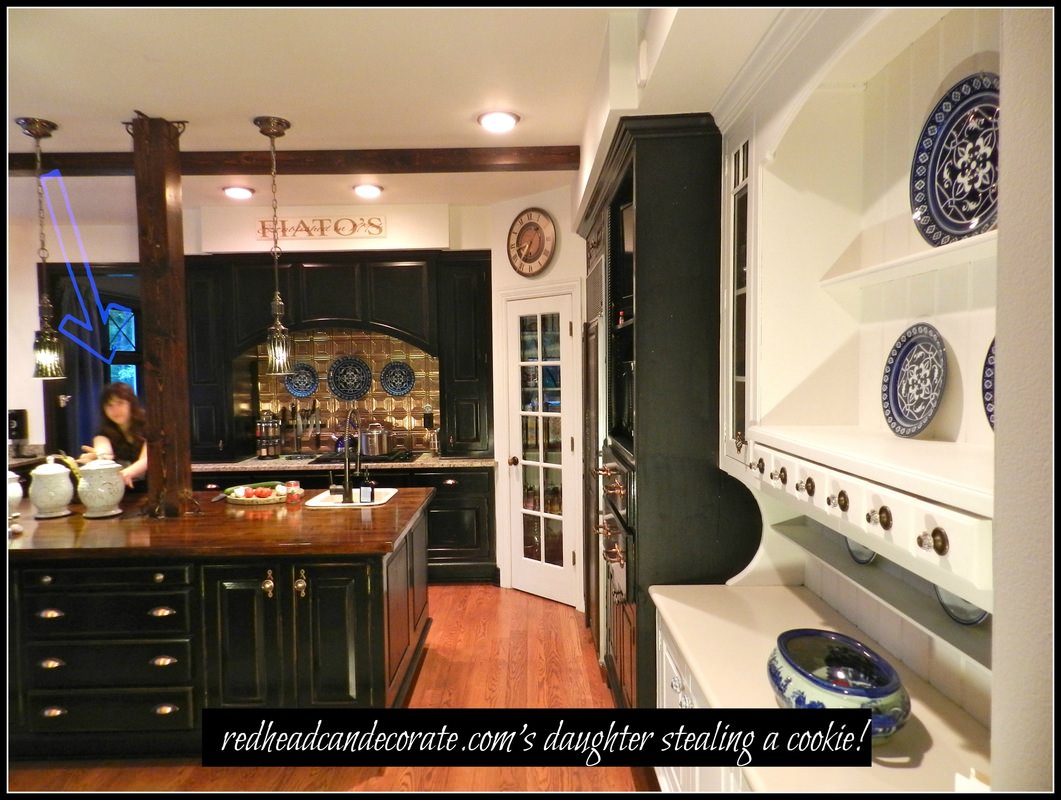
One of our best friend’s is a very experienced builder (Scott!). We asked Scott to make a “beam” for the island out of pine. Rick stained it, polyurethaned it, I spray painted some brackets (found on e-bay) with oil rubbed spray paint and then a splash of copper spray paint.Holy cow this beauty brings the kitchen together. It’s almost like it pulls everything in to surround the island.
The granite we had done professionally, but actually had a terrible experience. Before you have granite installed, please read our “Granite Nightmare” story.The x moldings in the window replaced traditional style muntin bars. I did this one afternoon by using moldings from Home Depot. I measured the length, asked the nice man to cut them for me, painted them, and stuck them in. They are tightly fit so they stay nicely. I did the same in my office that you can see to the right.

I hope you enjoyed our kitchen makeover…
There are several items I did not cover on this post but feel free to ask me any questions you have!
 /> /> |
 |
 |
 |
 |
 |
 |
 |
 |
 |


Hi, I am in love with your kitchen! I have been wanting to paint my cabinets & trim black for a while and my hubby thinks I am crazy! I was happy to come across your pictures so I could give him something to visualize. My question for you is, did you paint the trim in the entire house black also or is it just in your kitchen? Did you use the same Ultra Black for both?
Thank you so much, Heather
Hi I love the chandeliers in the black kitchen. Where did they come from?
Pottery Barn
I love this kitchen…am trying to duplicate it to some degree. I saw the colors of paint that you used, but did I miss the stain color on the island? Is it walnut?
It’s mahogany by Minwax, Judy. Good luck!
I am not able to find on your sight the technique used for your dining table top. It is incredible. Can you please advise?
Thank you. Your great!
Can you describe what you’re looking for a little further, Tina? I’m not sure I did what you are referring to?
Sorry – You’re great
Hi Julie-
I love your kitchen. I was wondering where you bought the back plates to your drawer knobs? Also, in the final finish do you have 2 different sizes of knobs? The drawers on your island look like two different sizes…
I already have cup pulls that look similar to yours (love the idea of sanding off some of the finish, might need to do that!)
I hope you are enjoying that beautiful kitchen of yours!
Hi Sandi! They are also from Home Depot. Yes, I used smaller round knobs on main cabinets and larger ones on the island. However all of the “cup pulls” are all the same size. I hope this helps…I go random with knobs and like to mix it up. 🙂 Julie
Thank you Julie. Your reply was very helpful. The small knobs would be what the link is to HD correct? What were the large knobs size?
So many questions, sorry. 🙂
I’m sorry, Sandi, I don’t know the exact size, but I measured and they are 2 inches across the knob. 🙂
Thank you Julie. That is helpful!
Good luck, Sandi 🙂
🙂
Hi Julie..I’m a redhead too ! Both parents Irish born..
Love your kitchen. We are renovating a beach houst to be retirement home. Can I ask a few specific questions please about island & hutch.
Dimensions of kitchen.
“. ” island
Other than prep sink are there any appliances in island.
Is the oak top on island 1 large piece ? How many inches deep ?
Dimensions of hutch ? Is hutch oak?
Thank you so very much ! And I hope you have notes you can refer to so this isn’t a pain..
Your talent is inspiring, but us gingers are an exclusive club !
Hi Mary! I recall your inquiries last March! I answered at the bottom of the final kitchen post. Here’s the link and then just locate your comment at the end. I left all measurements there! https://redheadcandecorate.com/2012/12/kitchen-makeover-part-3/