I wanted to give our grown kiddos a gift they could cherish from their “childhood home” that would remind them of the years they spent imagining, growing, & playing in the yard together. When my talented friend posted a tutorial on how to make a little dish out of clay with imprints of a Hydrangea leaf, I immediately thought about the huge Hydrangea bushes in the front of our house we just sold. Are you in the mood to try something that is honestly not any harder than making cookie cutouts (and no baking!)? Here’s “How to Create Fall Hydrangea Trinket Leaf Bowls”…
Where was I Inspired to Create Trinket Leaf Bowls?
This neat clay project all started with my friend, Jen, from Cottage on Bunker Hill. She inspired me to give clay a try, and I can honestly say that I found this project to be very soothing during a difficult time in my life. Some folks enjoy reading, watching TV, listening to music…I enjoy creating, and this really relaxed me, and was exciting to watch come to life. Jen & I both work together on the Thrifty Style Team series every month saving tons of cash, so check that all out here: THRIFTY STYLE TEAM.
Okay, so now that you know why I decided to work with clay, lets’s get this trinket party started…
I still can’t get over how pretty these little trinket dishes turned out. You see…the little sneaky redhead in me decided to go around the outside of the house we just sold and grab anything I could before we had to leave to make myself a big bouquet to bring to our new pad. After all, we took care of these grounds for 13 years! Because it was late in the season, I was only able to find some Daisies, Hydrangeas, and my favorite Pine tree branches, but it turned out so cute.

That was all I needed for my future leaf clay project I had tucked away in my heart until I had more time. Luckily, the Hydrangea leaves really held out in the cooler temps on our new patio at our temporary apartment. I had a couple weeks before I had to get to work.
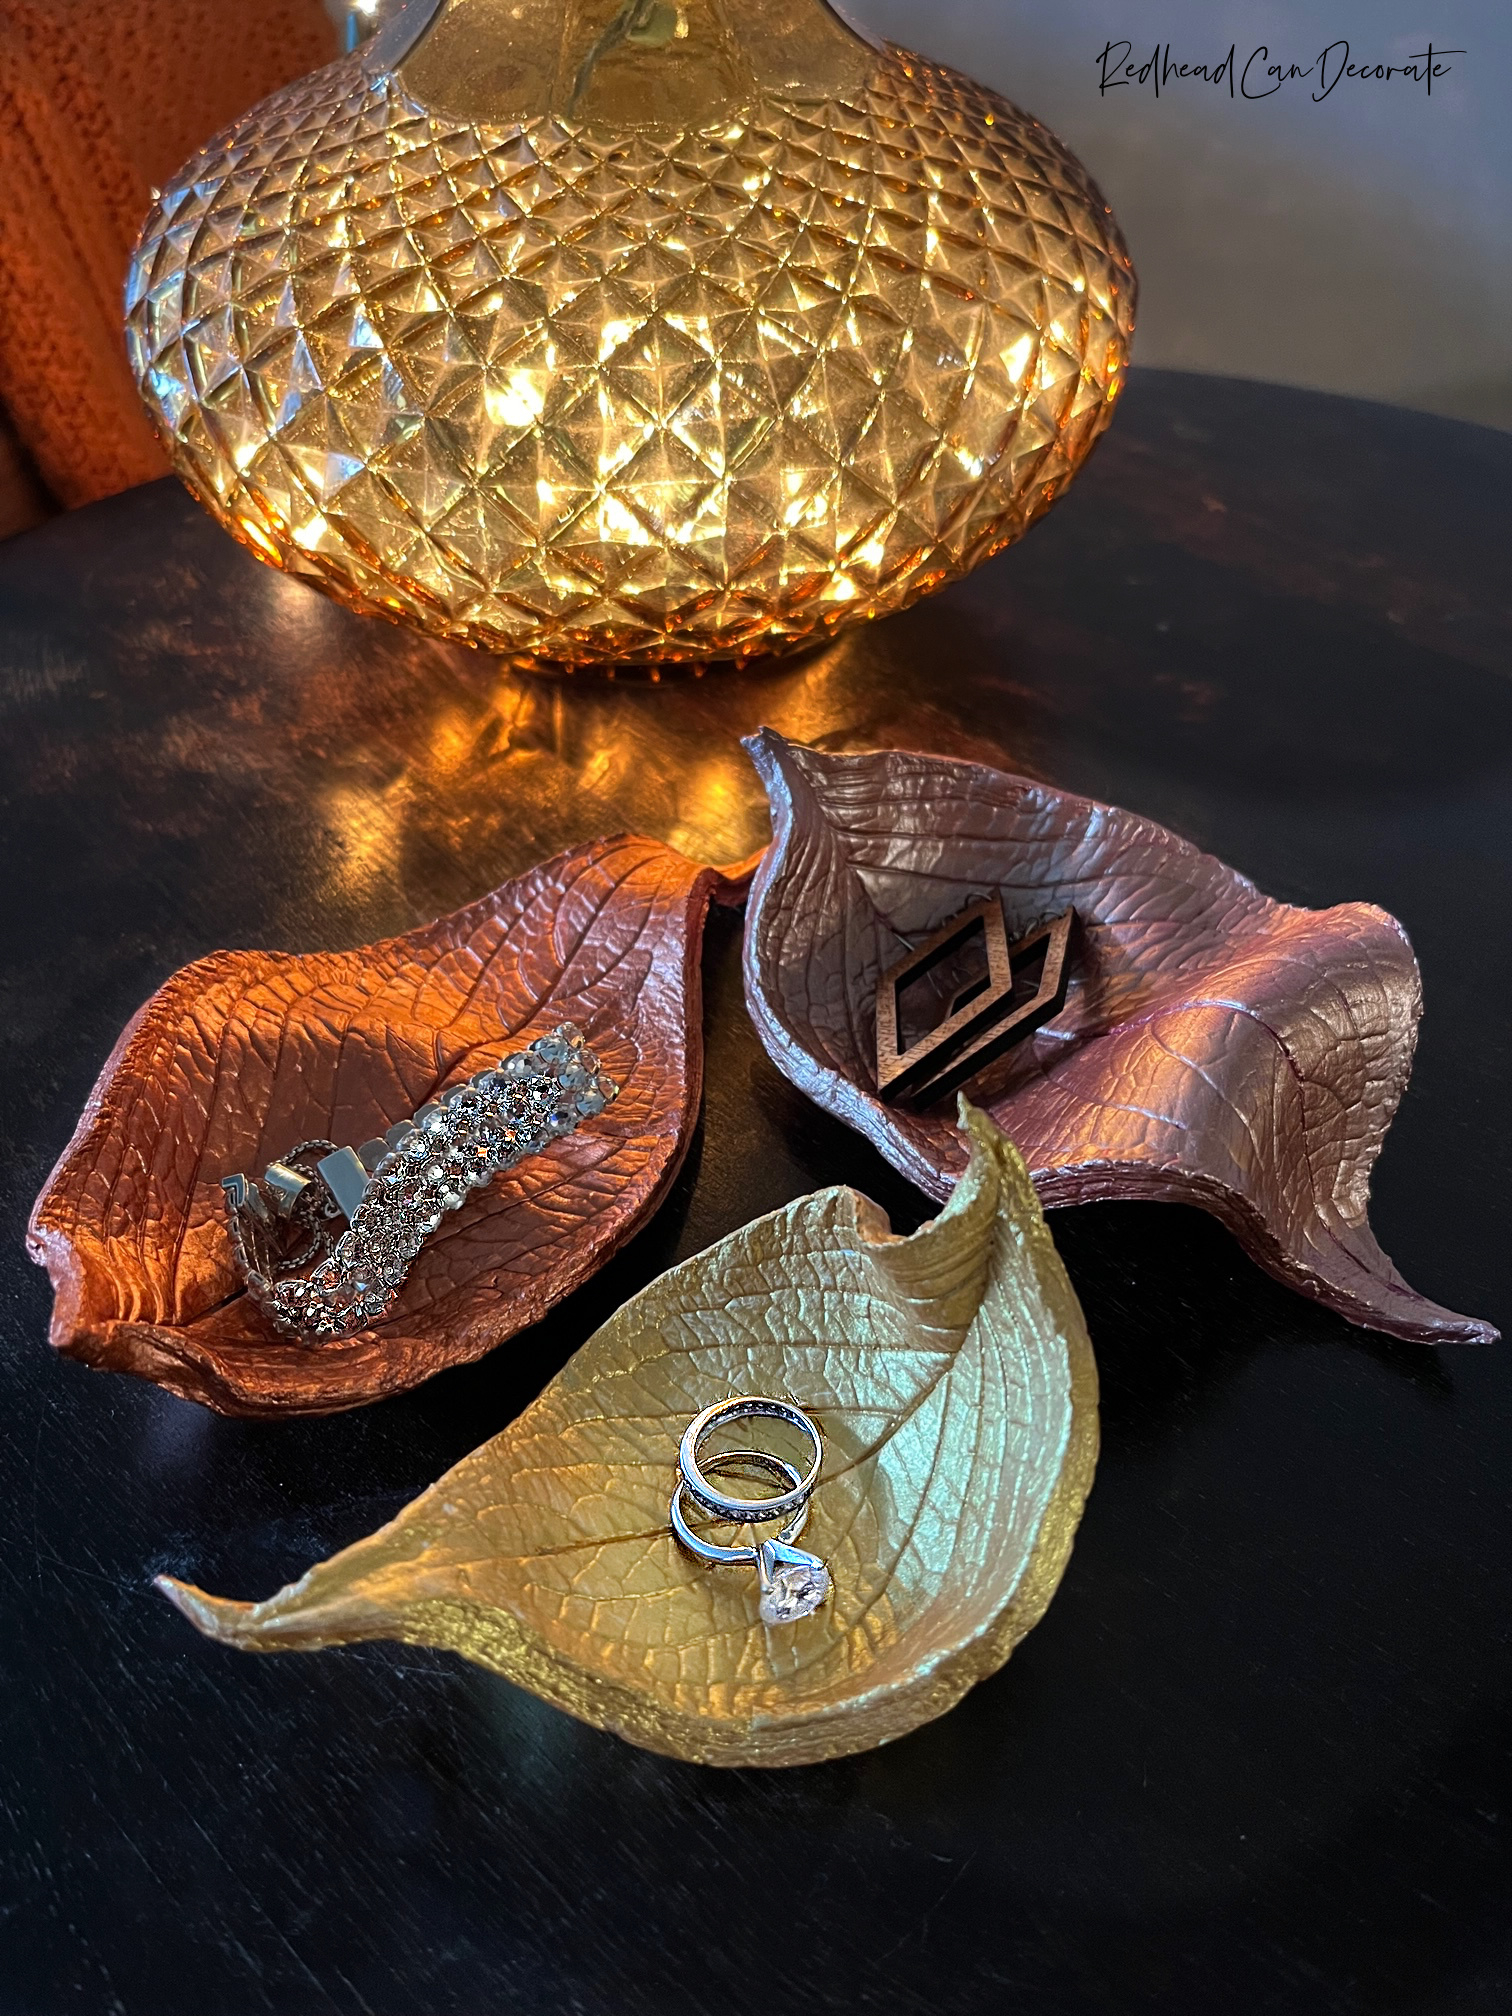
So, before I share tips on how I ended up making these “Fall Hydrangea Trinket Leaf Bowls”…I thought a tour was in order including this photo below that displays how the leaves can intertwine, and almost become 1 display. I loved that idea because it reminds me of how I have taught our kiddos that we need to rely on one another for support ❤️.
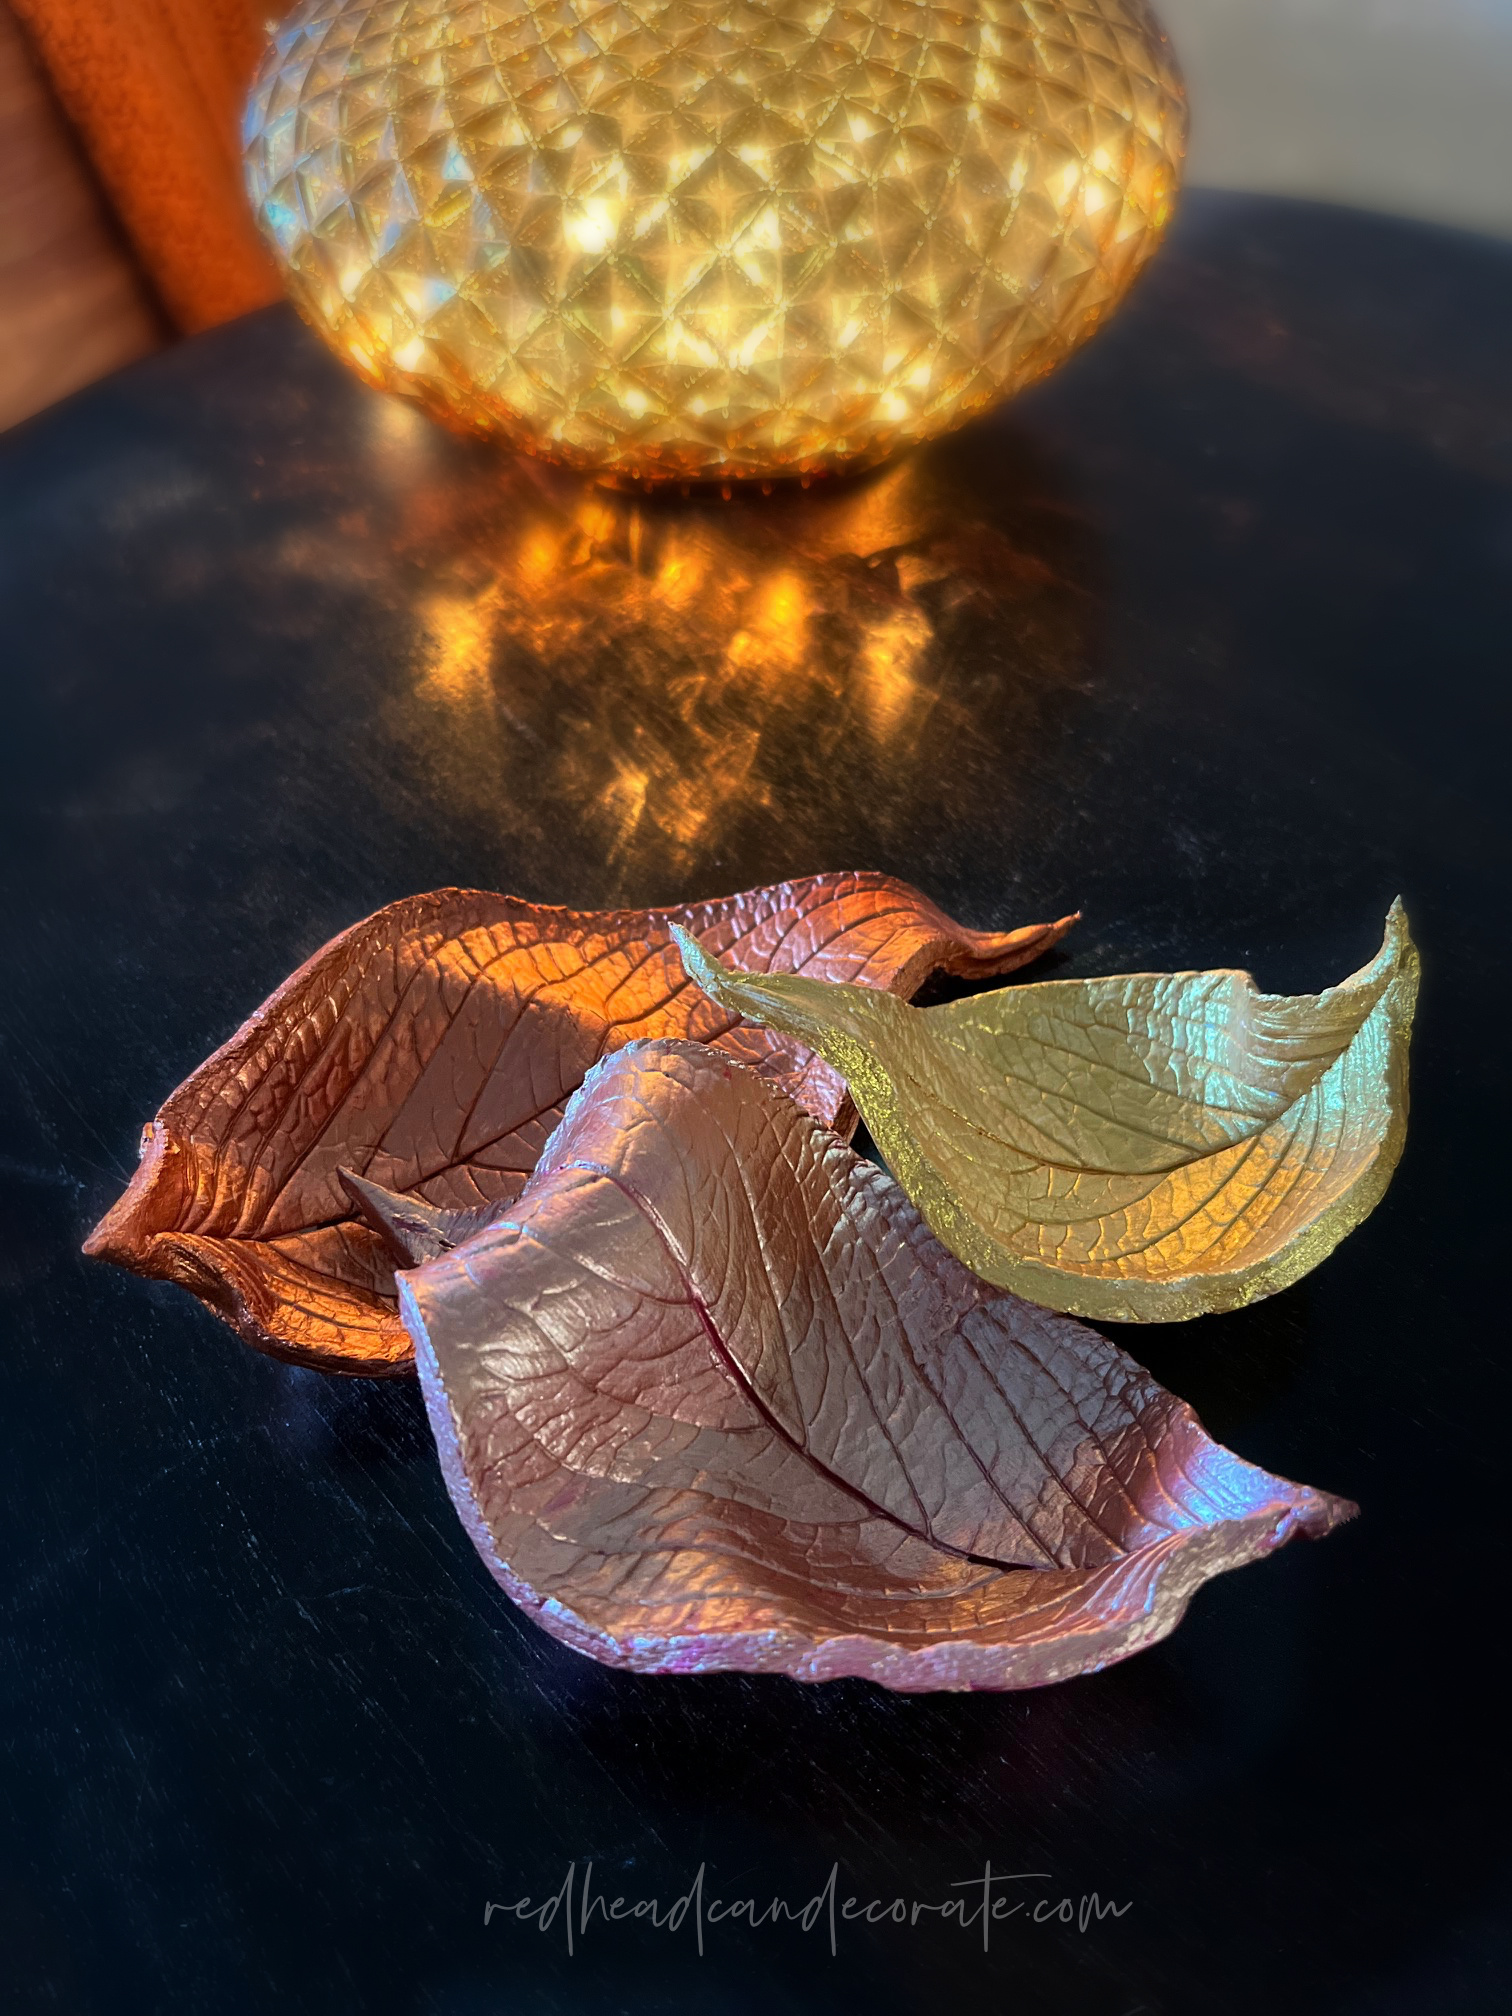
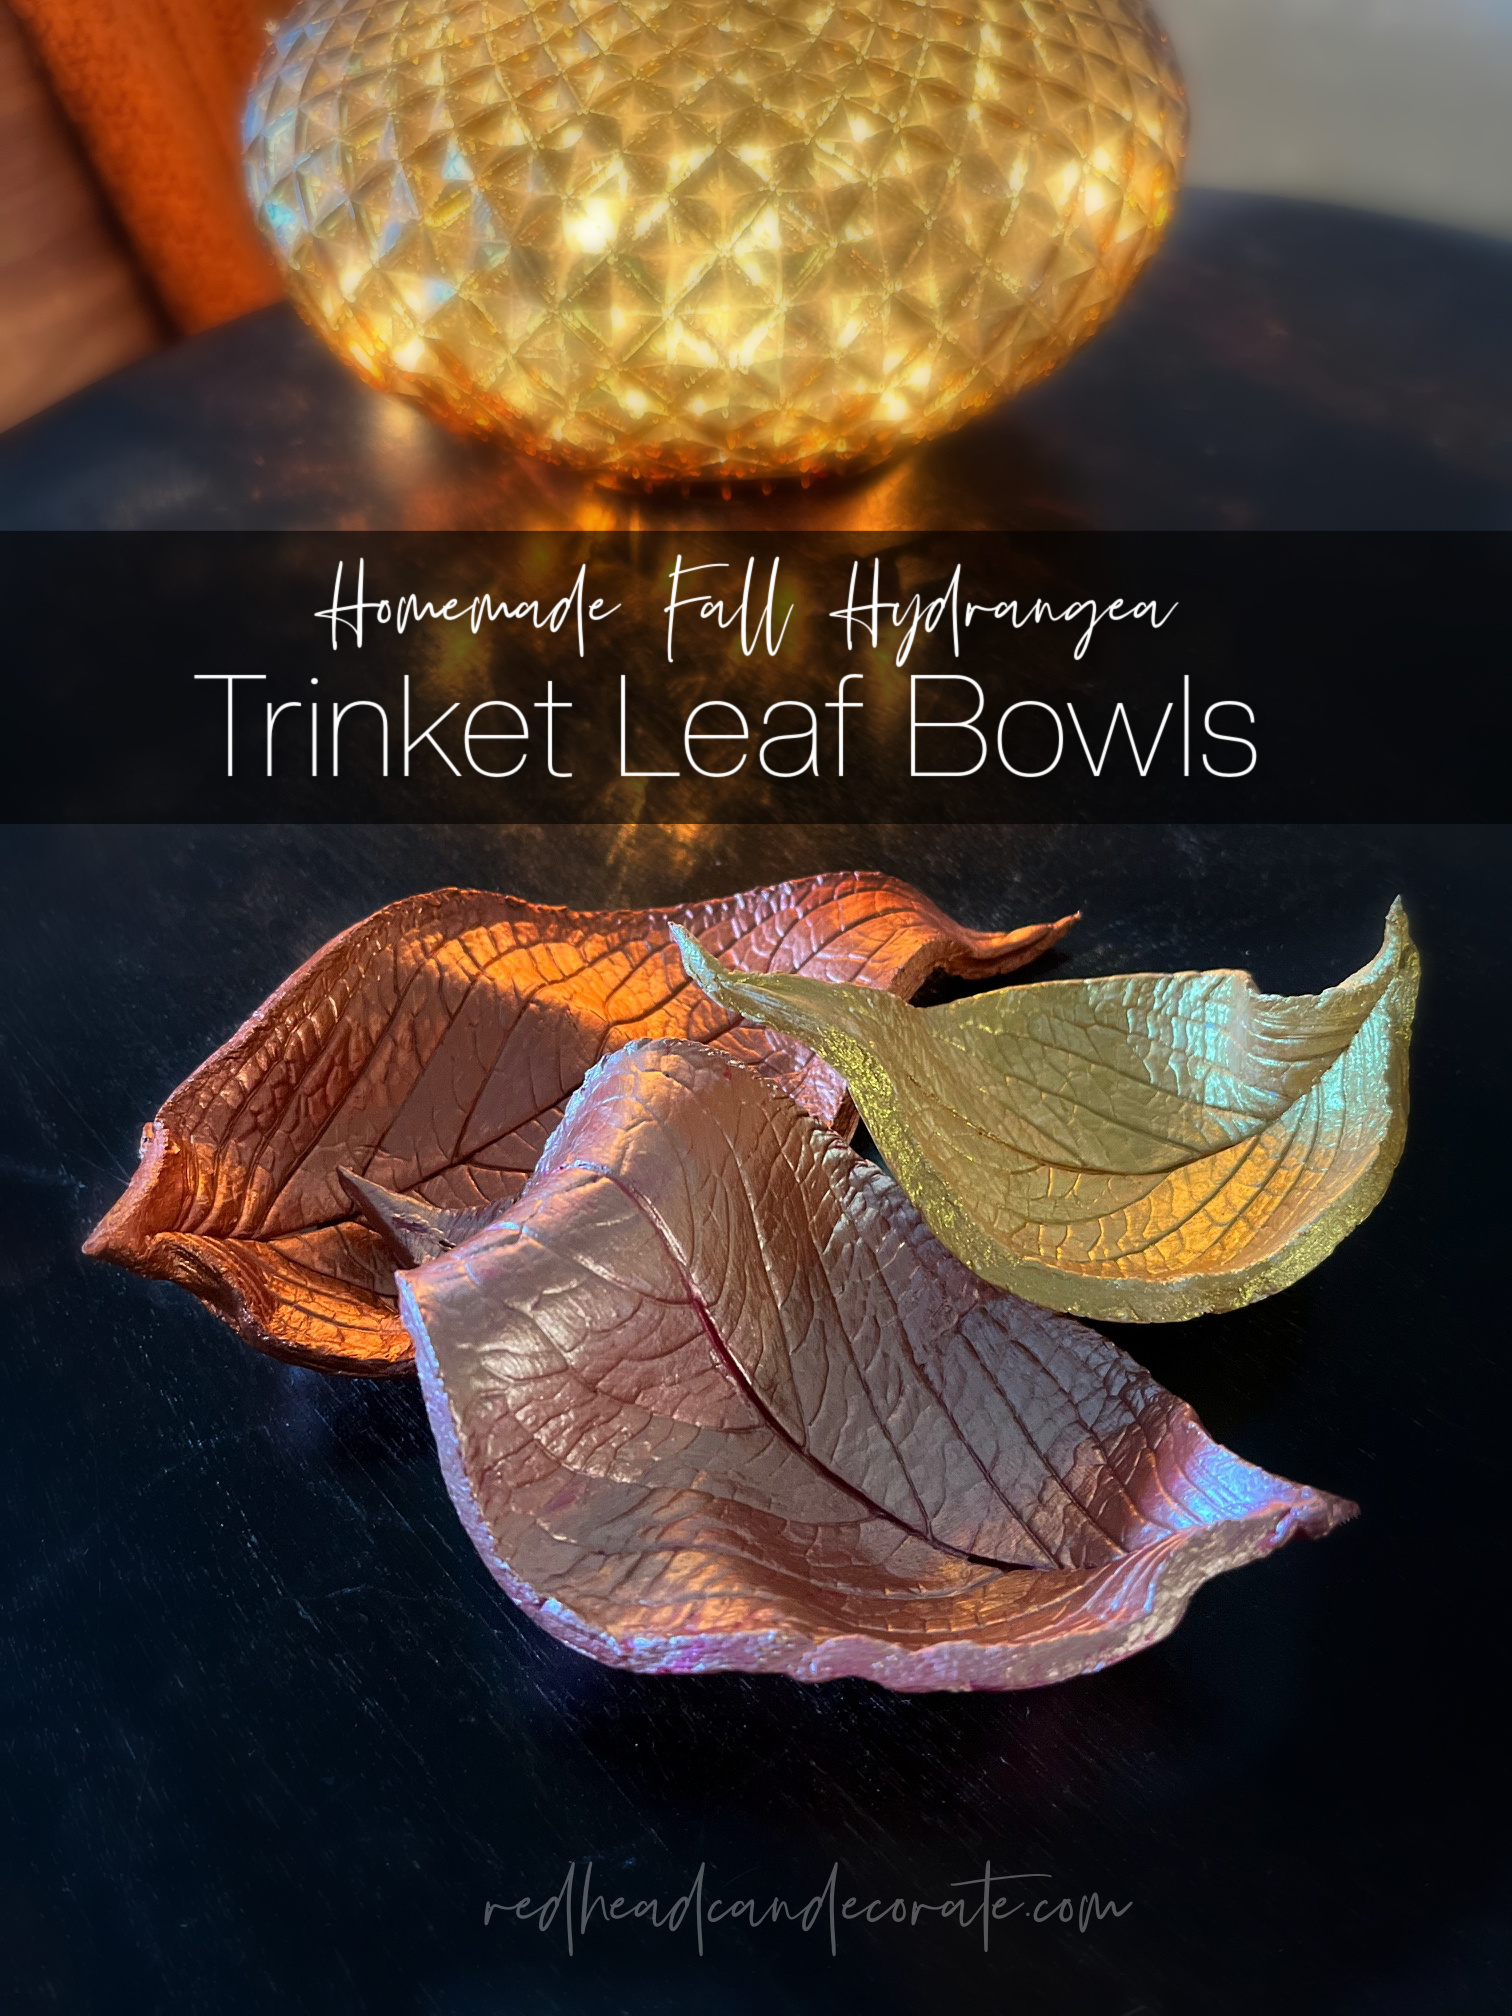
Introducing my Fall Hydrangea Trinket Leaf Bowls
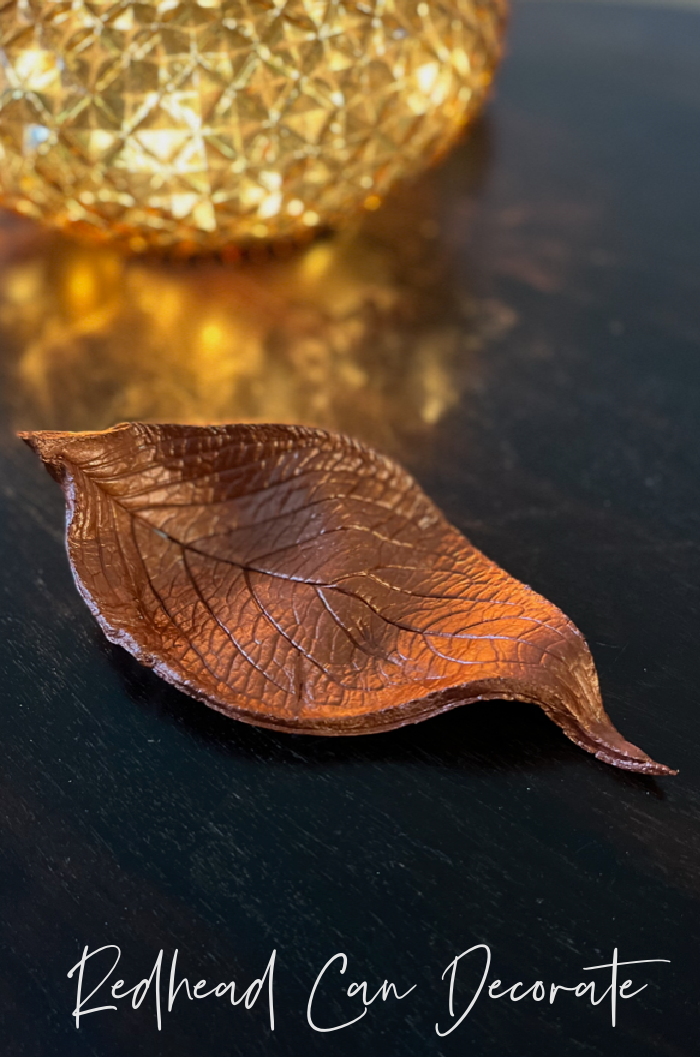
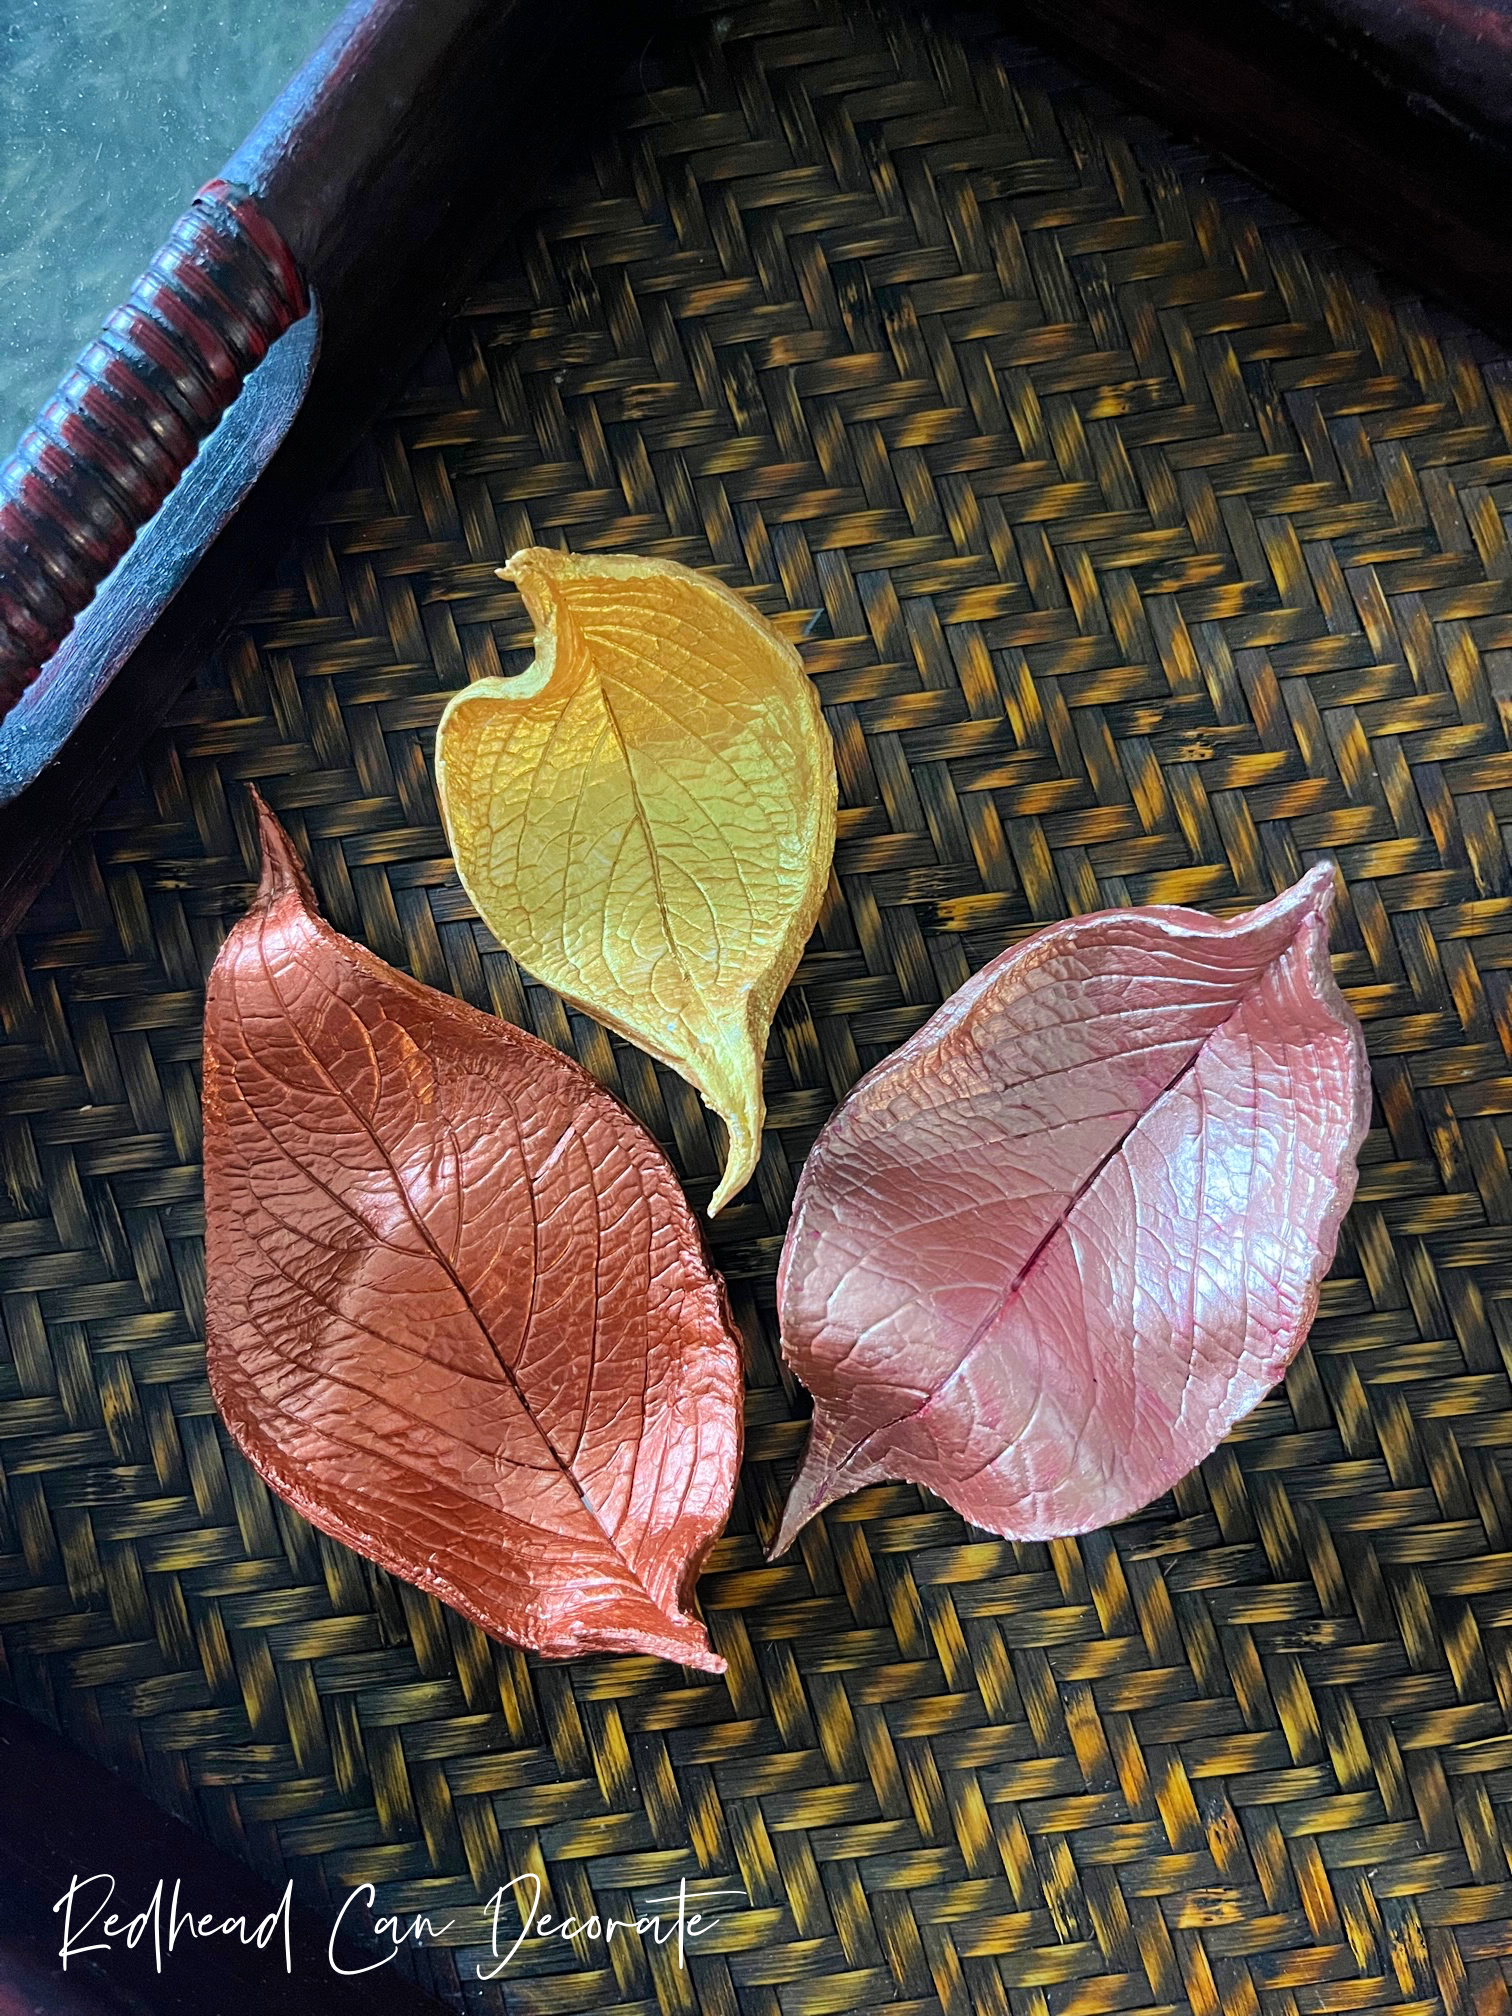
I ended up giving all 3 trinket bowls names. Introducing Rusty…
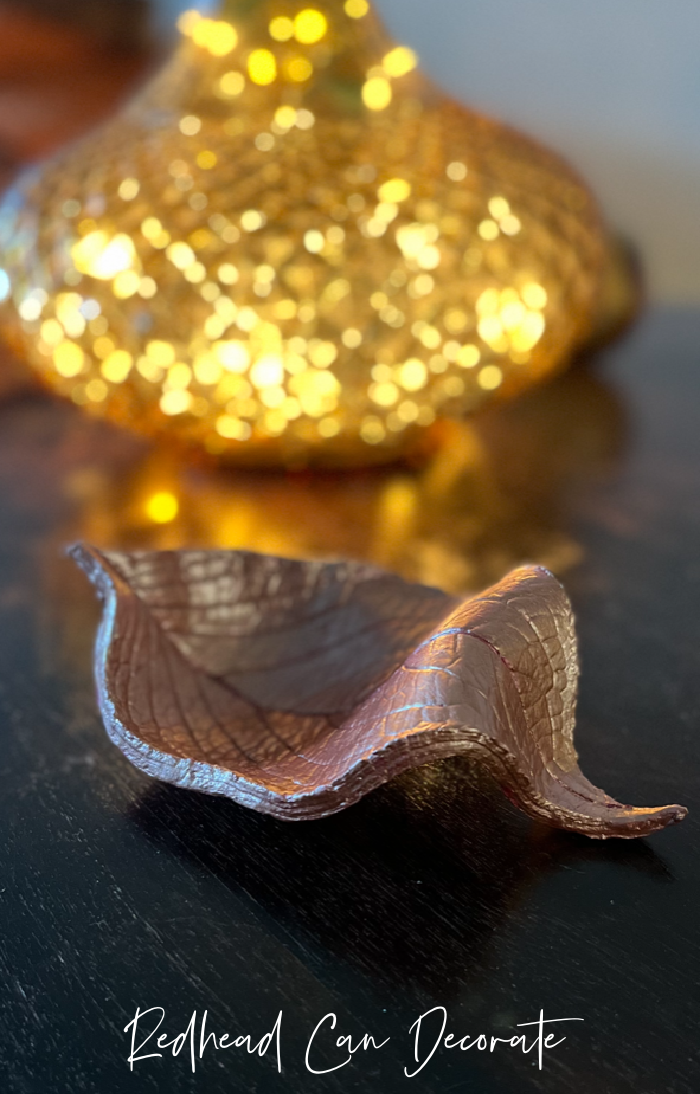
Here’s Rosie..
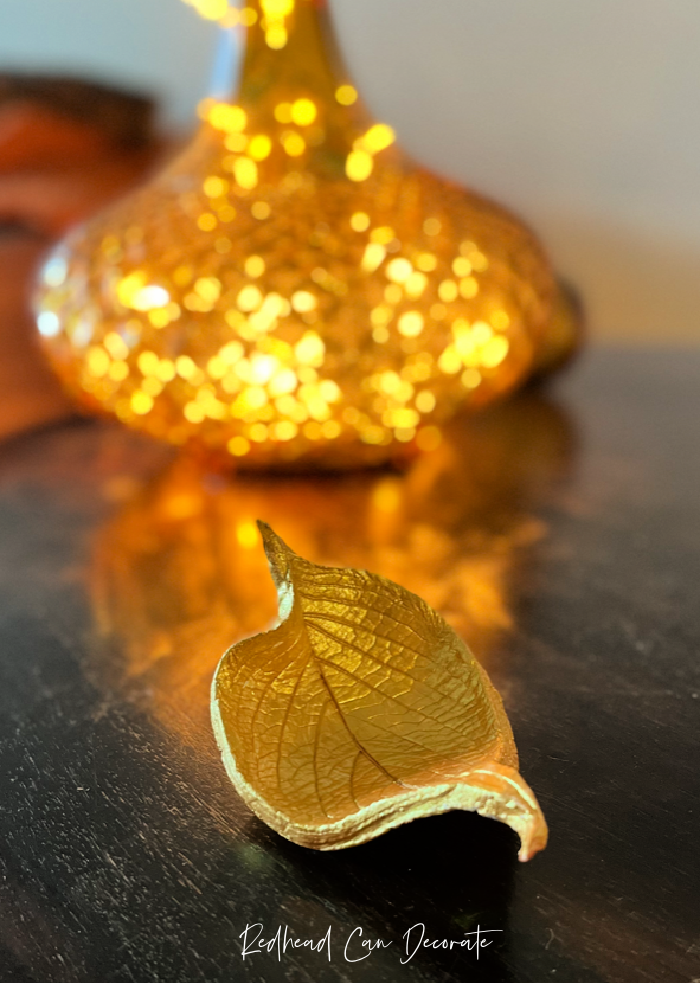
Lastly, here’s Goldie…
*** Some of the links in this post may contain affiliate links for your convenience. Read full disclosure policy here.
Rusty, Rosie, & Goldie certainly go well together don’t they? Especially with the metallic paint I used to give them that fall glow I am addicted to. Hey…did you happen to see the glowing amber decanter project from last week? If not, click here: Glowing Amber Decanter.
How to Use Your Trinket Bowls
👉🏻The little trinket bowls are going to be divided between my son, daughter, and I, but I wanted to show you how they would work for your jewels 👌🏻
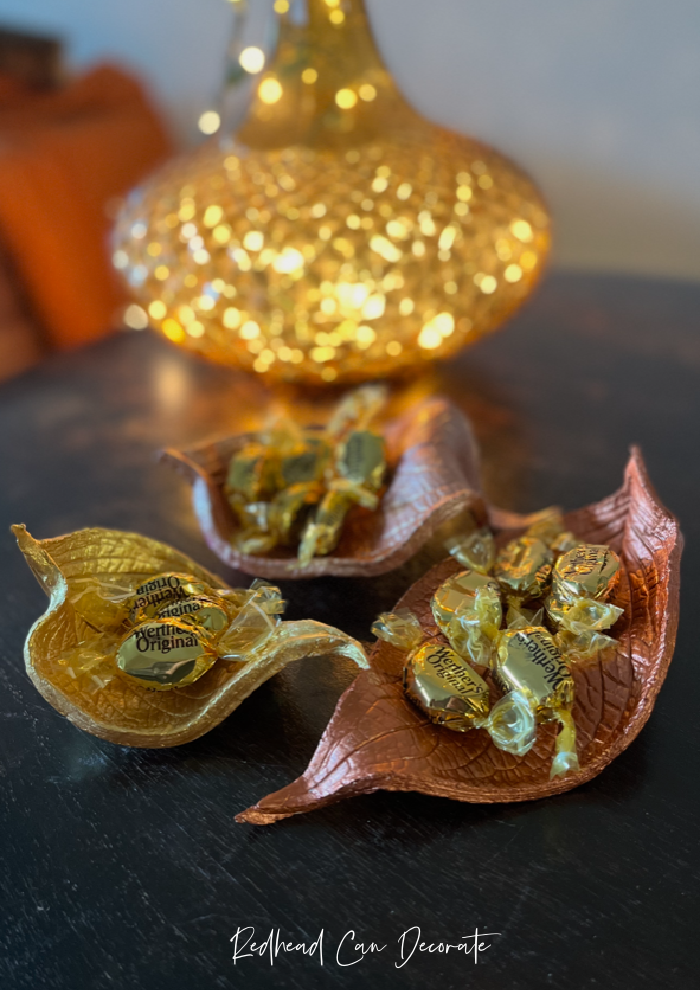
Or for your candy (that’s for you mom ❤️)…
Or, just let them sit on a table and leave them completely empty because the beautiful lines Mother Nature provided are plenty to entertain our eyes…
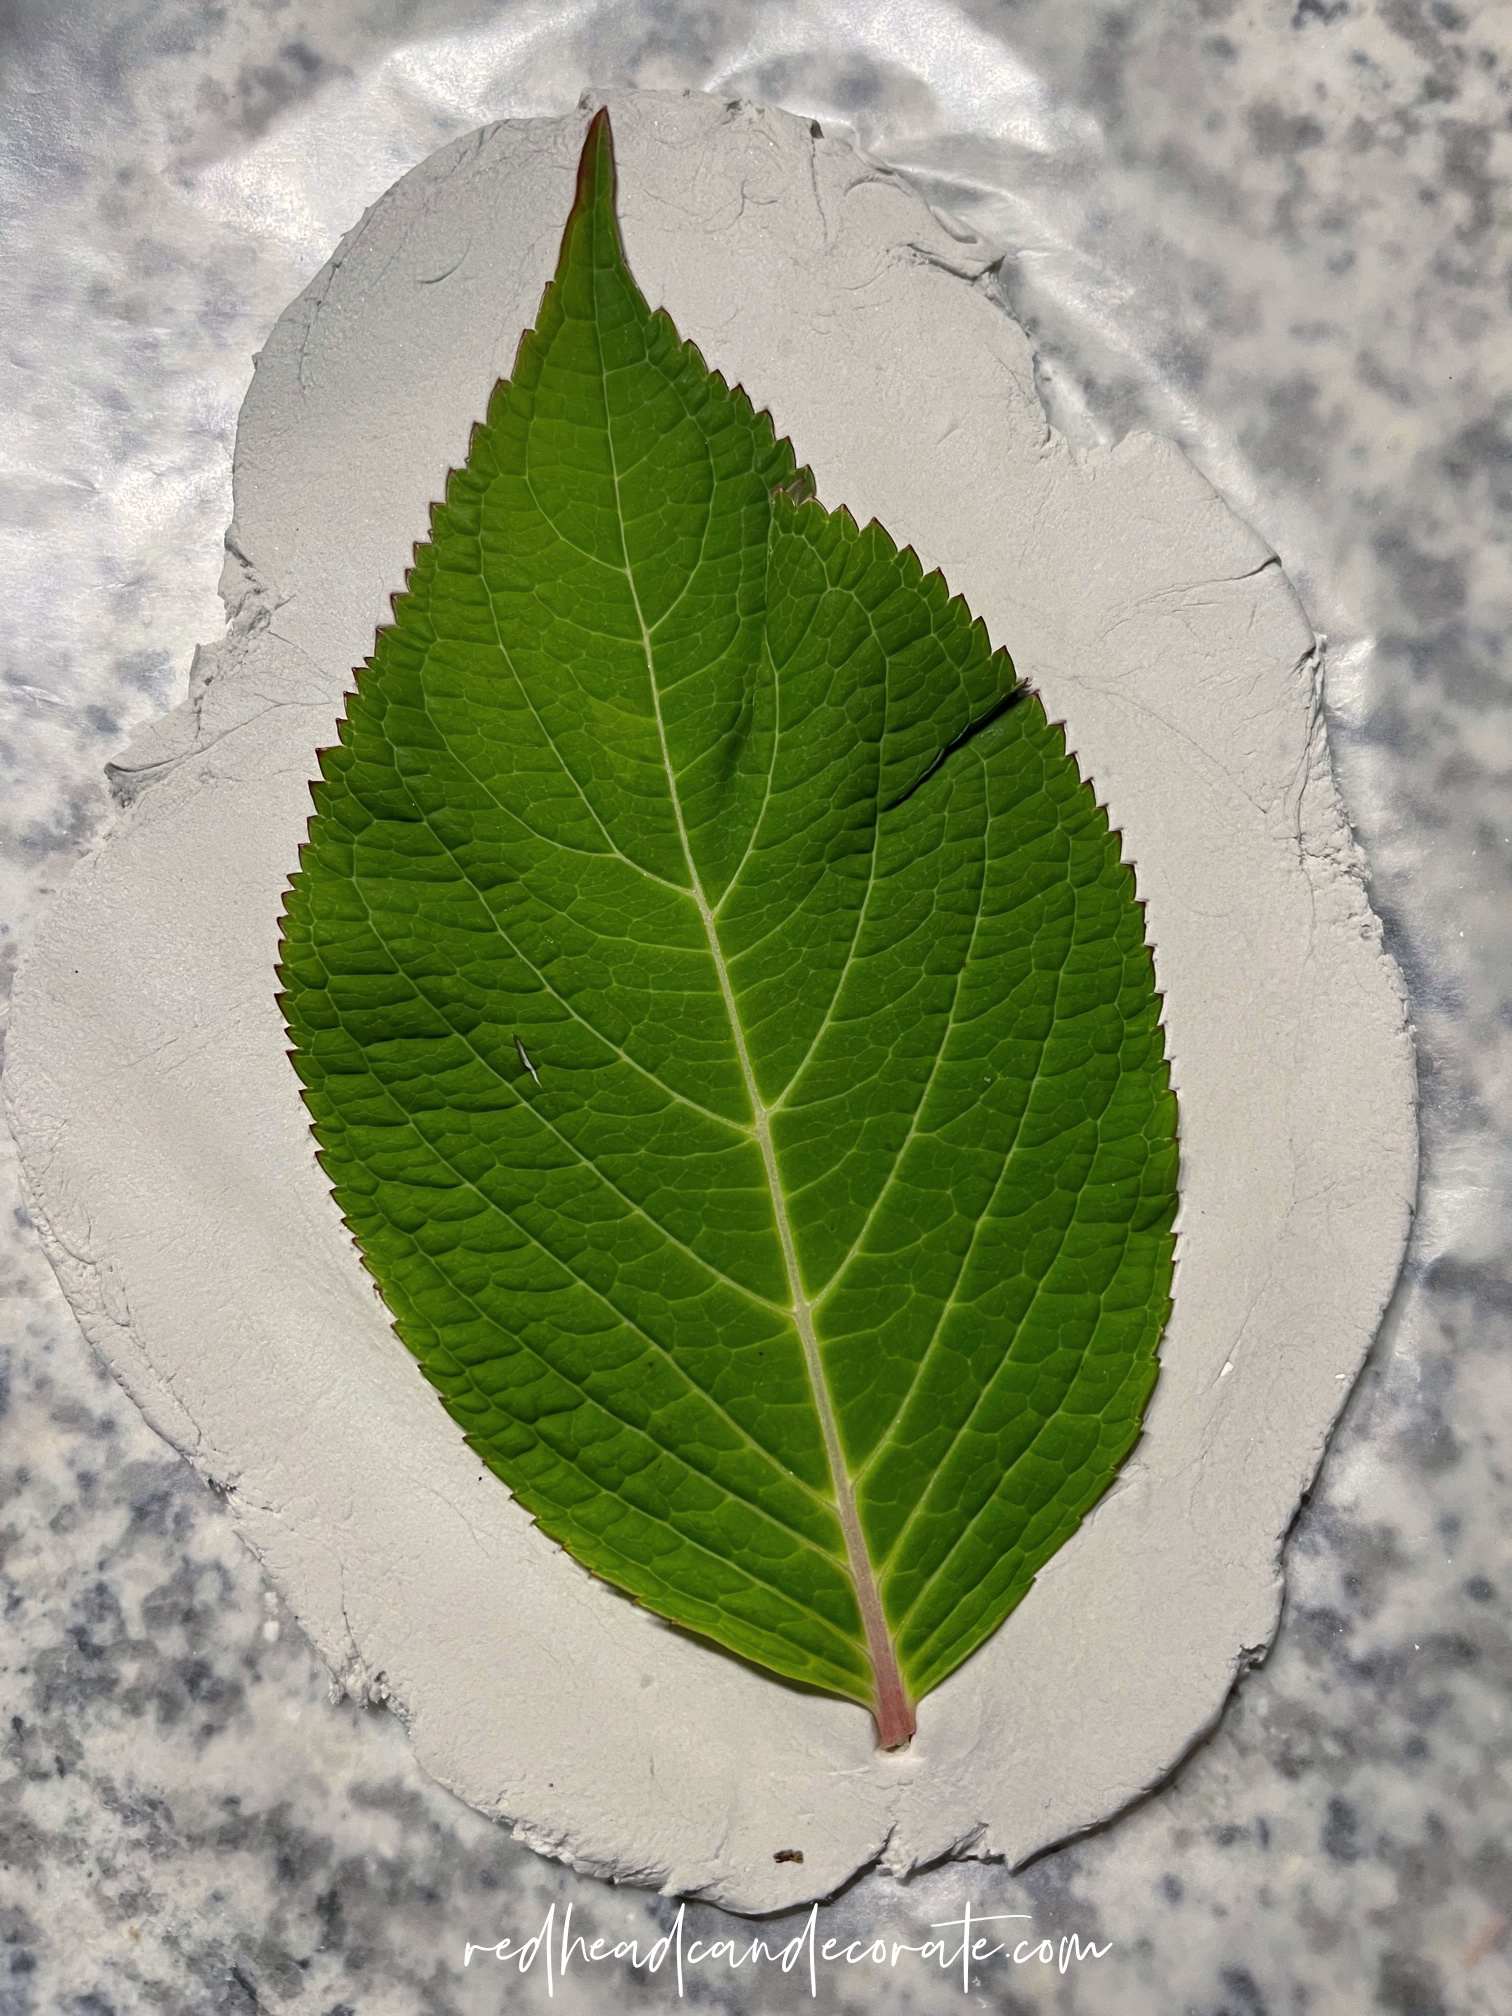
Tips on How to Create Fall Hydrangea Trinket Leaf Bowls
Please follow Jen’s tutorial mentioned above 👆🏻, but I will tell you below what clay I used, and a few other tips that worked for me…
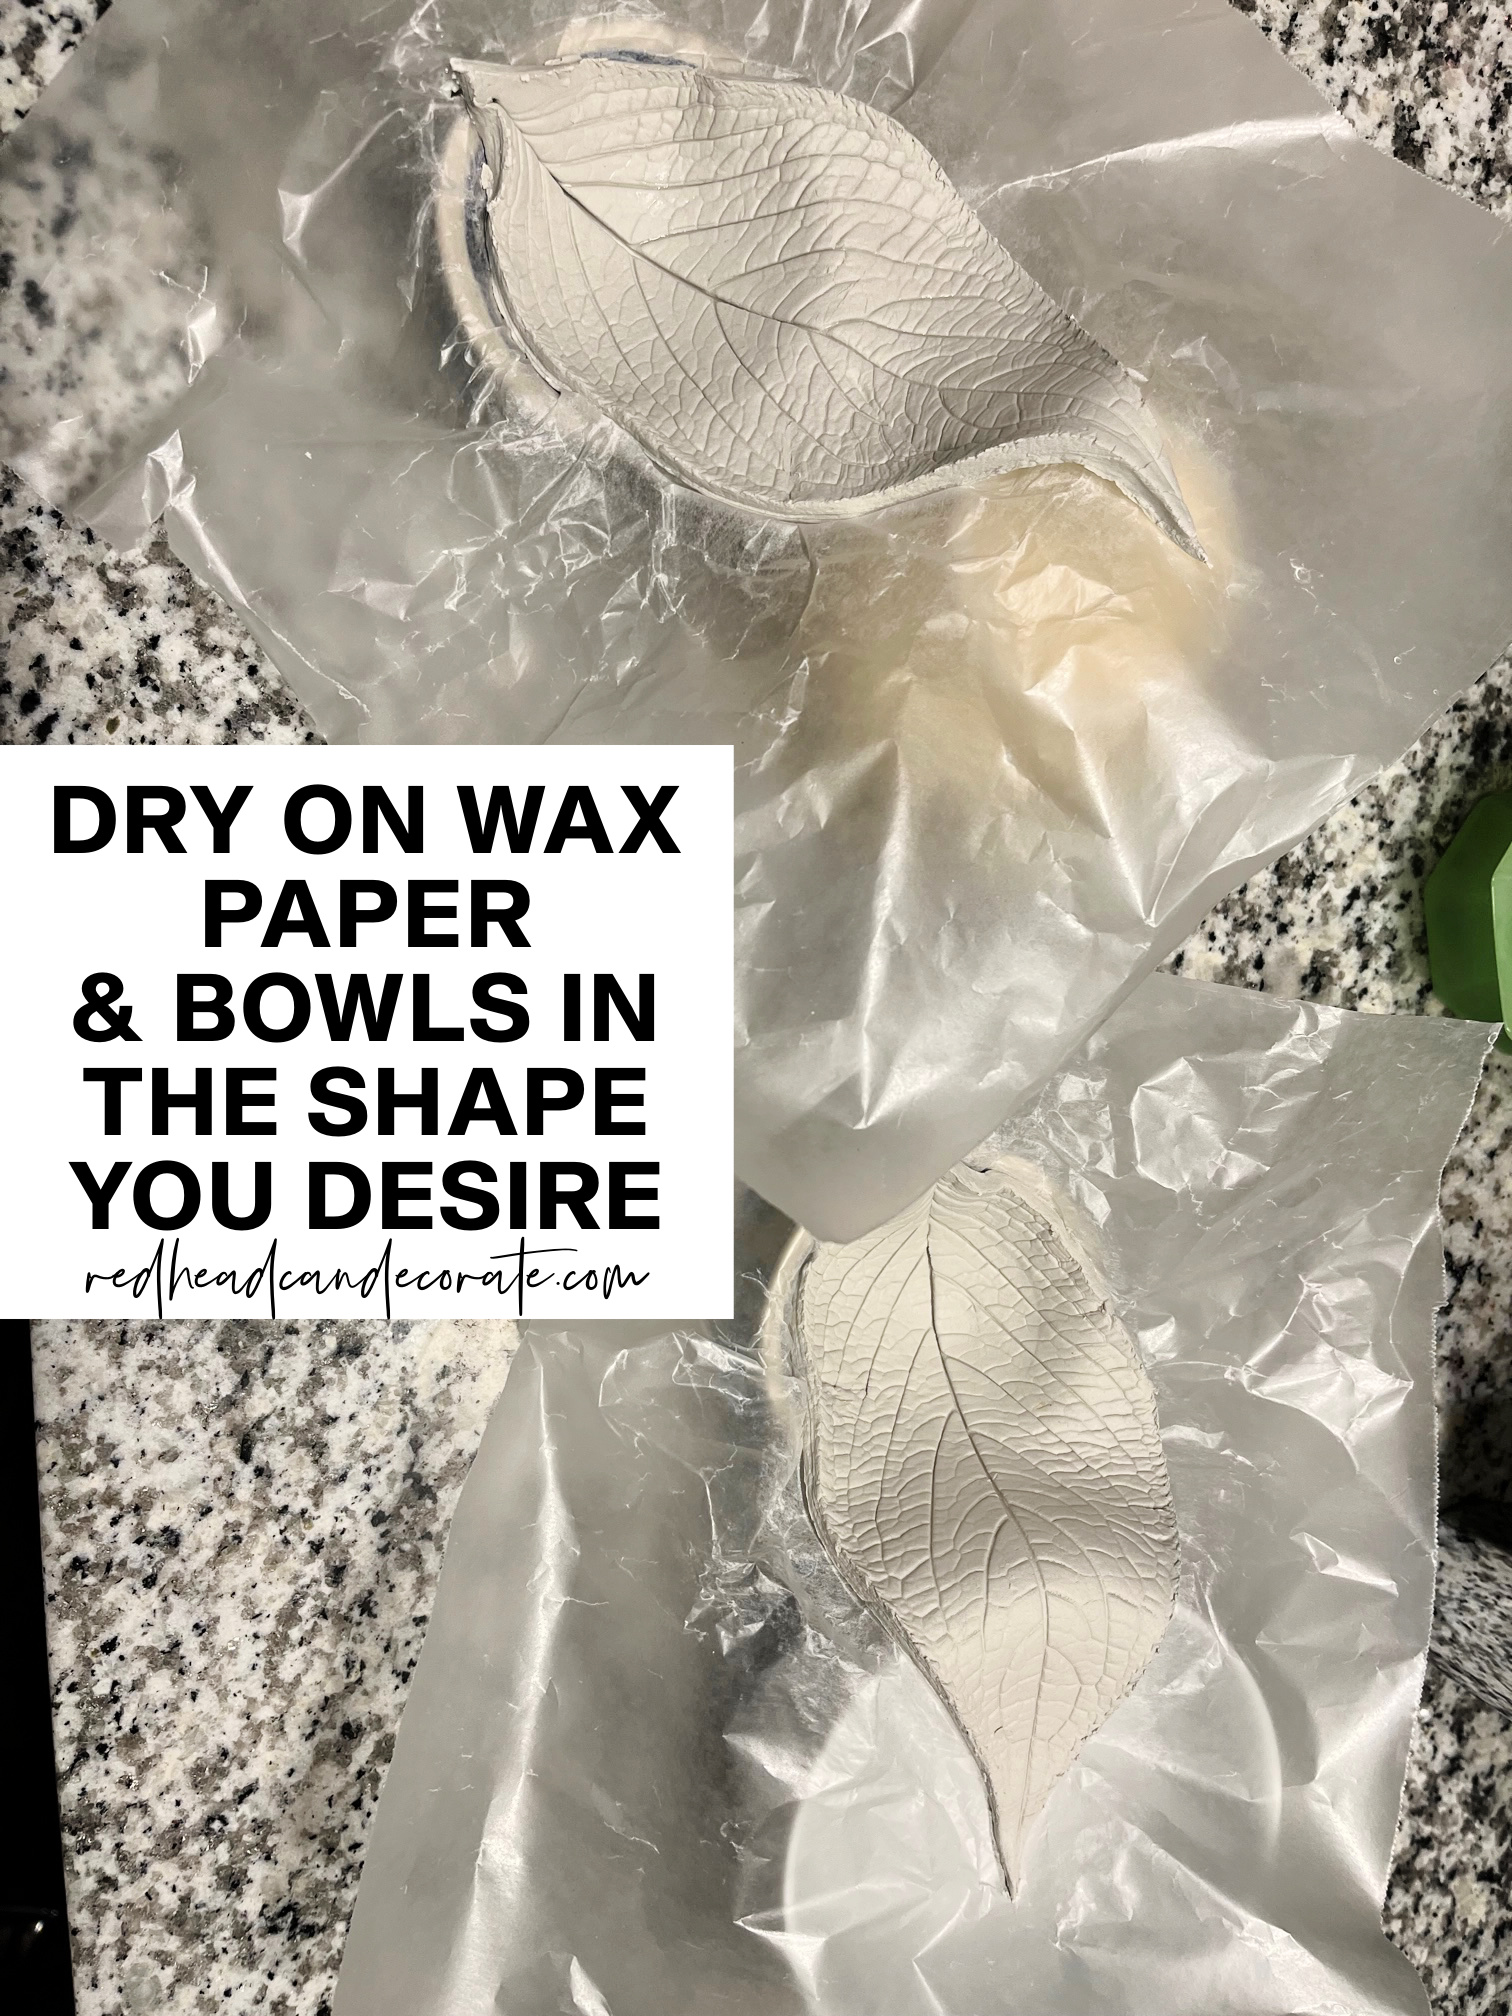
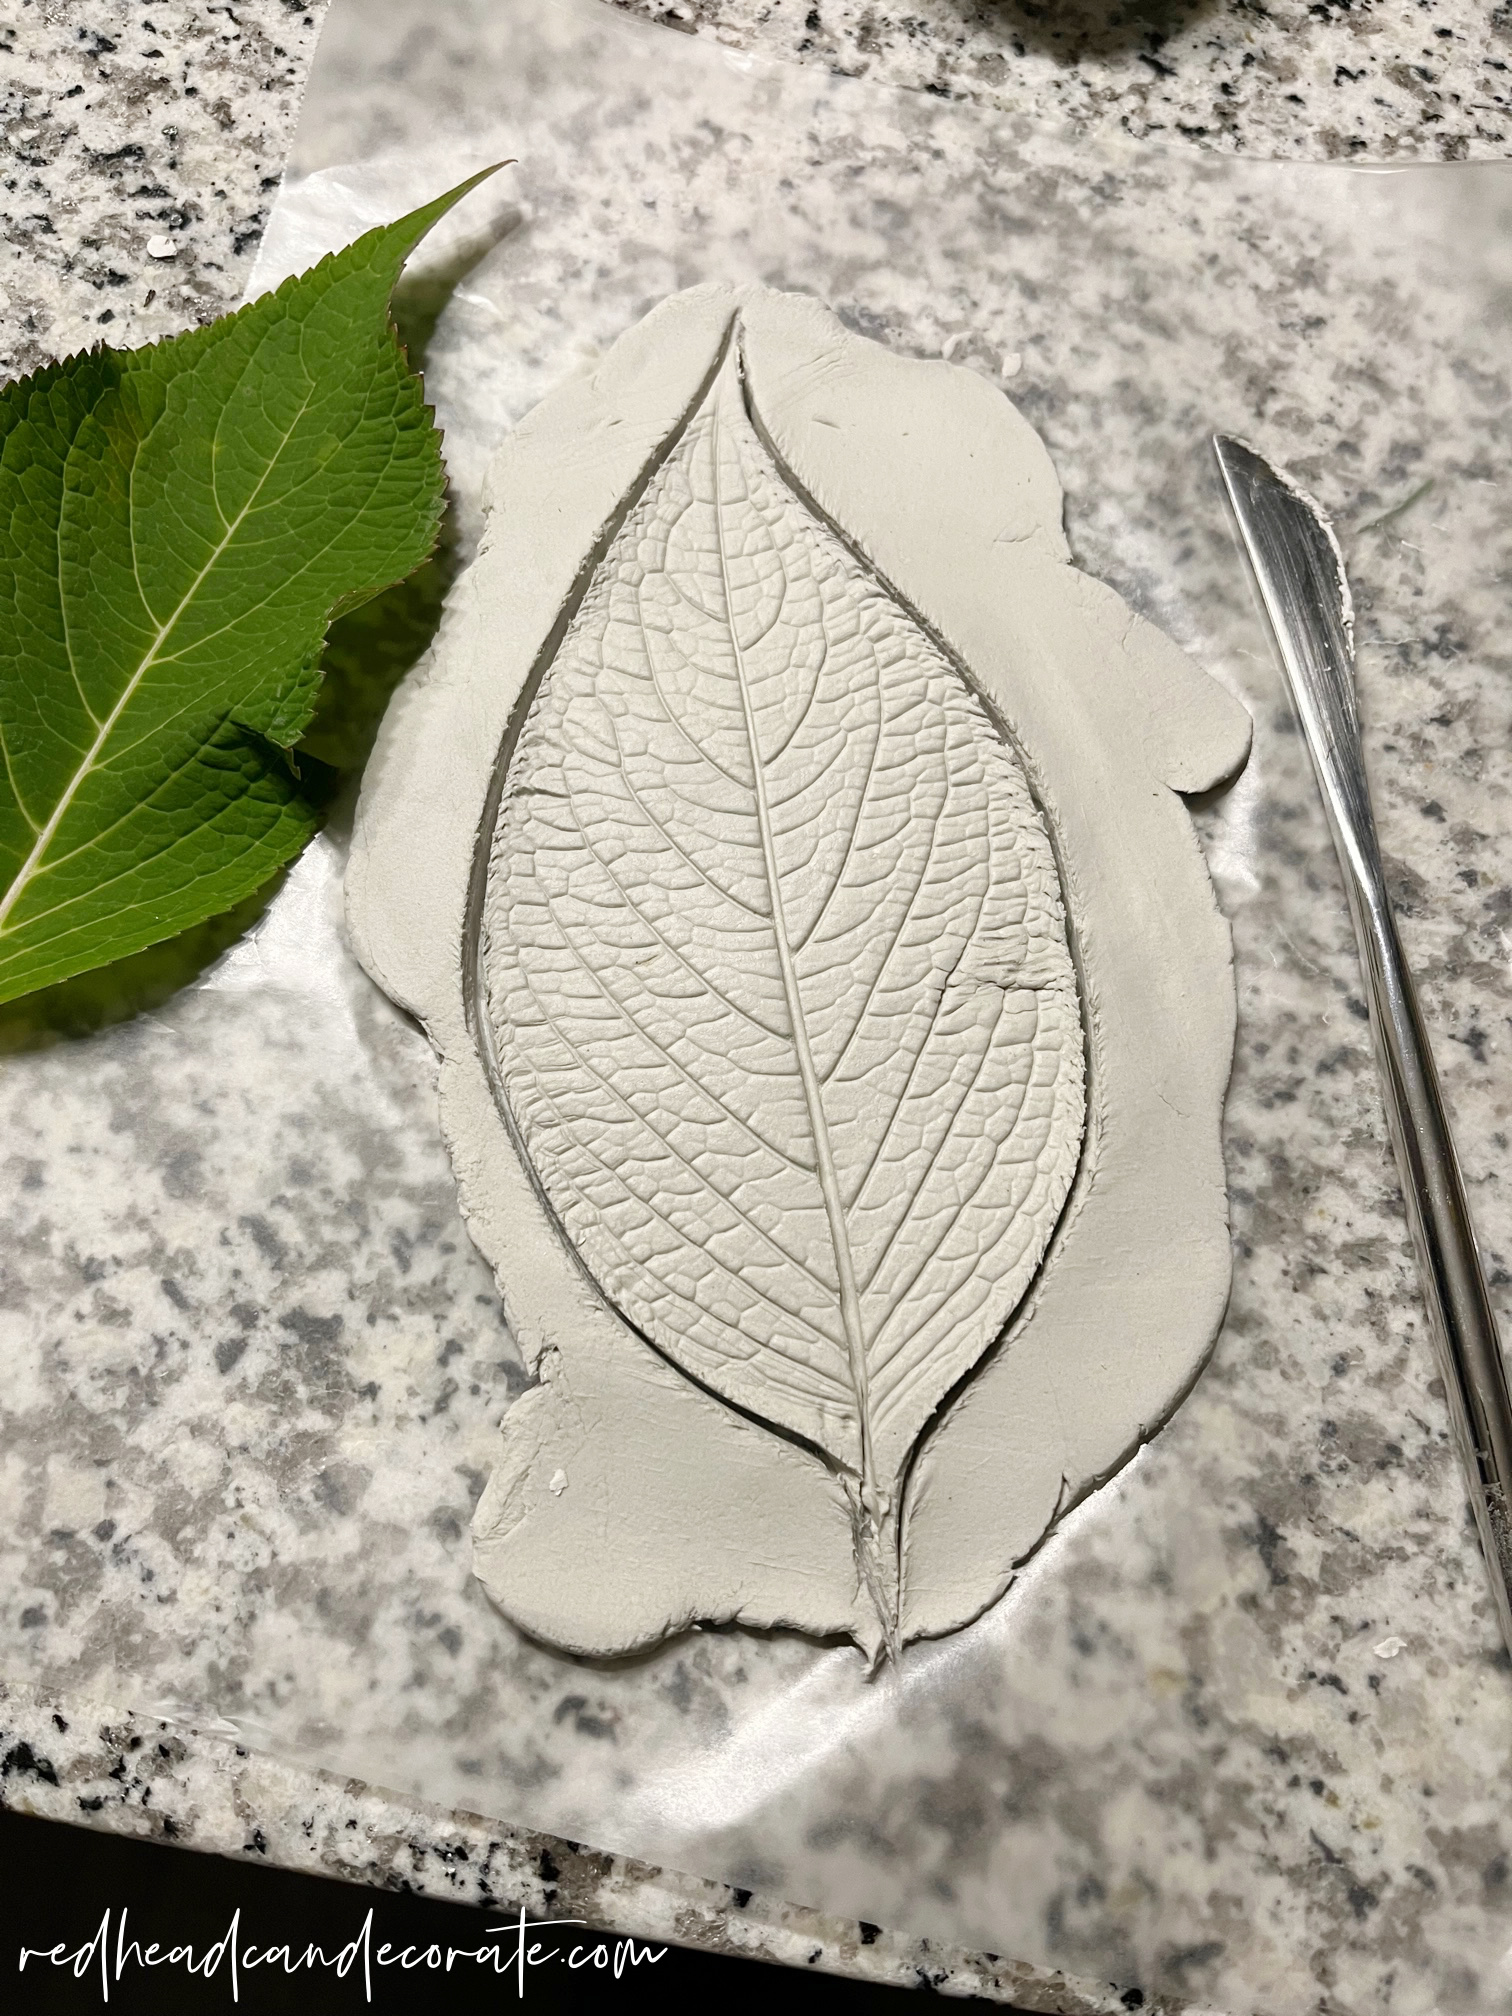
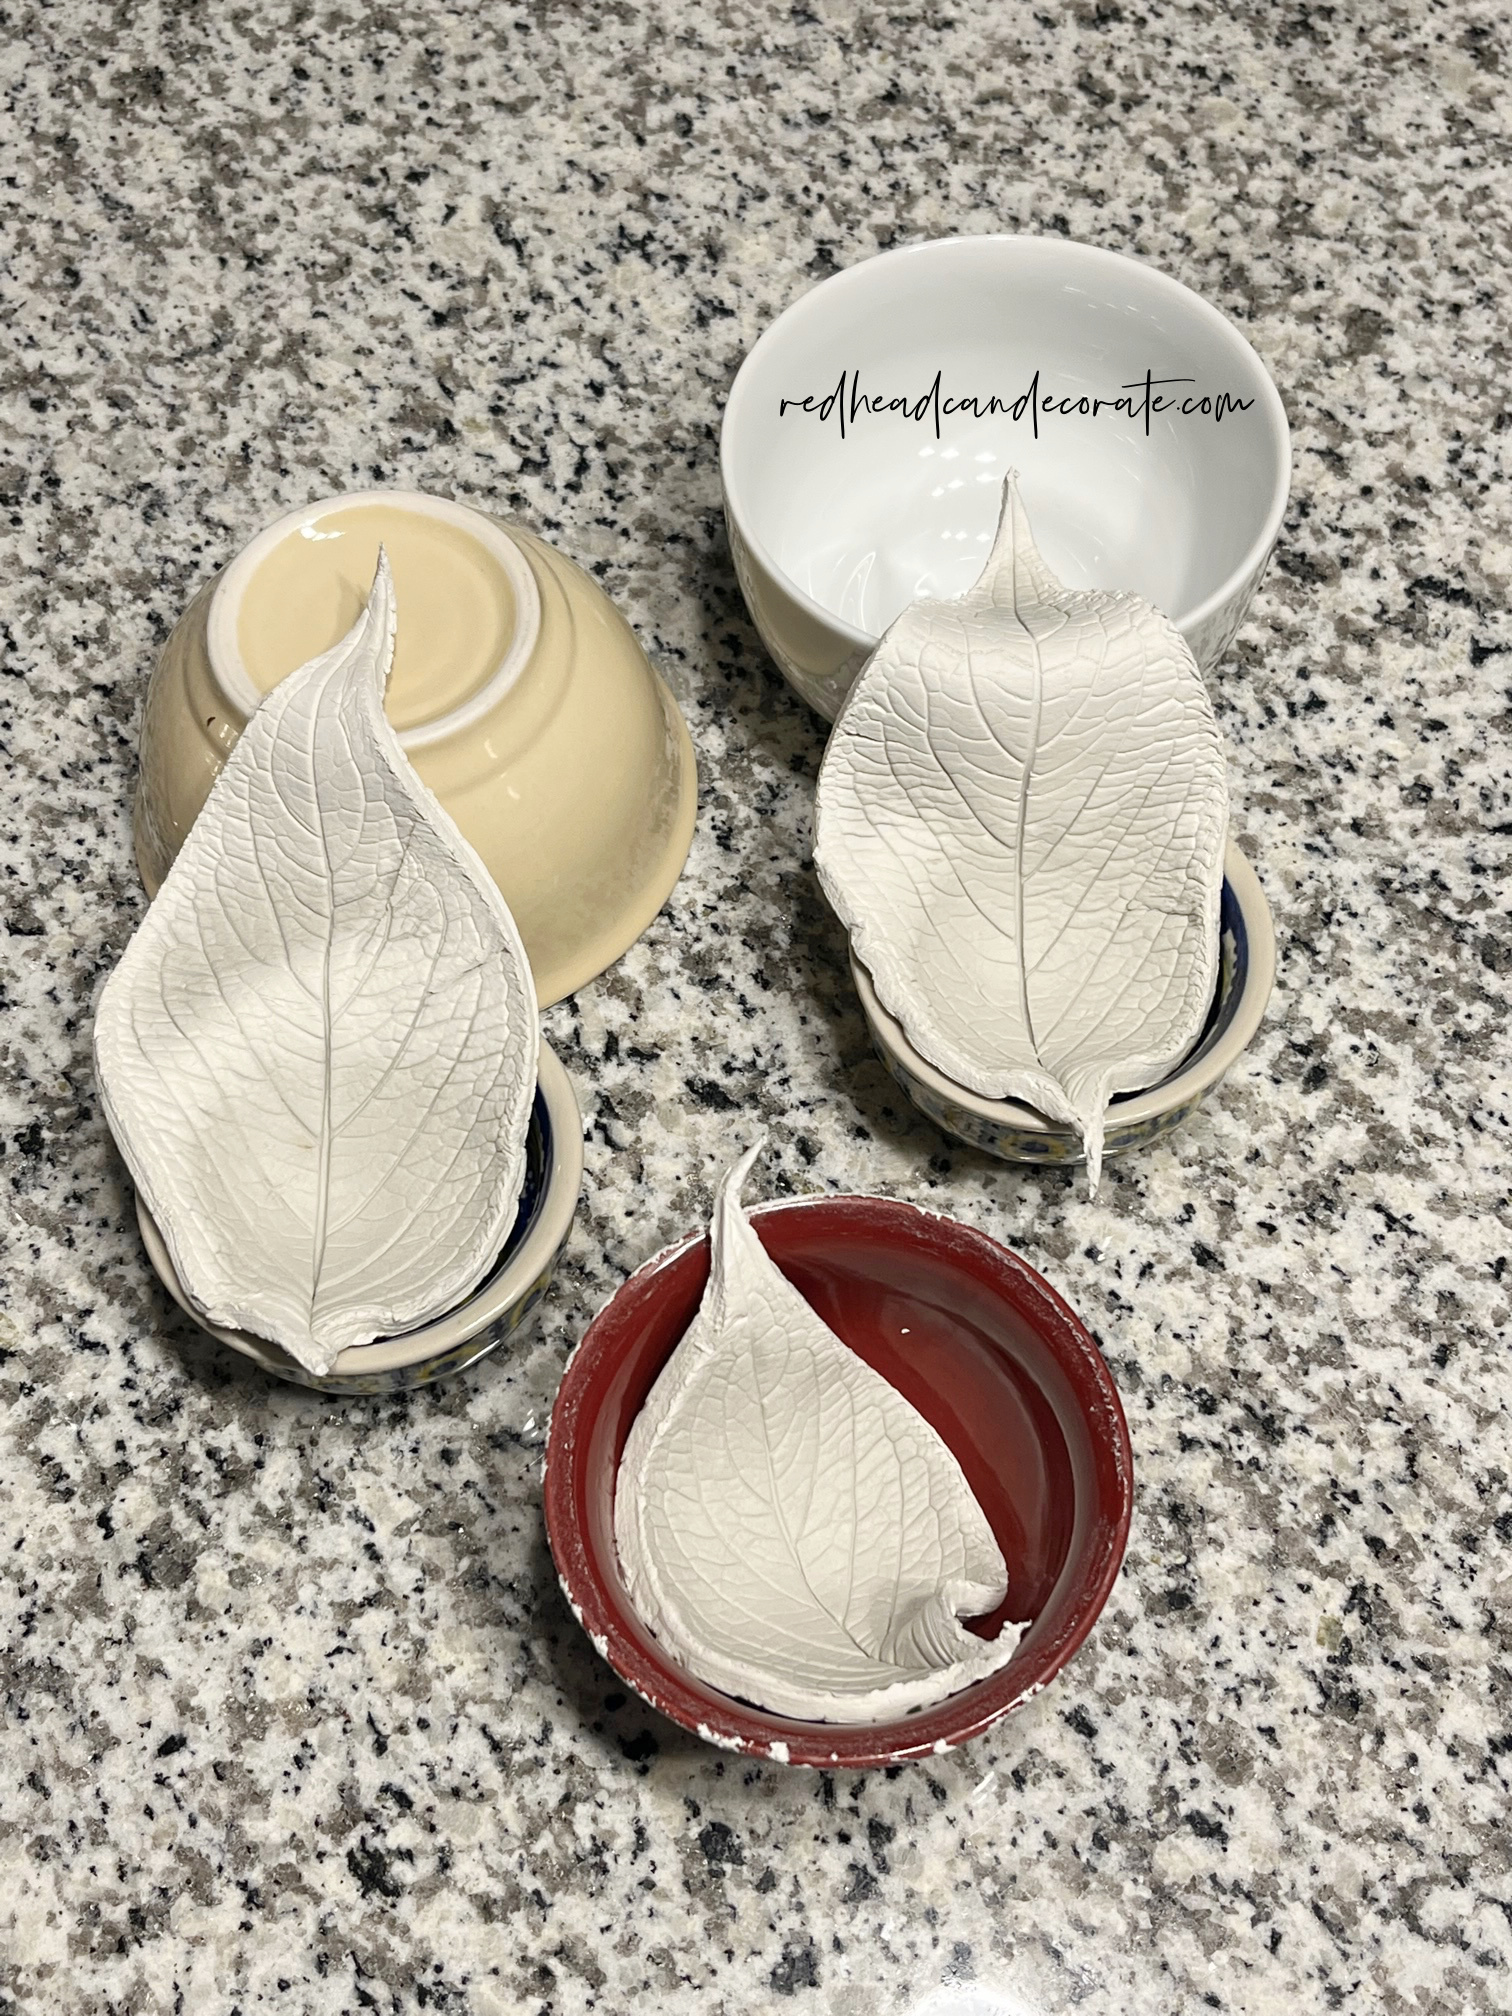
I used THIS WHITE CLAY, and I rolled it out onto wax paper like Jen mentioned. After I placed the Hydrangea leaf on the clay, I pressed down just a little so the lines would appear on the clay. Then I took a butter knife and cut the leaf out as best as I could. I let 3 different leaf versions dry on bowls in the desired shape for about a week (mine took longer because I did not bake them). After they appeared dry, I let them dry another day or 2 without any wax paper, but kept the bowls there.
Painting the Clay Bowls

To really make these beautiful leaves shine, I decided to use a metallic paint. Because we live in an apartment right now, I have no place to spray paint, so I just used good ole fashioned paint on paint. Here’s the exact paints I used:
I put on 2 coats and did not put any thing else on after. Boom!

Last Year’s Mortisha & Gomez Costumes
No tutorial on this next one guys, but I will tell you we had an amazing night dressing up as Mortisha & Gomez for fun last year in 2021 (I ordered the costumes in early Fall on Amazon). We laughed so hard, and it was extremely sexy. Sorry…not sorry 😊 This year we are dressing as a new popular duo! I hope you can subscribe here to see it.

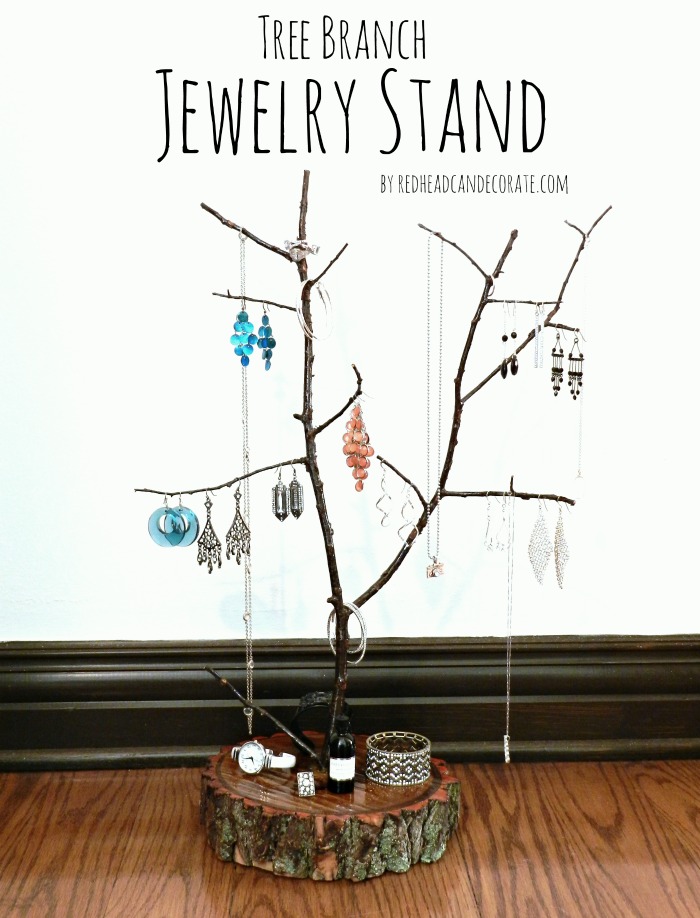
Tree Twig Jewelry Stand
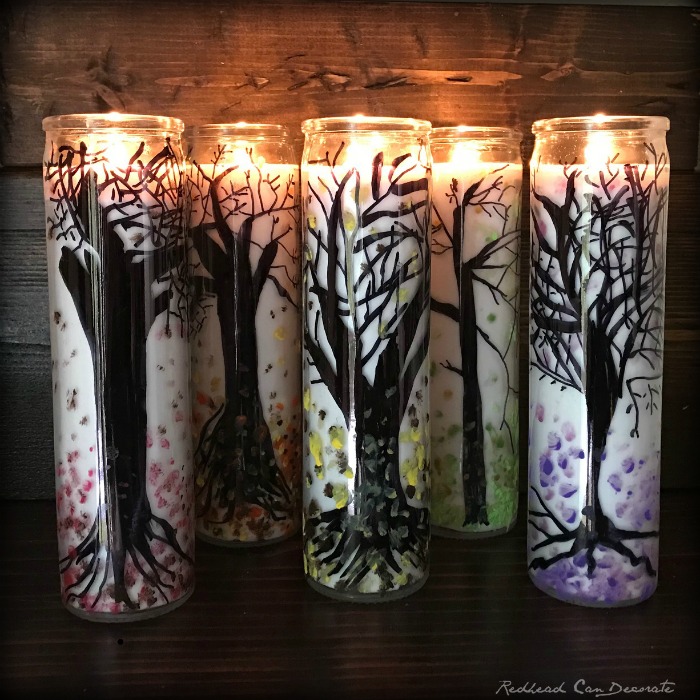
Dollar Store Fall Tree Candles


Beautiful!! And will be a sweet reminder..
Sure will! Thank you, Beverly!
Very pretty and a wonderful keepsake from the home you all loved. Garden memories brought to life!
I love these Julie, so pretty! I bought a box of clay a few years ago to make something like this and it was all dried up when I wanted to make it. You’ve inspired me to try again and actually use the clay lol