Have you noticed how pretty party paper napkins have become? I almost feel like wall papering a room with them!
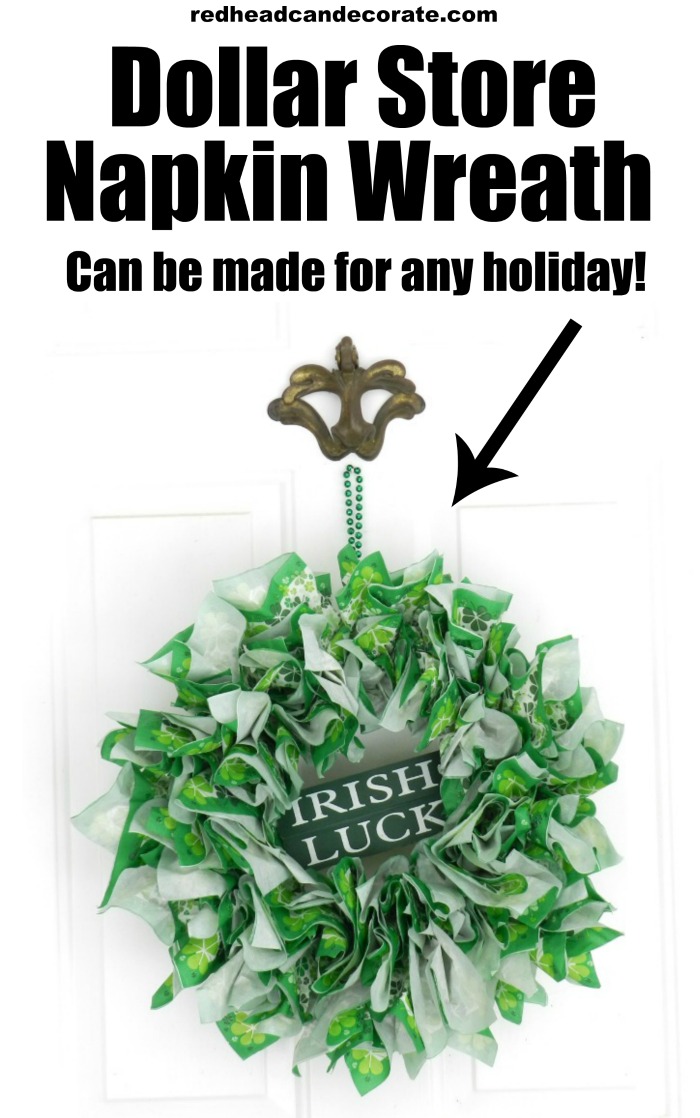
I see them in the dollar store and super markets and I am taking full advantage of it in my decorating. This “DIY Napkin Wreath” is one of the easiest wreaths I have ever made (see instructions below).
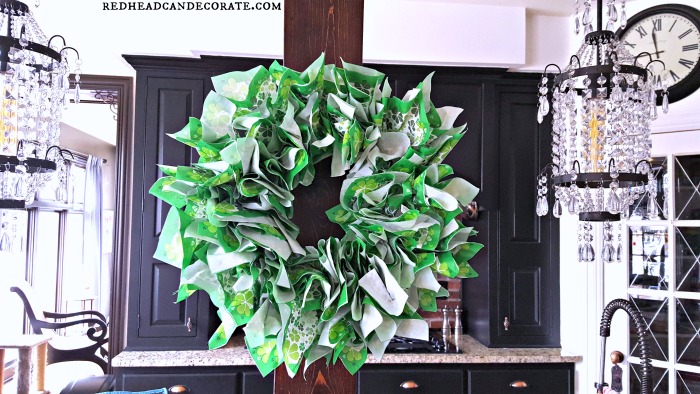
It’s just so fluffi-fied.
The best part, is that you can make a wreath using napkins for any occasion, including all holidays.
The possibilities are endless. I want to make a rainbow one!
*** Some of the links in this post may contain affiliate links for your convenience. Read full disclosure policy here.
If you don’t want to take a trip to the dollar store, you can find the napkins HERE. You can also find the foam base HERE.
Here’s how I made it:
Supplies:
1-2 packages of paper napkins (also located at dollar store)
sign in middle is optional (mine was from a previous project)
Instructions:
Place the foam base on a flat surface with a towel under it.
Using one napkin at a time, open the napkin up and stick a knitting needle (or other long thin stick like a small screw driver) into the center of the napkin without puncturing the napkin.
Then dip the point into a little glue before you stick it into the wreath.
I started at the top and put 2 napkins per row. I inserted it about 1 inch deep. I didn’t put napkins into the sides of the wreath because I only had 1 package of napkins. If you want to cover the sides too, you will need another package of napkins (2 should do it). No need to cover the back because you want it to lay flat when you hang it up.
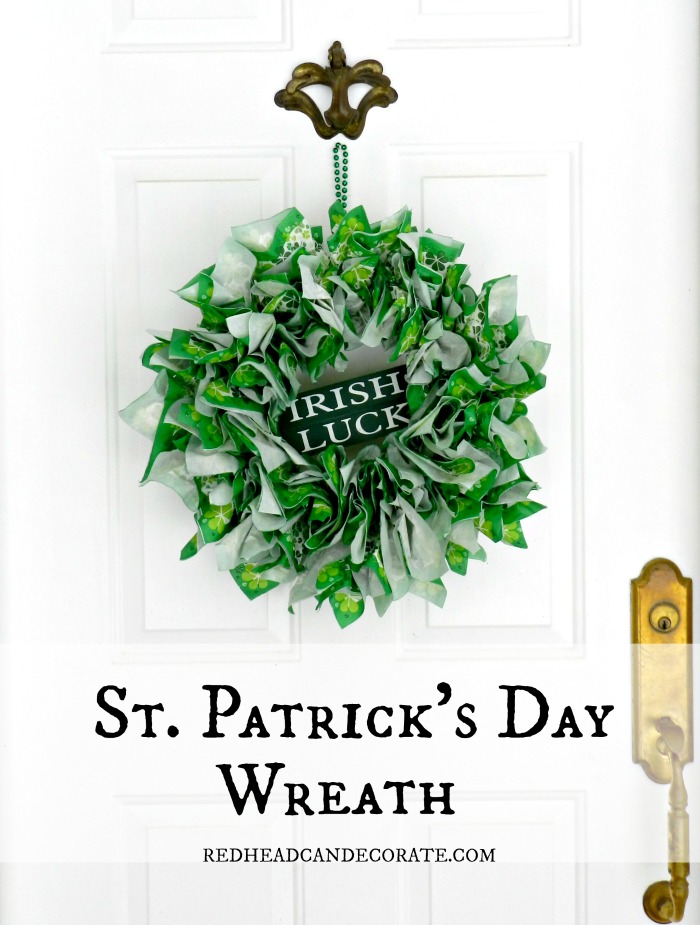
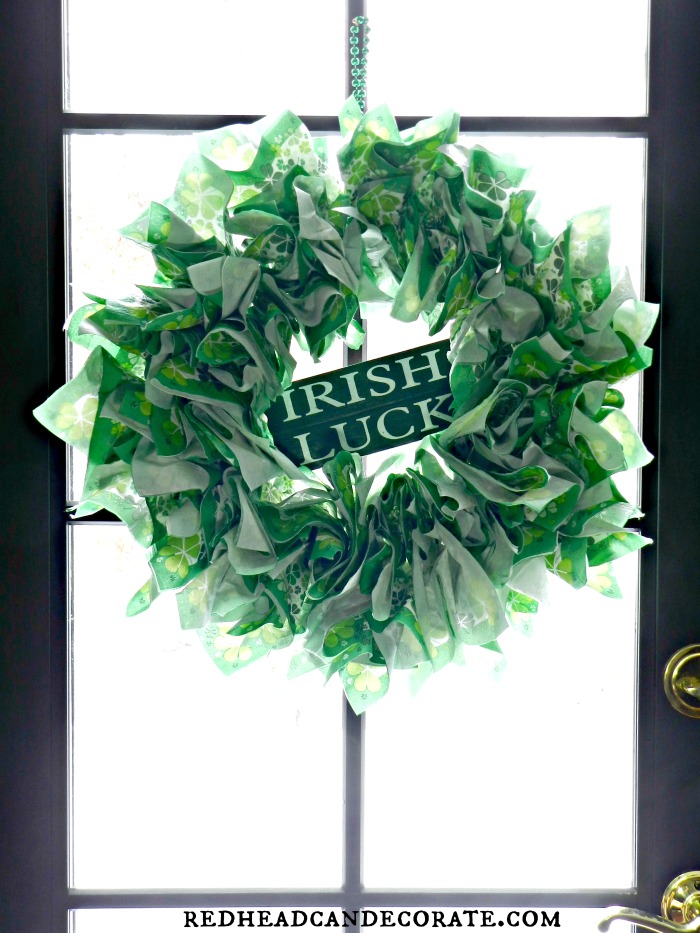
I stuck my sign in the center and added a little glue to it.
Lastly, I hung the napkin wreath with 1 strand of green beads by looping the strand through it self to end up with one end of the necklace to hang.
Happy St. Patrick’s Day, friends…I wish you all the luck in the world!
To view all of my DIY Wreaths, click HERE.


So cute; love the easy-pezy, the low cost and the fab end result.
Thanks, Carol!
Love it!!…Have a great weekend!
What a great idea.Thanks
This is ADORABLE!! Not only that, but you could make one for each different holiday. A Christmas one would be OH SO cute!! Also, now I am wondering what one would look like made with the paper doilies? Thanks for sharing 😀
What a clever and perky welcoming wreath! It’s such an easy project from your directions, it seems very doable. Thanks for the smart idea!
Thank you, so much, Sue!
hey girl this is pretty cool!
Too cute Julie !!!
Super cute…I always look forward to what you come up with next!! Your Room is awesome. Love love love the wood!
Super cute…I always look forward to what you come up with next
Thank you, Alisha!!
Wow, this is awesome & just so pretty! Is the foam piece underneath, the base, is it round wreath shaped?
Thanx for being so unique & creative Julie! I love checking my mail for your next re-incarnation!
Thank you for that kind comment, Becky!! I need those to keep going!! Yes, the foam is a circle. In my instructions you’ll see the link to one on line!
Super cute!
Thank you, Lisa! Have a great weekend! ~ Julie
Darling…Who would have thought!
Hi Darlene-I know, it’s crazy easy!!
Im half Irish, that makes you 25% love, Dad in NY.
Wowie!
What a CUTE wreath! Just love how easy it is and inexpensive. Great idea!!
Thank you, Cate!
Hi Julie:
I’m having a St. Pat’s dinner and thought this wreath was so nice. Not sure if I can do it like you, but will attempt it. My Valentines dinner got snowed out, so I’m moving it to St. Patrick’s.
Thanks for the idea.
Cheers, Bette
[…] Dollar Store Napkin Wreath […]
[…] Irish Napkin Wreath DIY | Redhead Can Decorate […]
Absolutely gorgeous. I will be making this, for sure. I just love your creativity. Thanks Julie
[…] St. Patrick’s Day Napkin Wreath […]
[…] St. Patrick’s Day Napkin Wreath […]
[…] no right or wrong, just fun. Check out this super quick DIY napkin wreath idea for […]