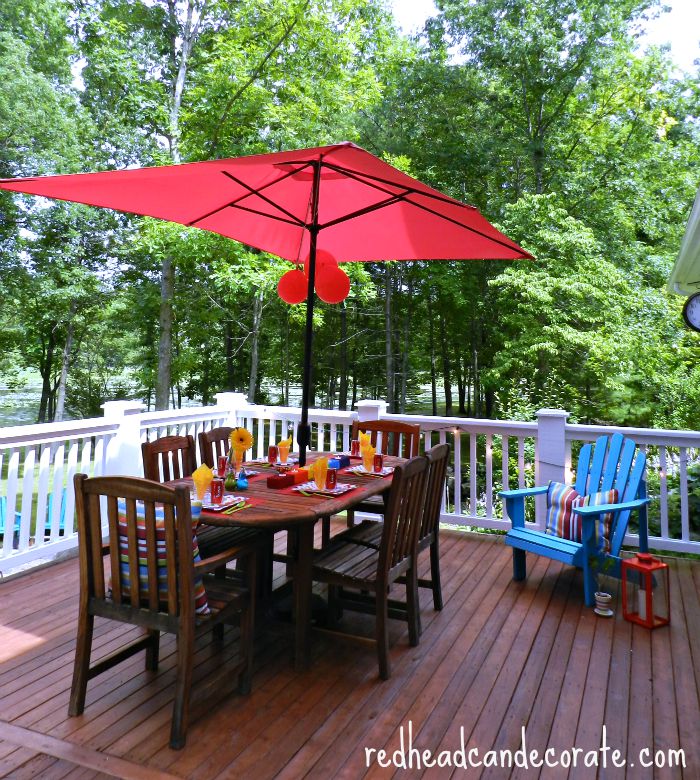
There have been a lot of RAINBOWS in the news lately.
With all that LOVE in the air, I couldn’t resist creating this “DIY Rainbow Candle” for my
FloraCraft Make It:Fun Team Challenge this month. The theme was “Outdoor Decorating”.
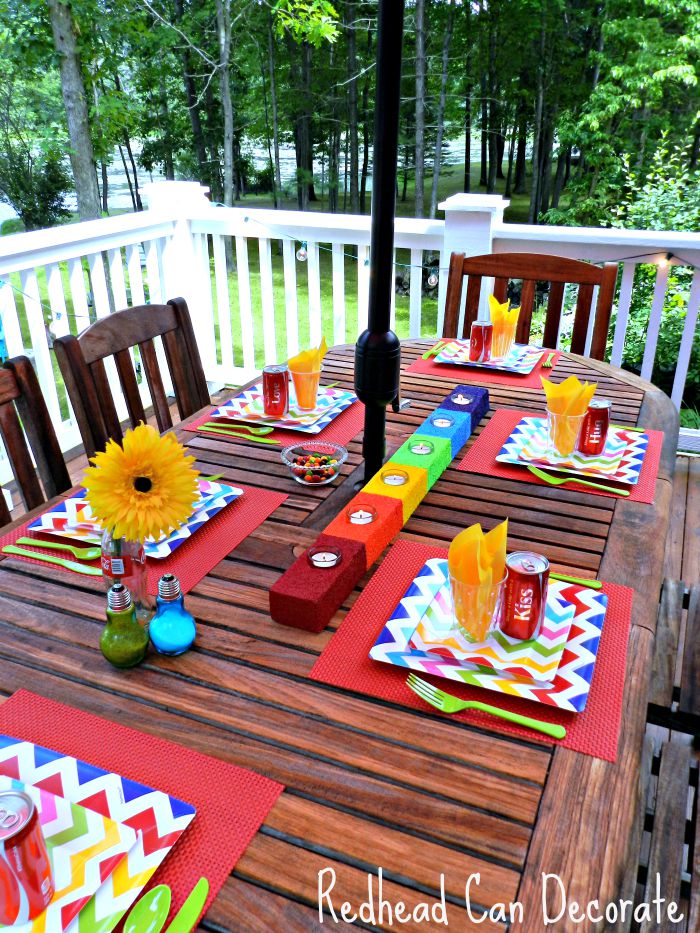
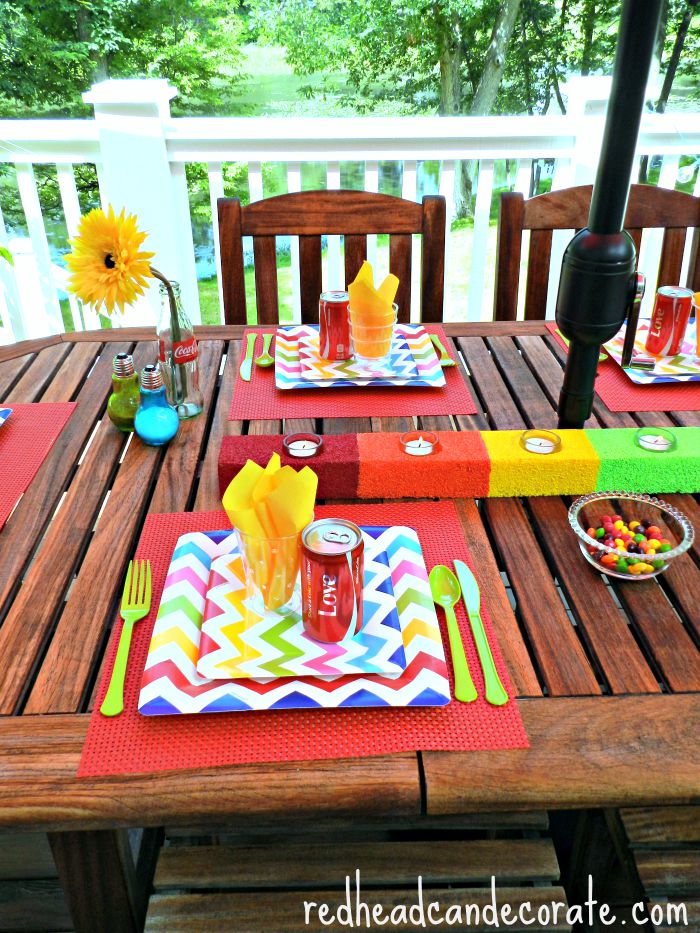
If you’re in the mood for a rainbow party…this cute Rainbow Candle is perfect for it!

Before I get to the tutorial, I must tell you a quick story.
While staging the “Rainbow Party” and taking photos of it, I glanced over to my 13 year old and said,”What a shame we’re not actually having a Rainbow Party.” She looked at me with those sparkly hazel eyes and said, “Well, we coooooould.” I looked at the table. I looked at her. I looked at the table. I looked at her…
I said, “Okay! If you and your sister can find 4 friends to come over for a Rainbow Party today, I’ll order the pizzas!”
She grabbed her phone out of her back pocket and ran upstairs to tell her sis.
Sometime those impromptu gatherings are the best.
The Rainbow Party was a success, and no one noticed that I set the table wrong, lol.
Fork, knife, spoon. I always mess that up.
Who cares…it’s a Rainbow Party!
Directions:
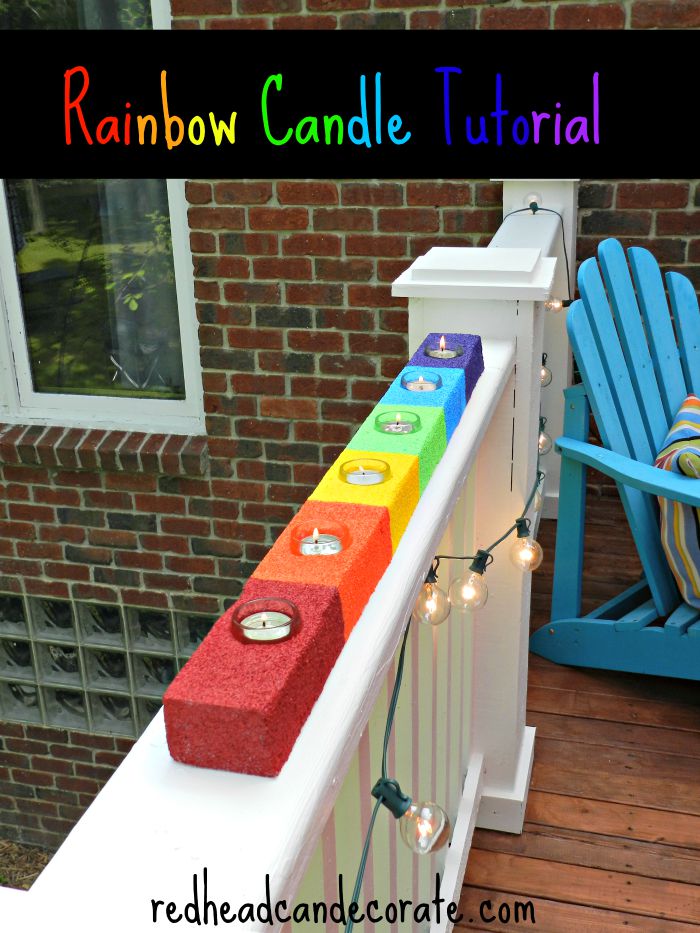
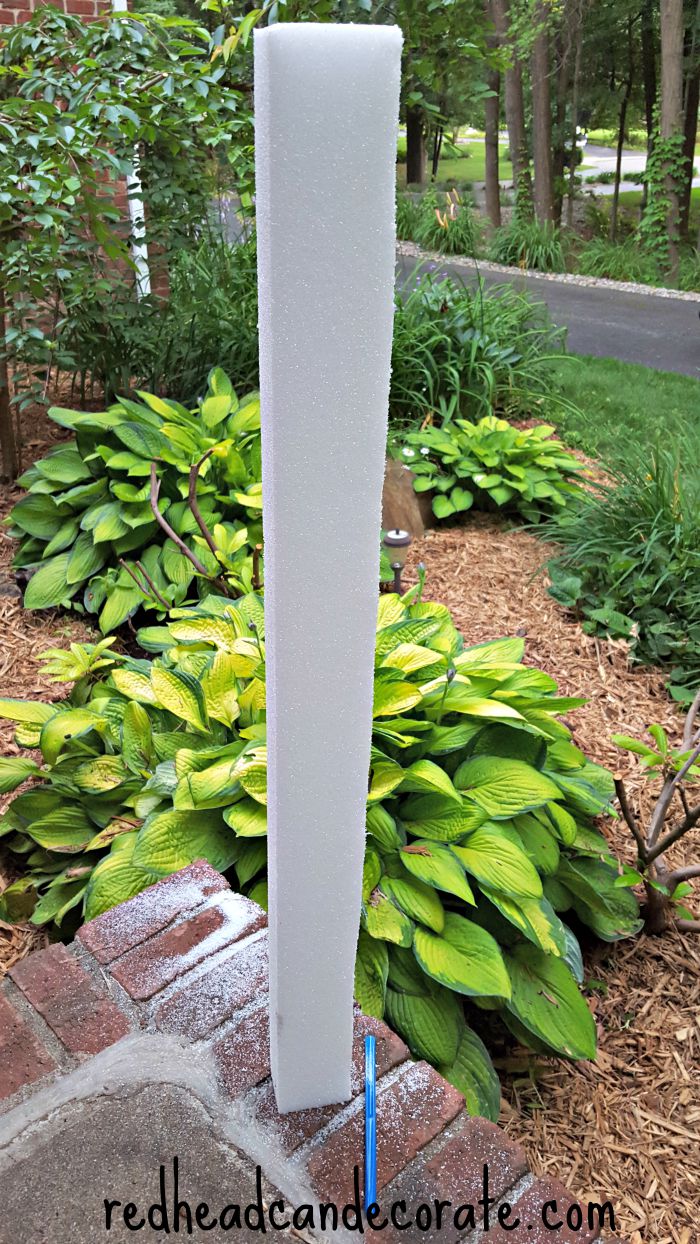
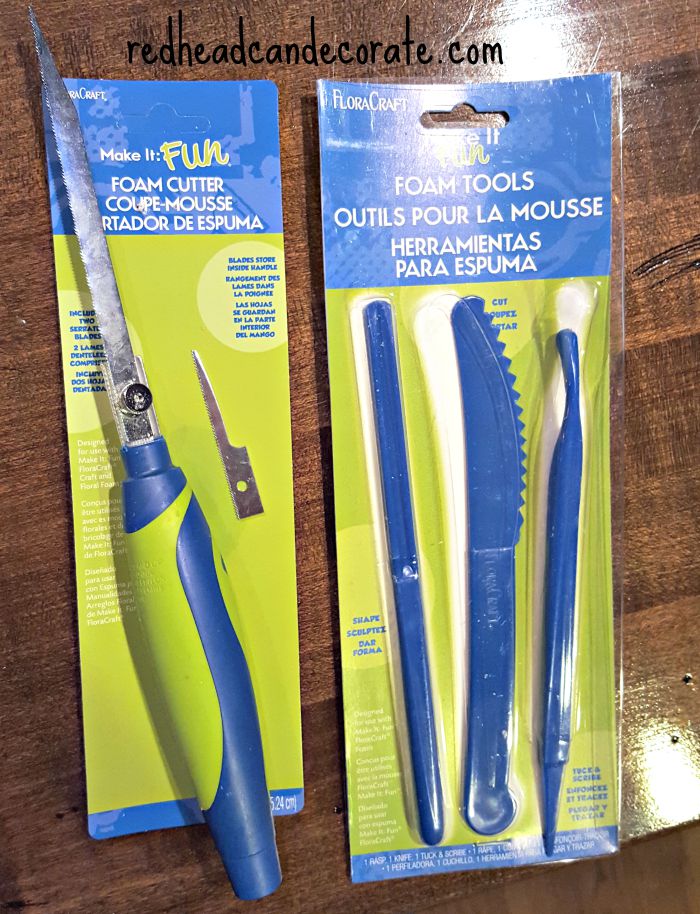
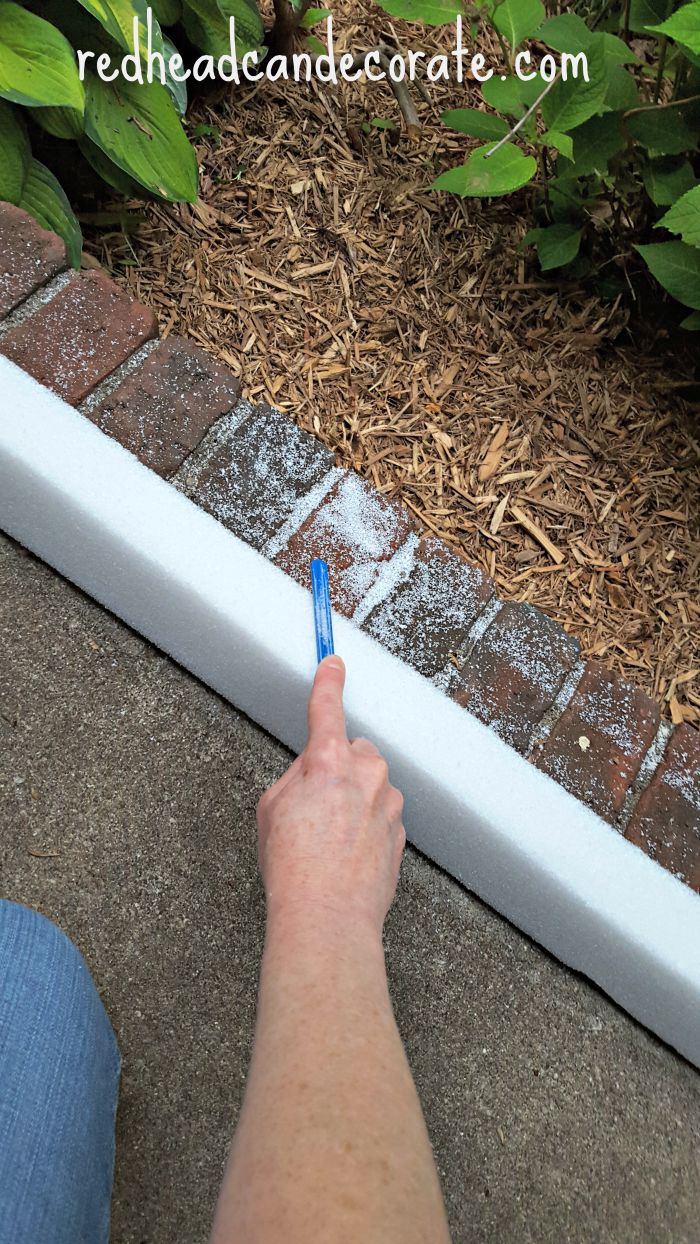
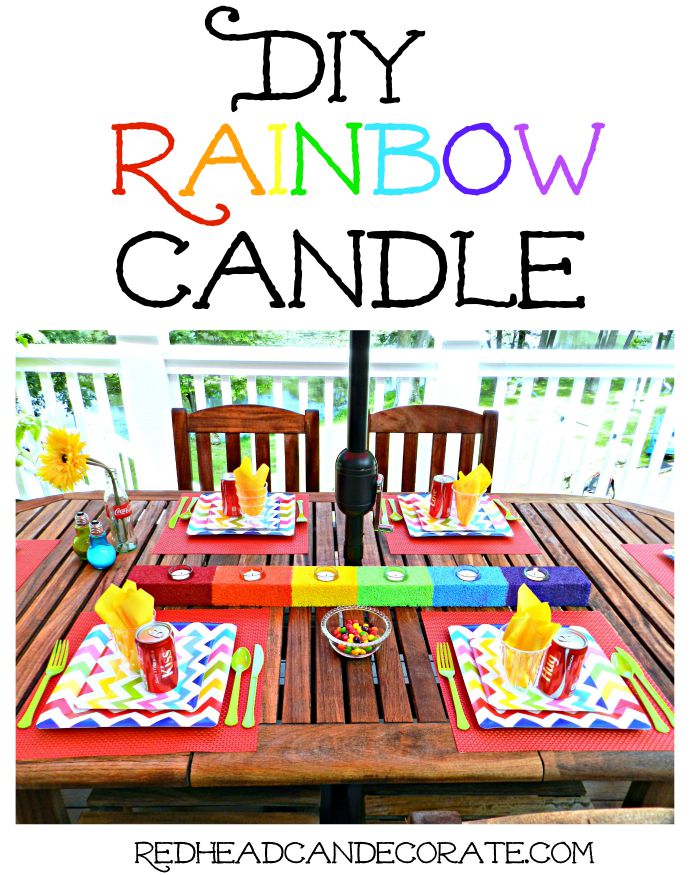
1. Use FloraCraft® Make It: Fun® Foam Sheets (found at Michaels) and cut your shape using a serrated knife, or even better, use FloraCraft® Make It: Fun® Foam Tools. I cut mine using the FloraCraft® Make It: Fun® Foam Cutter. I did not measure (I hate measuring), I did this by eye only. It was slightly uneven after I was finished cutting through, that’s when I decided to “shave” it using the “shape sculpture” to get it even. Please view next photos to get the idea.
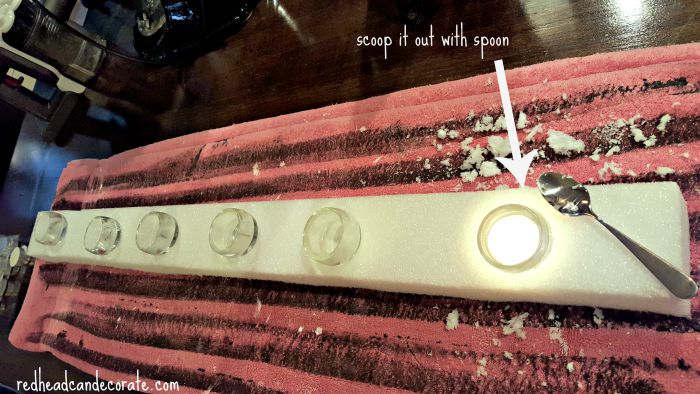
2. Next, I scooped out 7 holes (again no measuring) for my glass tea light candles. I ended up using a stainless steel soup spoon.
3. Unfortunately, I forgot to photograph in the middle of painting, but it was very simple. I used blue tape and taped off the “bricks”. You can’t do them all at once because they will over lap. Just begin with red, yellow, and blue acrylic paint (1 coat). I used a small 1 inch craft paint brush I happen to have. Then remove the tape and finish with orange, green, and purple. Let dry for a couple hours before you try the second round of colors.
4. Stick your glass tea lights in, and be very careful when you light them because the foam will melt if you get it near a flame. Do not leave lit candle unattended.
5. Have a RAINBOW PARTY!
Visit MakeItFunCrafts.com for product information and to view all of the amazing creations you can make with Make It Fun Foam!


I love this, and who doesn’t love a rainbow party? Thanks, Julie!
What a super fun way to use that foam and such a versatile idea for any themed party. Great idea and pinned!
Super, super cute idea!….Such a fun table and yes, impromptu parties are the best..no pressure…just fun!!
[…] DIY FOAM RAINBOW CANDLE […]