When Floracraft® invited me to participate in their “Make it Fun® Foam Wall Art Challenge” last month, I knew it would be perfect timing for a Valentine’s Day project. My mind starting twirling and I came up with 2 ideas. The foam is so fun to work with, I couldn’t just stop at one!
Presenting my first idea for my”Valentine’s Day Wall Art”…this “Electric Love Sign”. It turned out so pretty.
Now look closely…do you see the roses?

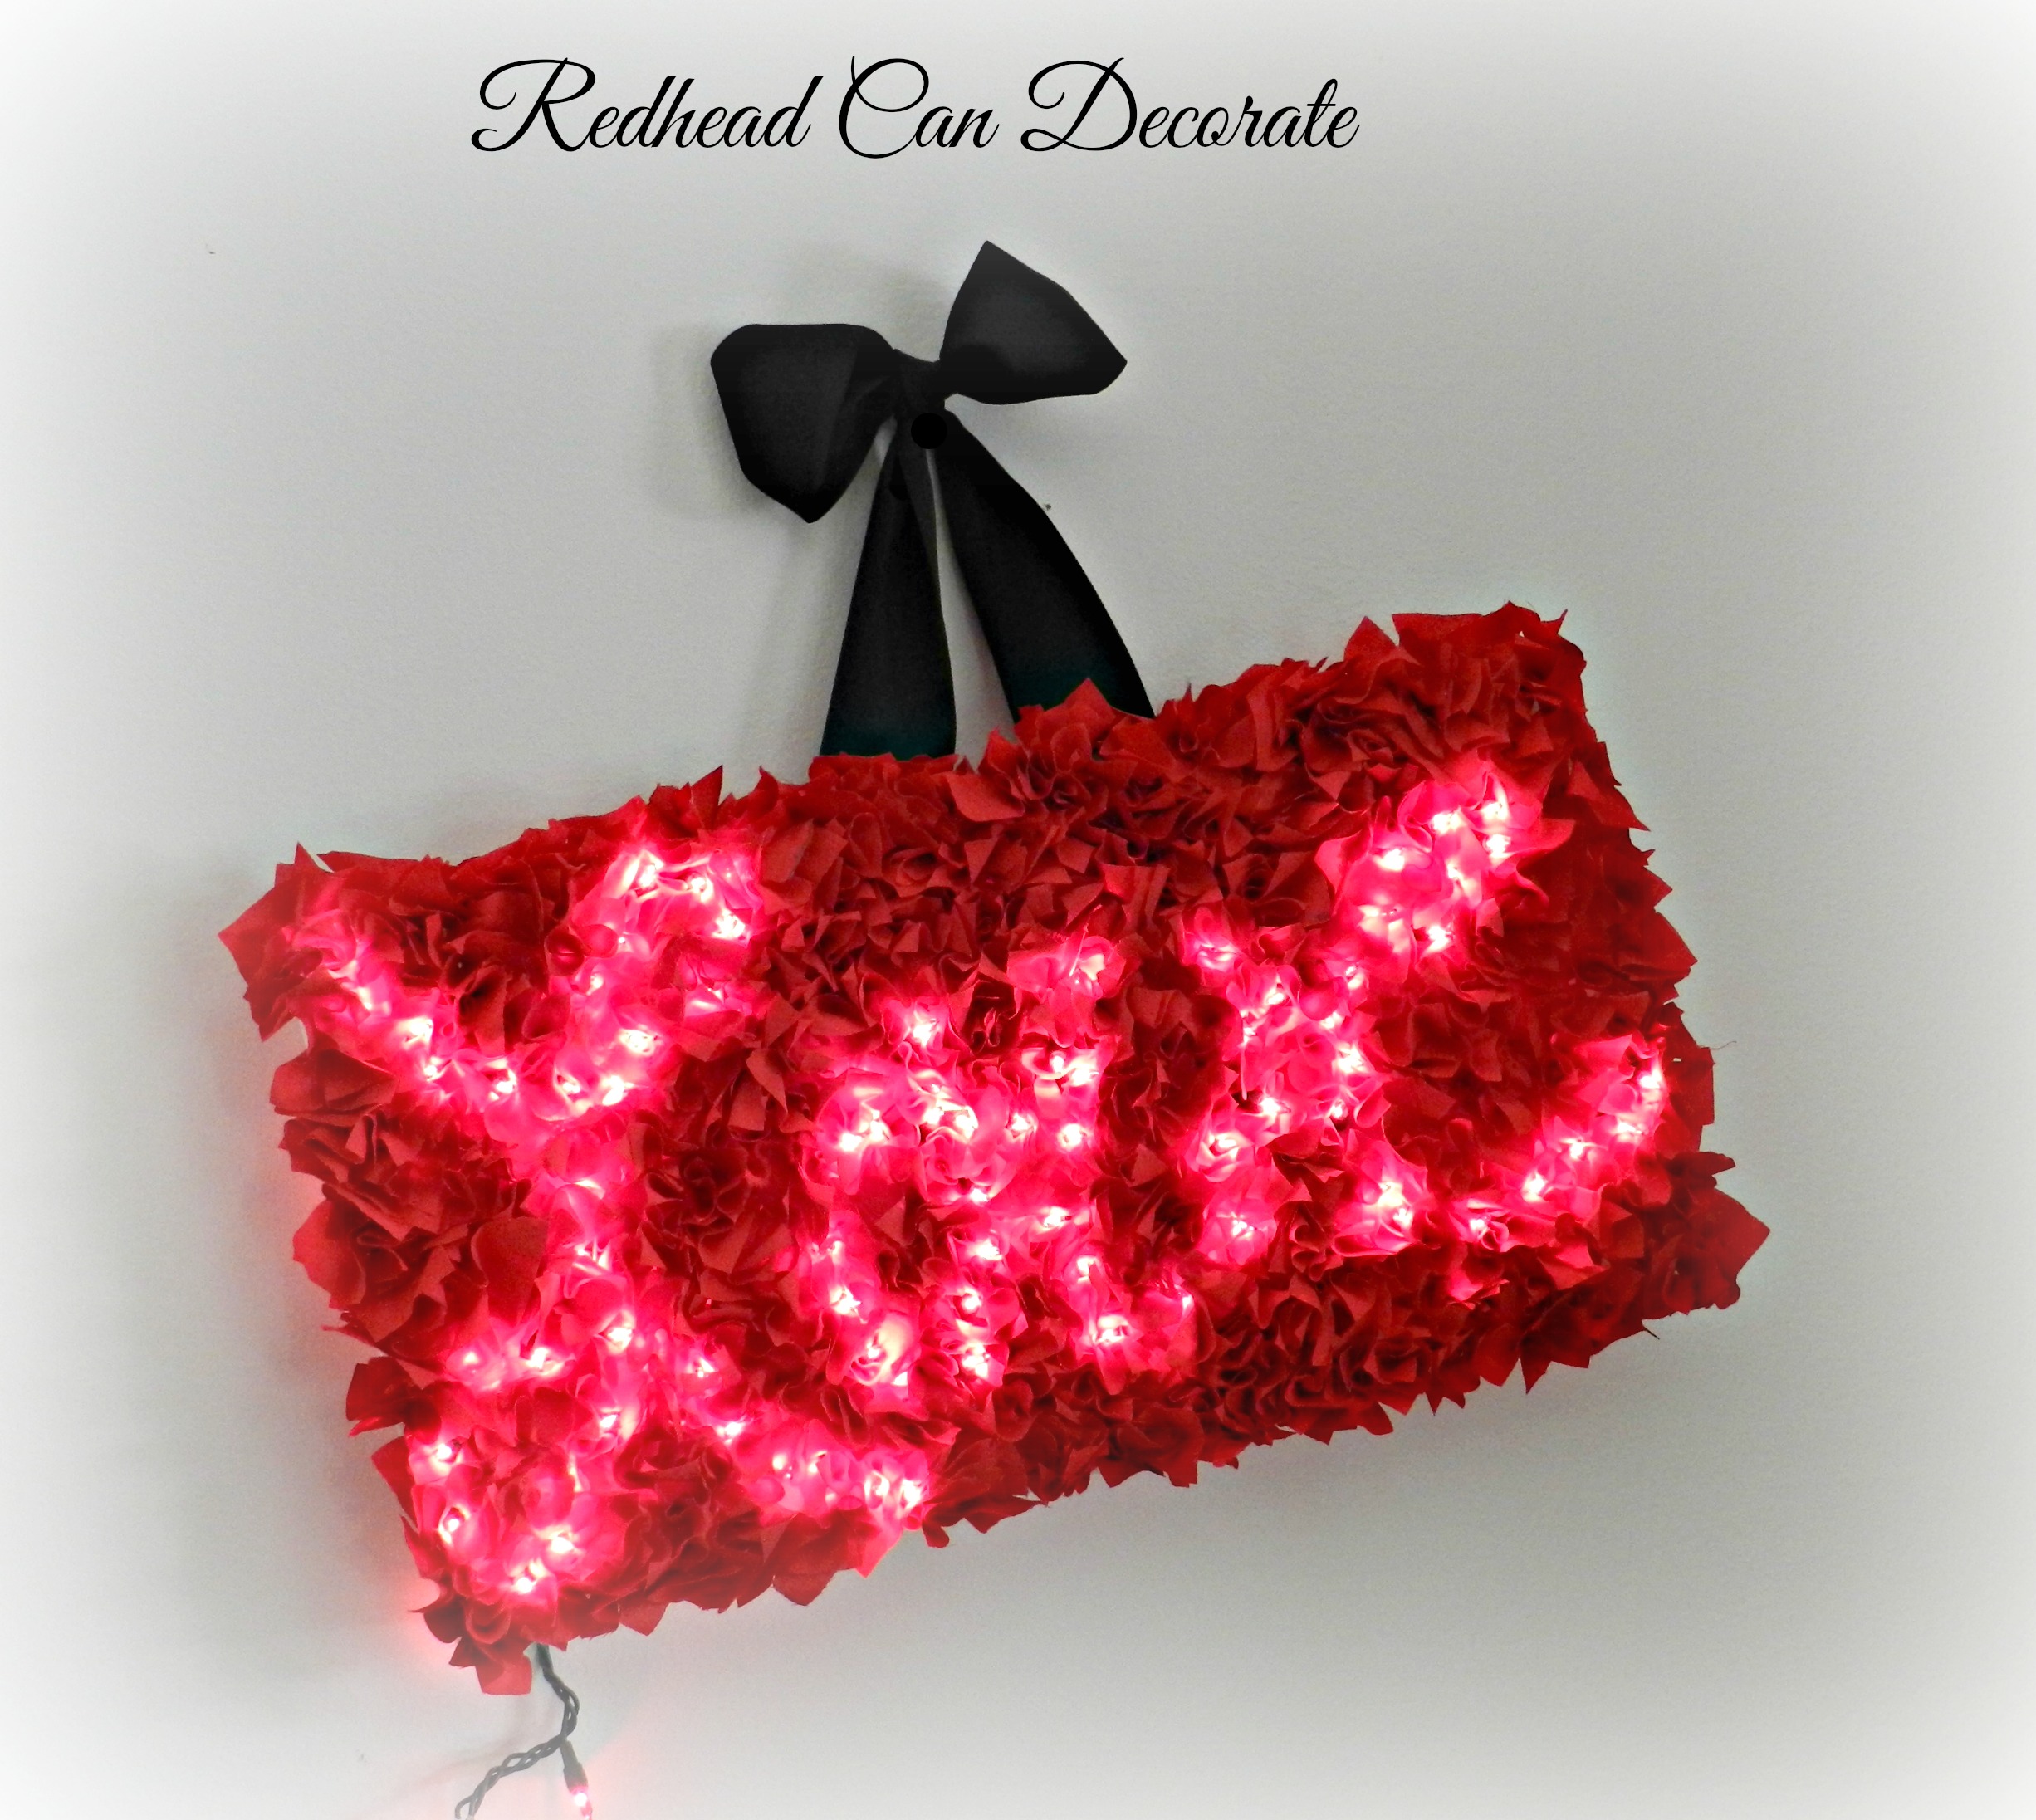
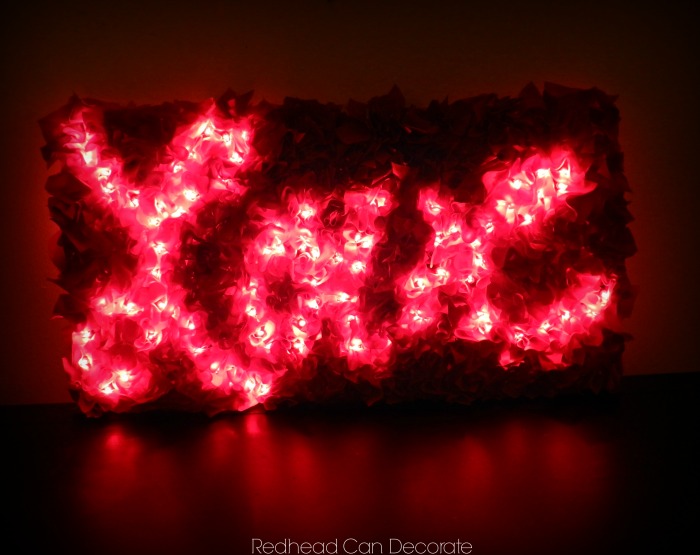
I hope you saw them. You have to kind of use your imagination a little, but they’re there.
This “Electric Love Sign” idea didn’t come together all at once.
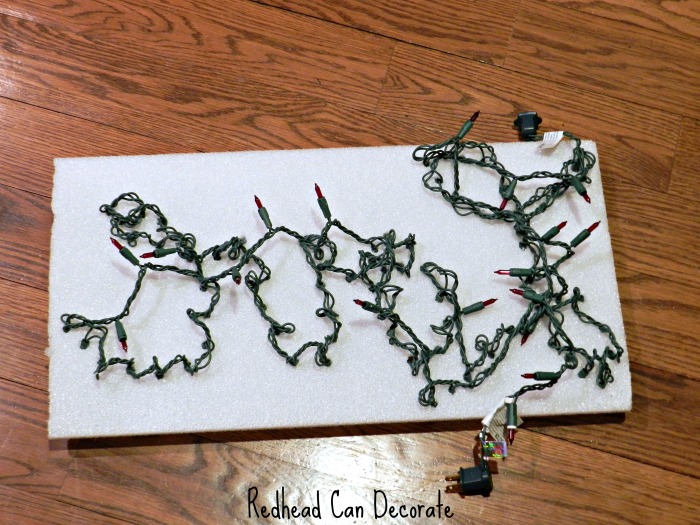
At first, I envisioned a simple sign with the word “Love” written out with the red Christmas lights. So, I wrote the word “Love” out on the foam with permanent marker. I wasn’t concerned about the lines showing because I planned on spray painting it. (We never got that far.)
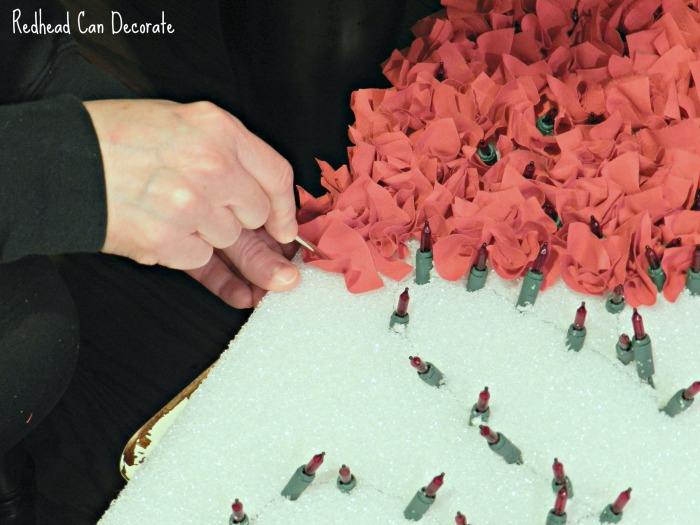
Second, I used scissors to punch in holes to put the lights through. This was fairly simple, but did take a little time. By the way, the foam I used was originally 1′ x 3′, and I cut it down a couple inches to fit the word “Love” using the Floracraft® Make It: Fun® Foam StyroCutter Plus.
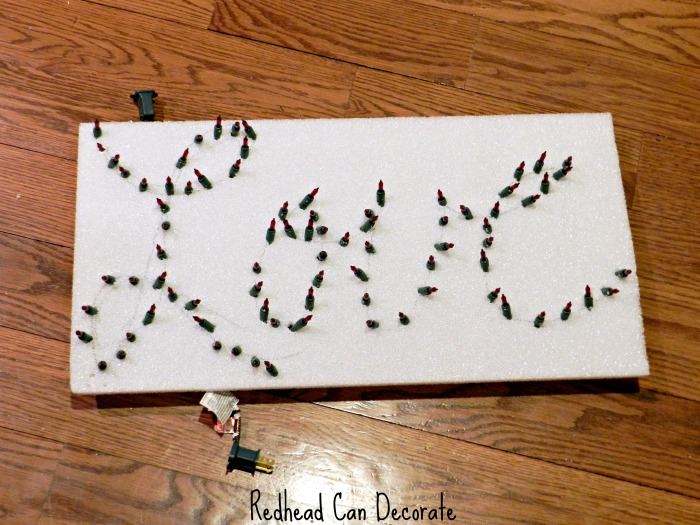
When I lit it up, we all looked at it to see if it in fact looked like the word “Love”. It did.
Then, that’s when the new idea struck. What if I pushed in fabric squares to fill in the sign, rather than spray painting it? It sounded like a much nicer idea. I also remembered my Mom doing this in the 70’s with a Christmas wreath, so I knew it worked.
So, I had to locate some fabric in the house because I really didn’t want to go out in the snow. Luckily, my creative daughters had extra red fabric from a costume they created.
I got busy and cut a million squares (1 in. x 1 in.) and stuck them in the foam around the lights with a nut picker (you know, those things you use on a cracked walnut to get it out of it’s shell). The foam held up really well, and I was very happy with the results. Especially since the fabric looked like mini roses.
When I finished, I lit it up and hoped for the best. I loved it immediately because some of the red fabric looked bright red, and other areas looked deep red. Now it was really looking like real roses. How cool.
I took it a step further and glued black ribbon onto the foam in the back and tied a bow to hang it.
I also rested it on my foyer table so folks can see it when they come in. It looks cute next to our family photo, and I’ll add a bowl of chocolate kisses soon.
If you would like to try my “Light Up Love Sign”, please visit makeitfuncrafts.com. It’s there you will find tons of inspiration and you’ll also be able to find the size/shape foam you are looking for to use for your project.
Stay tuned, next Friday I have another Valentine’s Day project using Floracraft® Fun® Foam Sheets that’s even easier. I’ll also be using this “Electric Love Sign” for a “Romantic Valentine’s Day Bedroom” I’m designing. That’s all coming up in February.


This is really cute and I remember doing that same fabric bunch thing back in the day….
My only critique is that I could not read it…..Maybe it is just me, but if I didn’t know the word was LOVE I would not have made it out on my own. I may do this, but will make the E a bit plumper so that it is easier to read. I also think I will use a block upper case font…. It is a really cute idea…
Thanks for the critique, Kris! You are spot on. I used my handwriting as the text, lol.
This is the best, Julie! I love the mix of lights and fabric! Thank you.
Thank you, Sharon!
love your tutorial makes this easy for me to do and I love that because sometimes have trouble doing projects following from inspiration monday have a great day
Me too, Lorraine!