|
My “rug” is finally finished!
You’re thinking I painted a rug aren’t you?
Well…I guess I did, but not really.I originally had visions of doing a large area on my kitchen floor,
but I wanted to test it out first (my husband is very protective of our wood floors). So…I decided to try it in our 1/2 bath that is located off of our kitchen. It’s a little dark in there and doesn’t get much sun, so I knew this would brighten it up. I could always cover up the rug with a rug
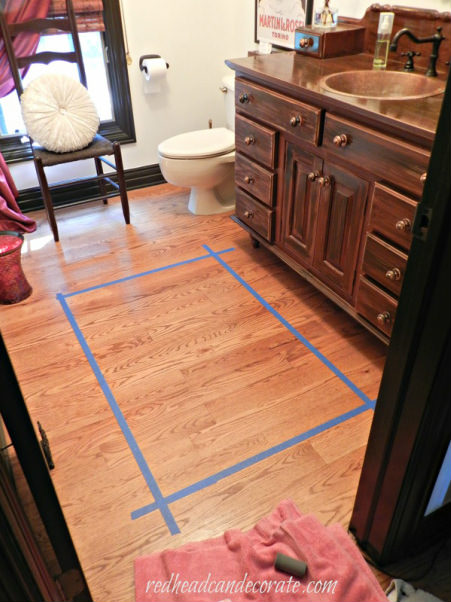
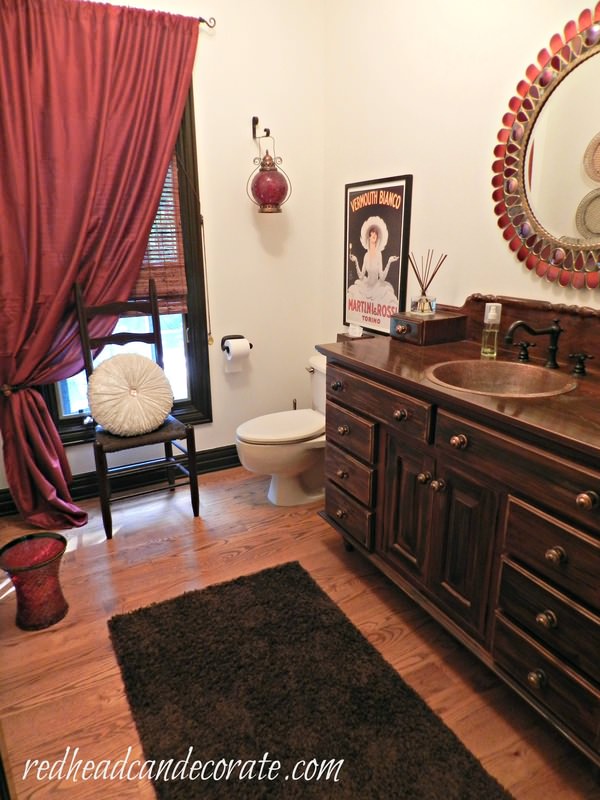
Here is the room before: 
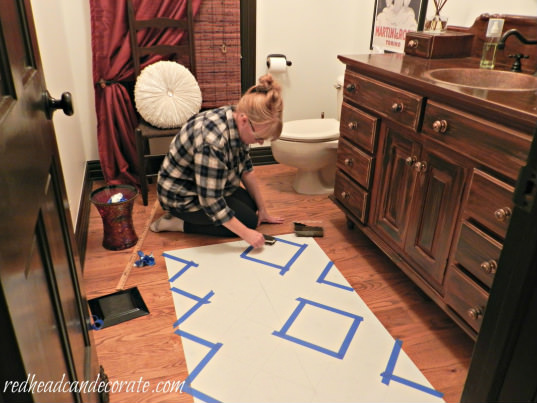
I hate measuring, so I traced the existing rug.
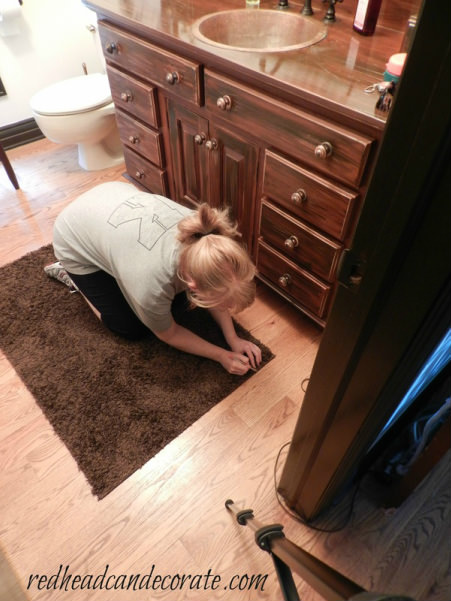
Then I taped the perimeter and really pressed hard with the tape so paint could not escape.
Now you will know why I complain of back pain.
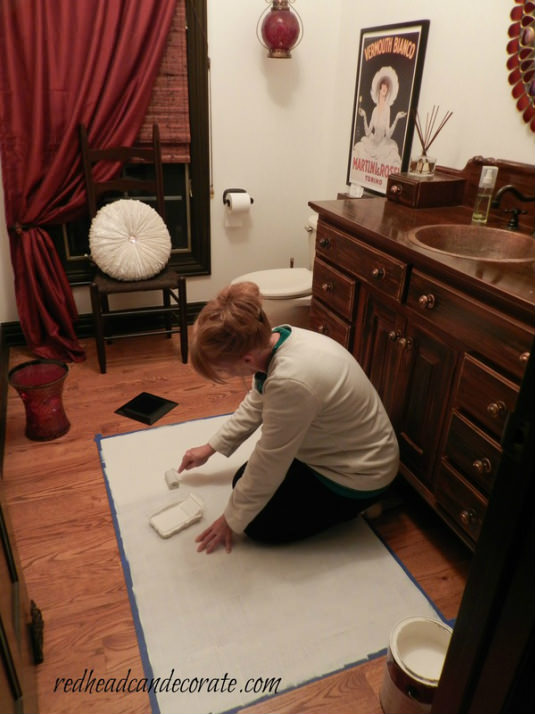
I put 2 coats of white and let it dry over night. I used Martha Stuart’s stencil kit roller and pan from Michael’s.
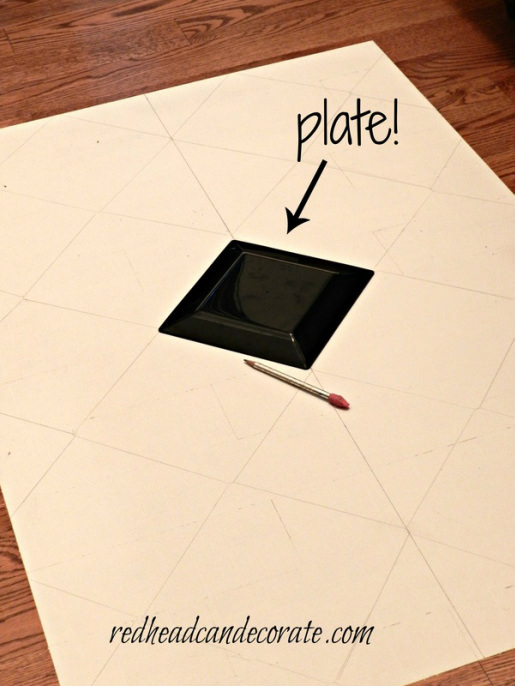
This was the part where I had to measure a little. I measured 1/2 way and drew the line all the way down.Then I placed 2 plates on both sides of that 1/2 way line and used the paint edge as my guide.I was able to fit 2 full plates and 1/2 plates on the end. I only used the plates to trace…no measuring here.
You probably have guessed by now that I am doing a
checker board pattern. I chose dark brown & off white not only because I had the paint left over, but I thought it would flow better than
black & white in this room. It’s actually the same colors that are on the walls and moldings.Next, I labeled the squares that would be dark brown with a B.You would be surprised how fast you can become disoriented while down there and paint the wrong square.
Ok…Here we go.
Ready for the final pictures?I love how it turned out.

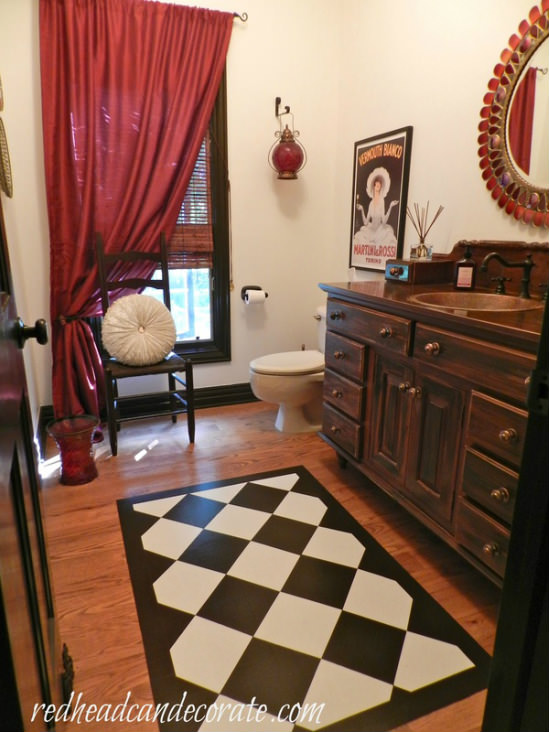
My husband loves it and my girls can’t wait to step on it!
(I’m afraid to still-too early!!!) 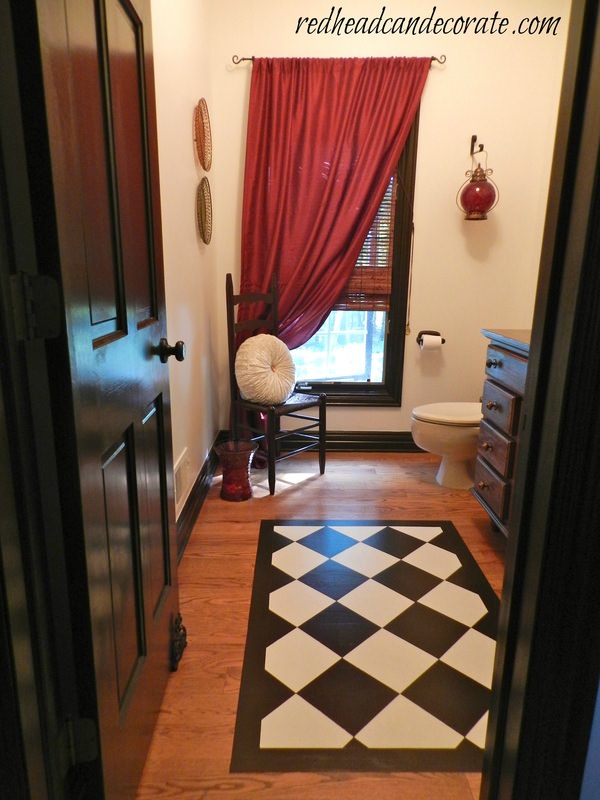
I used 2 coats on everything, including 2 top coats of Pro Finisher Water-Base Polyurethane.
I also got away with out measuring the trim. I traced that with a blind valance.
So, I guess the question is…will I try this in the kitchen?
Let’s just say I am satisfied for now, but you never know what this redhead will do.
Thanks for stopping by 🙂
|


Wow, great addition to an already beautiful bathroom! I’m jealous! I’m going to search for the kitchen post next just in case you did decide on something.
Love, love, love the floor. Thinking of doing something in our foyer as a rug never stays still and I hate to shake a rug. Will have to find a pattern to go with. I also love the bathroom mirror. What is the story on that beautiful piece?
Thanks Bonnie-the mirror is from Pier 1.
This is just so very cool! I love the way you did it and the way you did it! LOL You little genius , you! I absolutely love this and the checkerboards are of course very dear to my heart (very obvious if you have ever looked at my funky furniture blog.) I will be coming back and going through your site to see what other great ideas you have! Great job! ~ Carolyn
You cracked me up, Carolyn! That is my sisters name, too! 🙂
First of all I love your blog….Your house is perfect and beautiful….You are an inspiration….I was wondering…I know of all the things…but where did you rescue the Dude from? My son and his wife had a yellow lab…named the Dude….They gave him up because the wife wanted perfection from the dog… They live in homewood Il……My grandaughter just loved the Dude…and my god..Where else would you find a dog named Dude..and a yellow lab….If you could give me a little info..God bless you and thanks for your attention…meem
Awww! We rescued Dude from the Michigan Rescue League. His name was originally, Gunner. Here’s his story: http://redheadcandecorate.com/4/post/2013/07/dudes-apple-tree.html
Thanks for sharing. Love your painted floor! Would love to do this on our entranceway. But our dogs scratch the hardwood as they run & rumble. Has your dog’s nails scratched the paint?
I painted a floor cloth one backside of some linoleum flooring and when I finished put some rug grip on the back. It was a lot of fun to do. Thanks for sharing.
Pretty cool Julie. The design is so sharp; I’m afraid somehow I’d manage to have paint seep under the tape. I really would like to try this on my cement patio (under the table). Hard to say if I’ll ever get brave enough.
Carol, My husband taught me to paint “away” from the tape, not towards it. That doesn’t seem like it makes sense right now to me, but it works! 🙂
Simply awesome
Thank you, Barbara! So happy you like it. ~ Julie
Hw did you finally add the border?
Hi Linda, I mention that at the end. Let me know if you can’t find it. Thanks! ~ Julie
Everything you design is breathtaking. I have a living-room we turned into a study/library/piano room with built-in bookshelves. The reason, because this is a long 20 or 25X13 room that I just do not know what to do with. Because your design ideas and creativity are so beautiful, I will talk to my hubby tonight to see can we put it in the budget to seek your help/advice.
How long did the painted rug stand up? I noticed that you put water-based polyurethane over wall paint. I used wall paint and acrylic craft paints. Haven’t sealed yet. Thank you!
It’s still standing up. Couple scratches but it still looks great.
i am going to do something similar at the front on 20 year old wood floors. Did you sand the floor first to remove the “varnish”? Or Can I just paint right on the wood? Thanks!
I didn’t sand but it was very dry old wood. Sand it a little it won’t hurt. Also use paint w primer in it or paint on primer first.