Your not going to believe what we did. Notice I say “we” when in fact it was me. I can admit that now because it worked. Let me explain. We spent most of our afternoon at Home Depot last Sat. picking out the counter, and sink. I was in shock because I actually joked about painting the faucet with my husband that morning. So, on Sunday morning I decided to try it on our roman tub faucet that we hardly use. I figured we are getting another faucet anyhow, so I may as well give it a shot.
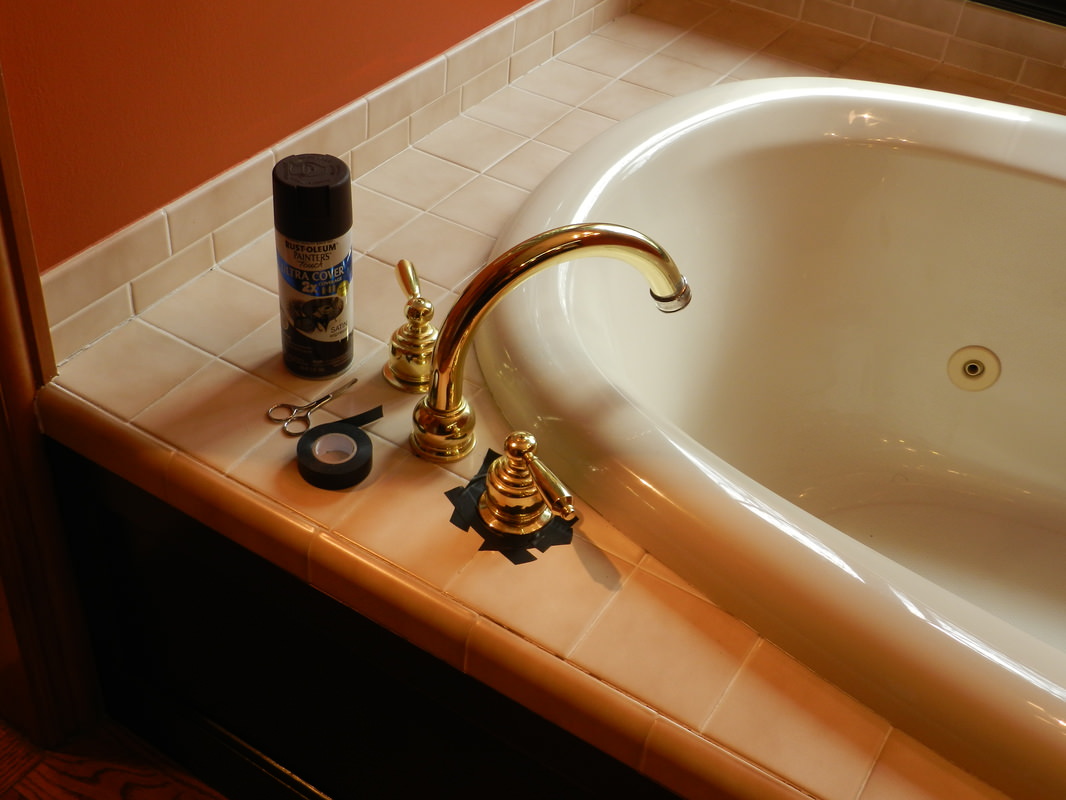
First, I taped it with the only tape I had besides scotch-electrical black. Rick said, “That will leave a residue!” Well, I did it anyways. 🙂 I had the spray paint from an outdoor wicker chair painting project my Dad does for me every year. It’s very close to oil rubbed bronze which I know I want against the bone.
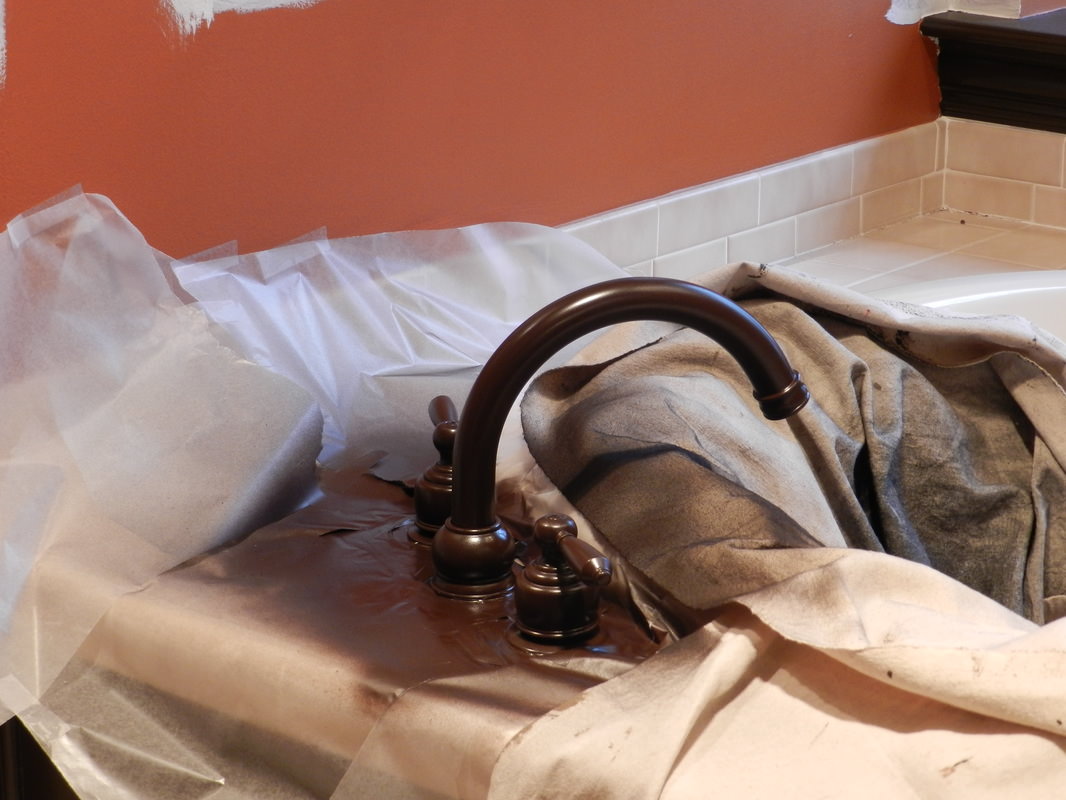
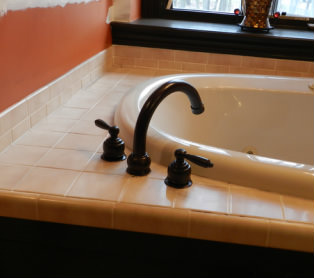
Next, I used wax paper and got some drop cloths to cover up the tub. I wasn’t worried about the walls because those are getting painted. It took a few minutes to tape, but the electrical tape worked really well to be honest. I did about 3 light coats and let it dry while. I just saved us $550. The faucet we found and the labor would have cost that. Unbelievable. There were a few areas that needed some touch-ups with a tiny brush. I sprayed a bunch of spray paint on a plate to make a puddle and touched it up. We still have work to do on the grout, but man I love it!
UPDATE:
Here is the paint we used and my affiliate link to Amazon: SPRAY PAINT


I am so glad to see that you did this!! I have the brass everywhere in My house. I sprayed our 1/2 bath towels bar and t.p. holder with rubbed bronze. Just love it!! Besides doing the faucet I will be doing the light fixture.
Thanks for your post!
That’s awesome, Donna! Good luck! ~Julie
Thank you so much for this blog. I been wanting to get the black faucets in my kitchen and baths, but just did not have it in the budget to replace them all. My husband will love you. You just saved us a lot!
Again, as always, I love, love, love what you did. Thanks for sharing.
Wonderful……………………….you’re BRILLIANT !
i love it but how does it hold up under use?
Hi Nancy! It was never used, but here’s what we ended up doing to it all…we took it all out! https://redheadcandecorate.com/2018/05/master-bathroom-renovation-the-full-reveal/