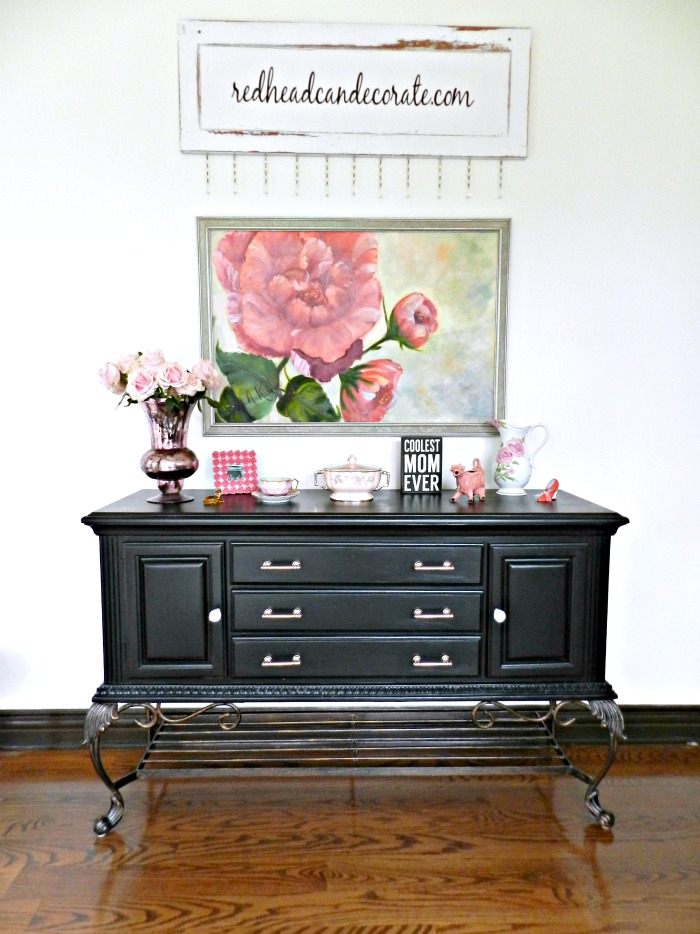
I’ve been patiently waiting for this day to arrive. There is no better day than Valentine’s Day to share this beautiful “Black Credenza Makeover”. Even though it’s black, it is SCREAMING Happy Valentine’s Day, don’t you think? It must be all of that pink beside it. So, Happy Valentine’s Day!
A couple weeks ago I shared my “Pink & Black Chair Makeover”. Now, it’s time for this pretty credenza with all the PINK trinkets on it. You’re thinking, “What’s up with all the pink, Julie?” Well, I’ll tell you. I’m a little bit obsessed with pink lately and I’ve started a “pink collection” that you’ll get to see on top of the credenza in this reveal. I’ve also heard through the pink-line that pink is this year’s “accent color”. I don’t really pay much attention to what colors are trending, but for some reason PINK has stolen my heart lately and I’m going with it. Stay tuned for the full room reveal when I put everything together in my [pink] office makeover this Friday.
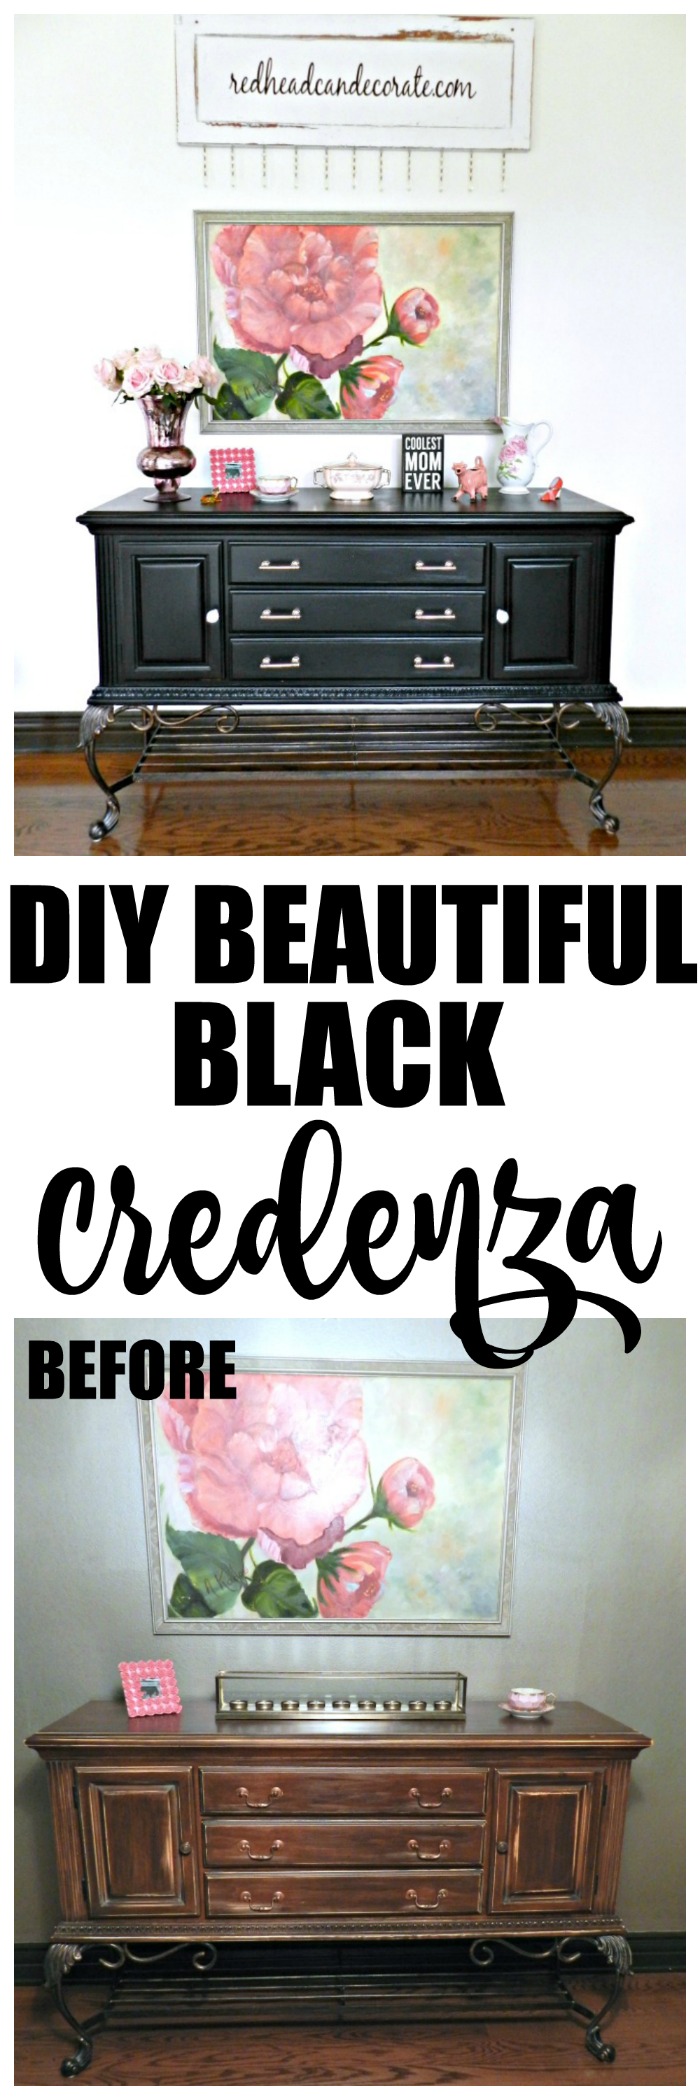
Until then…here’s the “Black Credenza Makeover” that sits across from my desk…
Going waaaaay back to BB (Before Blogging), you’ll see what my now office looked like as a dining room with the crendeza in it’s original form. I grew tired of dusting the glasses on it, so I unscrewed that thing and screwed it onto some old cabinets in our garage. It makes an amazing tool bench now.
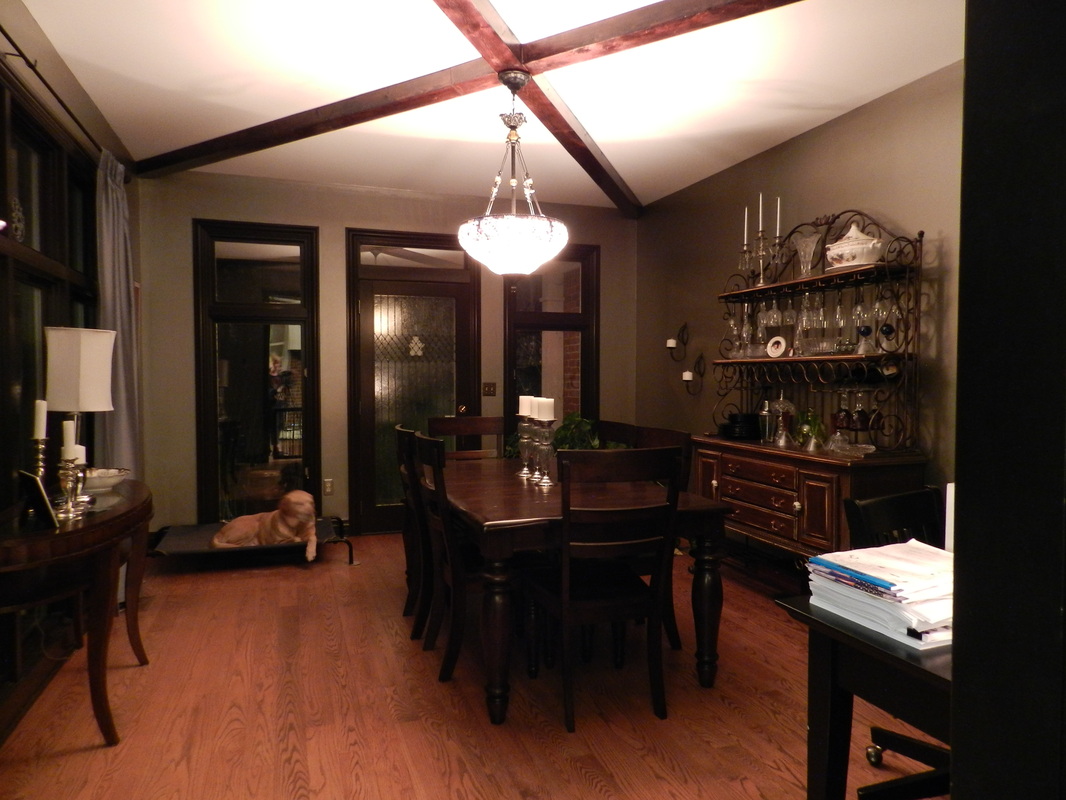

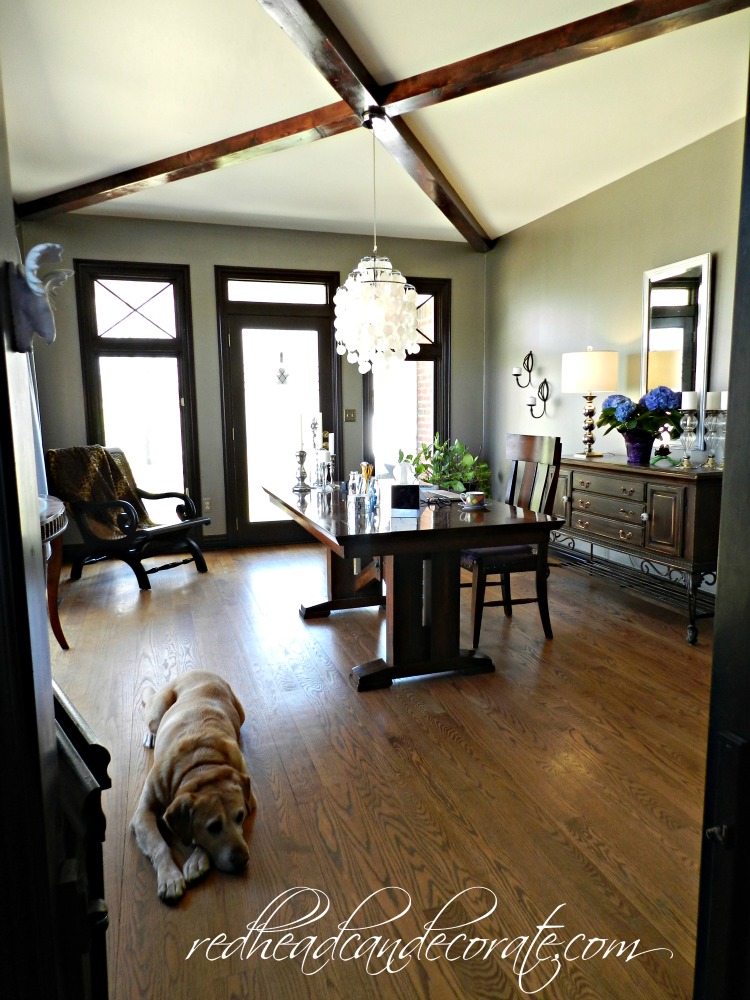
I love how it opened up the room, but the bottom part turned side-board, or credenza, just disappeared back there behind my desk. I tried changing the knobs, and distressing it to help it look better, but it still just said DRAB to me.
So, before I painted it back, I tried styling it in different ways and it just seemed to get worse!
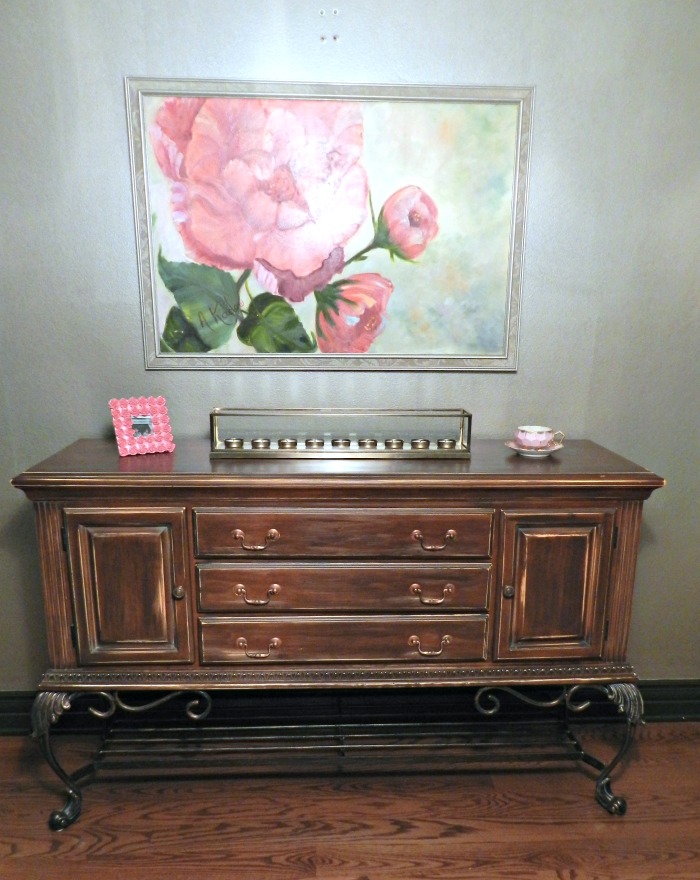
I knew then 2 things. 1. We needed to freshen up our walls from that nasty metallic grey. 2. I needed to paint the credenza.
My husband took care of painting the walls, and I painted the credenza. TEAM WORK made it easy. (See products used below.)
Guess you could say we put a lot of LOVE into it all 😆 .
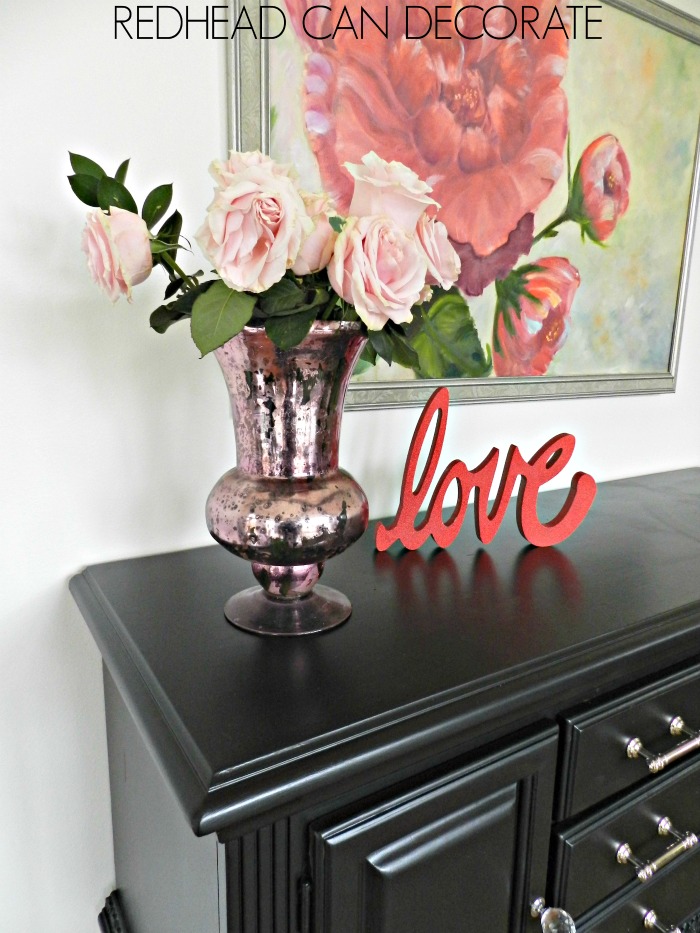
Then I decorated it with my “pink” collection I told you about earlier, and my special peony painting I inherited from my Mom. Just look how the pink & black pop against the bright white.
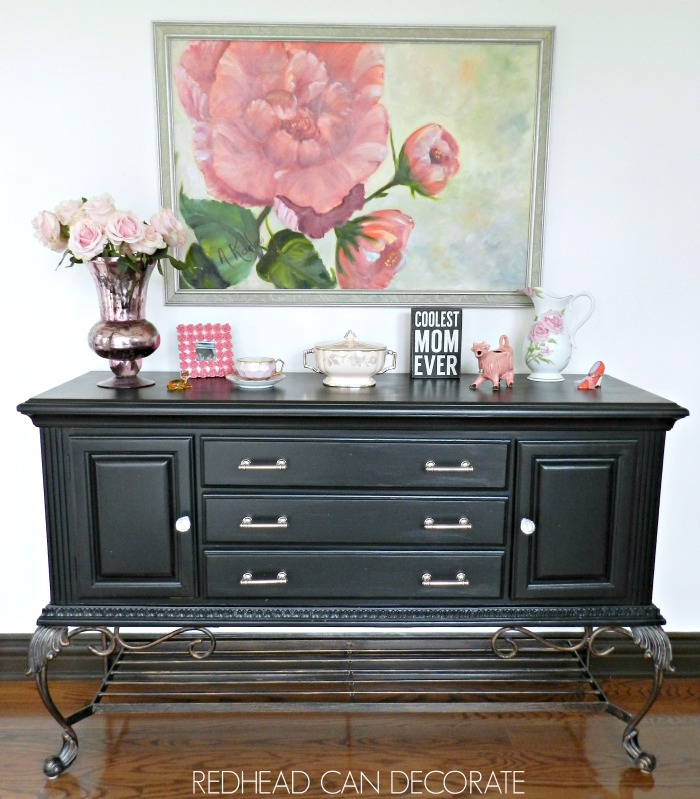
You may have noticed I switched out the hardware, too.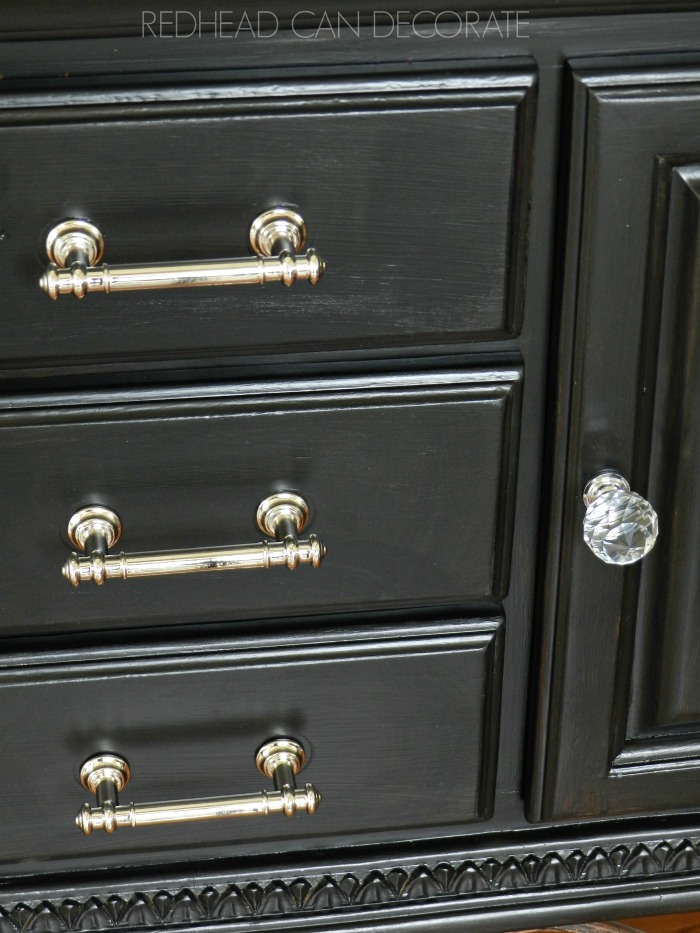
I was going for a little modern glam with those, but didn’t want to be too trendy.

So, then we added my repurposed blog sign on top of the painting. You can read all about my blog sign that was repurposed from an armoire cabinet door HERE.
*** Some of the links in this post may contain affiliate links for your convenience. Read full disclosure policy here.
Shop this look here:
Before I list the products used & give a quick tutorial on how to paint the credenza, the first part to the full “Pink Office Makeover” is located here in case you missed it:
Don’t forget to pin for later!
Products Used to Paint Credenza
paint brush (don’t skimp here)
Painting Instructions:
Remove all hardware and lightly sand the credenza in all areas after you place a drop cloth under it. Vacuum the dust off with a brush attachment and then go over it again with cheese cloth or a dusting cloth. Paint it with the brush, (I kept drawers in the unit while I painted). I used the roller on the top only. 3 coats should do it, and make sure you let it dry in between coats for about an hour. Install your new hardware and you are finished.


Very nice work, love it all, Mom and Dad in NY.
What a beautiful difference
Love what you did with the credenza it looks awesome!!!!
Thank you, Aina! I really like the change, too! ~ Julie
Looks great! You did a wonderful job with the painting. What type of paint did you use?
Hi Norma, The full tutorial & product list is at the bottom of my post. Thank you!~ Julie
My favorite item is the peonies picture. I have been a fan of peonies since I was a little girl.
Your credenza makeover is amazing! It is so beautiful!
Thank you so much, Karenann! ~ Julie
I really enjoy your blog Julie and I look forward to seeing your DIY projects. I think your credenza now looks amazing.
That made my day, Mary! Thank you! ~ Julie
So beautiful!! Great job!
Thank you, Cheryl! ~ Julie
You did an amazing job!!! I am so glad I recently found your blog. You are giving me great ideas & inspiration ;)) Thank you ;))
Oooo…I love to hear that, Stephanie! Thank you! ~ Julie
what a gorgeous piece of furniture! great job julie!
Hi Penny! Thank you so much! So happy you like it. ~ Julie
That is absolutely Gorgeous. So rich and powerful looking.
Great job
Thank you, Colleen! I like that word powerful, lol! ~ Julie
Love the base of the credensa. The peony picture is perfect here.
Love the way the white walls create sharp contrast with the black credenza. Huge difference from brown and gray. Are they real roses in the pink mercury glass vase? So beautiful.
Thank you,Ann! Yes they are real and are from Kroger! ?
Do you mind sharing what kind of paint you used. I am having a hard time with brush strokes.
The supply list is at the bottom, Sue. Remember to use a high quality brush and roller for the top. My favs are in the post.
Hey Julie,
Just love the black with pink accents! They pop when put together. Good job!
Thank you, Beth! ?
Love, Love this make-over!
That is amazing you done a beautiful job.
Wow, turned out fabulous ? Really liked the original look but “hubbs” gained on this make over so that’s a good thing! Love it thanks for sharing Julie
Ha ha! Yes, the hubbs would have been happy to just let it be, lol. Thanks, Darlene! Have a great night! ~ Julie
Julie:
I LOVE everything you did! Such a special space. I really adore all of the pops of pink.
LOVE this refinish, and I have a piece I want to do like it (with different hardware).
Just curious, did you consider painting the INSIDE pink? If not, why not? Asking because I’m considering, but want to make sure I’ve thought all cons through!
I absolutely love what you did and I have a similar (but not quite as nice!) piece i want to update. I was about to order the same paint you used but saw it was only 4 oz. How many cans did you need for 3 coats?
Great question, Kathy. I used 1 can, but to be safe I would get 2 depending on the size of your piece, plus you will have it for touch ups or for other projects. I will add another larger size to the article if you want to go that route! Good luck, let me know how it goes! ~ Julie
WAIT! I just checked & the link I supplied is for 8 ounces. That should be plenty!
Beautiful!
Thank you, Christine!
Thanks for the inspiration! Really nicely done!
[…] Earlier this year I had enough of the grey, and we painted the walls crisp white (like the rest of the house). It really is shocking how much white opens up any space. You may also notice that I painted the credenza behind my desk black. You can read my full tutorial including what paint I used here: Black Painted Credenza. […]
Great post!
Love this blog!
[…] Painted Black Credenza […]
[…] may recall the black credenza I painted a couple years ago. She still looks so pretty black, and I really get a kick out of complimenting […]
[…] you look behind you, you’ll find my Thrift Store Silver Platter Wall, and an old credenza I dismantled and painted black. “Man-boy” is our middle child, I mean kitty, and he is […]
[…] BLACK CREDENZA […]