If you’re looking to learn how to strip wallpaper, you have come to the right place. We are making over our laundry room (slash mud room), and removing the wallpaper is the first task on our list. Stay tuned for several parts to this “Laundry Room Makeover” series, this one being first. I have many DIY decorating ideas I can’t wait to show you!
So…I had the wallpaper done about 7 years ago and I’ve hated it ever since  . It was just a bad choice on my part and I have no idea what I was thinking. I think we paid a little over $300 to have it installed and the guy did a perfect job, but nothing was going to take away the busy tacky design.
Below you will find a full tutorial disclosing the steps and products we used to take this wallpaper down. Products are clickable links if you want more information on those.
Stripping wallpaper can seem like a daunting task. However, with careful preparation and some basic supplies, you can tackle even the most intimidating stripping project.
Here’s what we started with. Yuck. 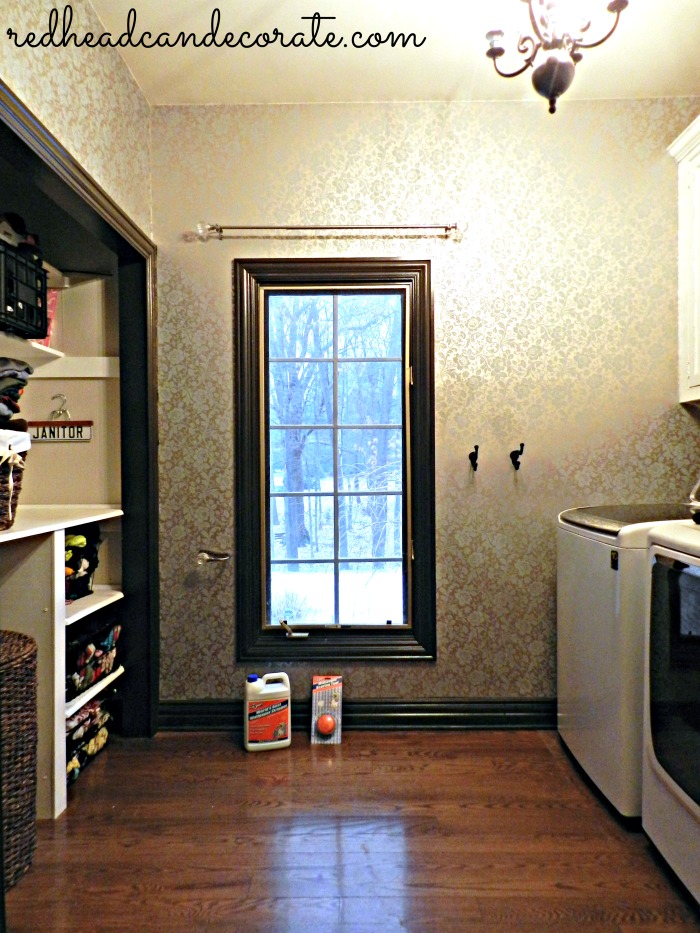
Even if you’re not interested in removing wallpaper, I think the process still might might be interesting to watch. Here’s our full wallpaper stripping tutorial, plus an extra hint on what’s to come next!
*** Some of the links in this post may contain affiliate links for your convenience. Read full disclosure policy here.

You will need (click products for more information):
1. drop cloths
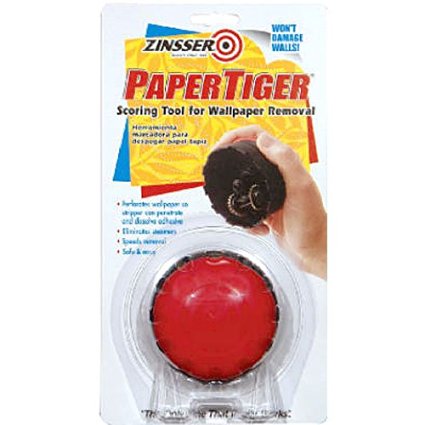
2. wallpaper scorer
3. large sponge
4. wallpaper stripper (we used 1 )
5. bucket
6. disposable gloves
7. drywall 4 inch patching knife (you may not need)
8. joint compound (for patching)
9. sand paper
9. primer
Begin by laying the drop cloths down on the floor in front of the wall with the wallpaper you want to strip. Be sure the drop cloth covers the floor right up to the the molding on the floor adjacent to the wall you are stripping so the floor is protected.
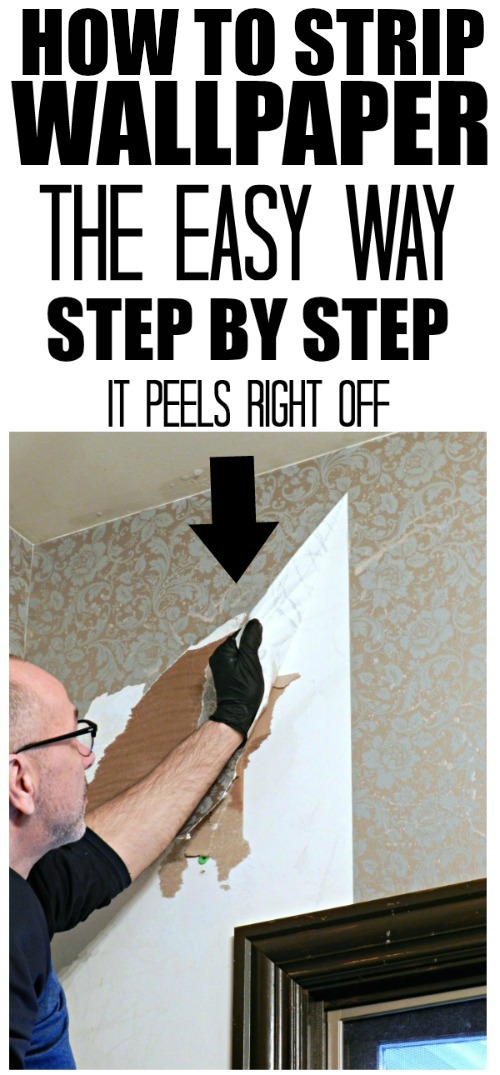
Next, use the wallpaper scorer to score the wallpaper on the wall. Work in circular motions, from top to bottom, making sure you score the entire wall evenly.
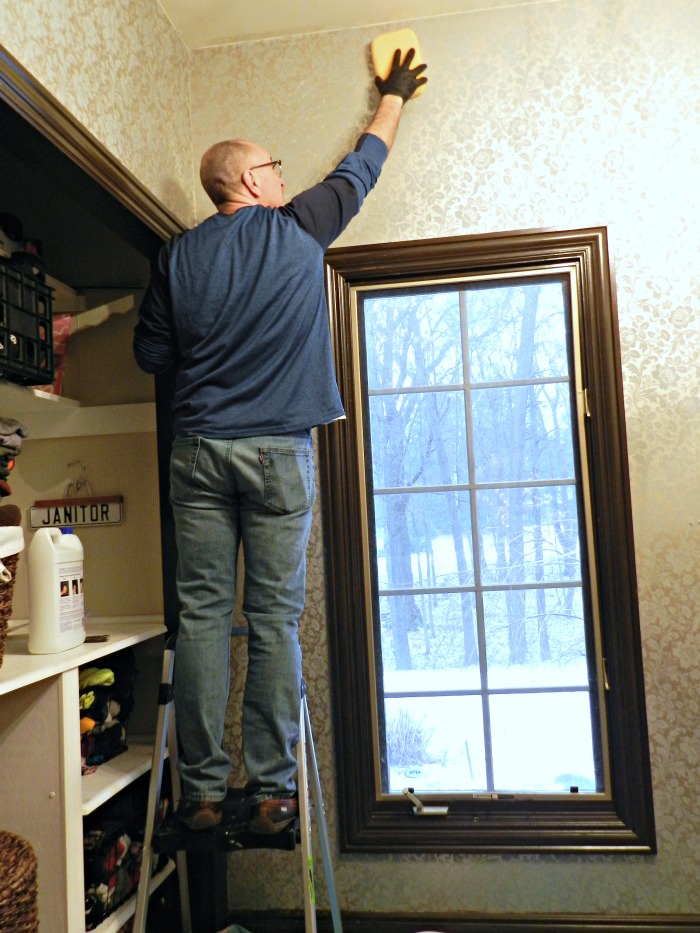
When finished, pour the wallpaper stripper into the bucket and using the large sponge, apply the stripper directly to the wallpaper. Wear disposable gloves to cover your hands during this step. We used a step stool, but you may need a larger step ladder.
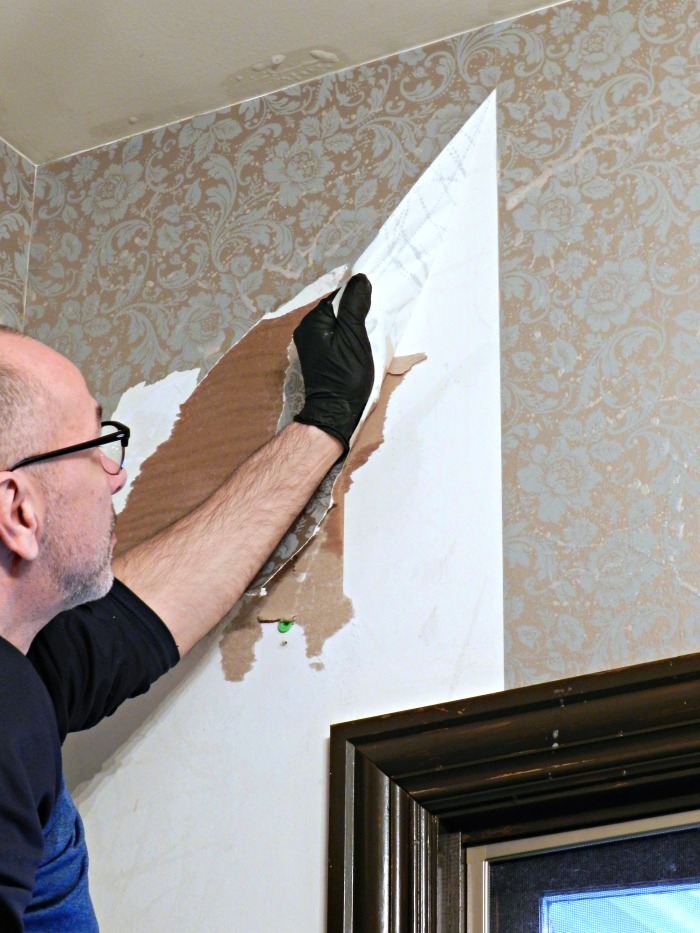
We waited approximately 15 minutes and reapplied the stripper a second time to ensure the stripper saturates the paper completely. Wait 5 minutes and the paper should peel right off the wall.
Stubborn areas may require additional applications of the stripper. You may also need a drywall 4 inch patching knife to scrape hard to remove areas.
Once the paper has been removed, rinse the bucket and fill with hot water. With a clean sponge, use the hot water to wipe down the walls removing any residual wallpaper glue.
Depending on how well the walls were prepped when the wallpaper was originally applied, you may have areas where the drywall comes off with the wallpaper. These areas will need to be patched with joint compound.
***IMPORTANT***Before patching, you will need to prime the wall(s) with a good quality stain kill primer. This step will seal your wall(s) and ensure any residual glue is neutralized so you can prep the surface for patching and painting.
After you prime the walls, you will need to patch any problem areas 2-3 times and the sand smooth. Re-prime only the patched areas and you are ready to apply two coats of your favorite paint. This last photo was taken before we patched, but you get the idea.

Total ROLAIDS…I mean relief 🙂
Stay tuned for the remaining parts to our cool “Laundry Room Makeover” series where we will be showing you not only what we decided to do with the wall where the window is, but I have many more decorative changes. It will be very exciting to see the before & after photos.


Not easy, have done it a few times, looks like Rickie has it under control, Love, Dad in NY
You guys did great! The last time I removed wallpaper from my walls, I had to have the walls repaired and skim coated. Even the steamer I rented, which also shocked me (yup, really) had a tough time loosening this wallpaper!!! Turns out the “professional” wallpaper installer I hired did NOT “professionally” prep the walls before he hung the wallpaper!!
That totally sucks, Kaycee!! I can’t wait show you what we did next! ?
The last time I stripped wallpaper, I stripped the wall too!
Hi Dianne! Yes that is a very common problem. I hope this tutorial will help with that. We had an average amount of drywall repair.
Can’t wait to see the next master piece
Thanks, Cindy! I can’t wait to see it, too! ?
Whay a fabulous and honest tutorial!! What memories I have had removing walllaper!!! Yes, I adored wallpaper at one time at all three homes we have had, so yes we have had to put it up & remove it many times. My husband jokes that he really loved me even when we installed wallpaper in our tiny master bathroom & then removed it too, without killing one another. . Loved the idea of it but removal ” sucked swamp water”. At our third home, I had to pay a professional drywall installer to redo my bathroom because after careful removal,, all of the walls had to be done!! Oh well, at our last & final house, we have taken an oath not to have wallpaper again, ever!! We can’t wait to see what happpens next???
Hi Edith! What a cute story ?. Thanks so much for sharing it. I’ll give you a hint. It involves wood! Can’t wait to share it. Have a great weekend! -Julie
We have natural stained woodwork and molding and it looks like you have something similar. Did any of the wood get damaged? That’s what I’m afraid of if I try to remove wallpaper myself.
No, our woodwork was not damaged. Wipe it down with wet cloth after. We got it on our hardwood floors and it just wipes right off.
You have the biggest job behind you now…good job
That’s for sure! Thanks, BJ!
You may want to caution people on one more thing – when using the paper tiger to score the paper, if too much pressure is applied, it may leave trails of little pindots where it penetrated the wall, thus making skim coating necessary to smooth out the wall. As retired painters, we encountered this problem several times.
Can’t wait to see the finished laundry room!
Very very good point, Karen! Thank you for bringing this up.
You never make bad choices when it comes to designs. However, I know how it feels when you do something and don’t feel good about it afterward. I like it a lot, but you are the one that have to live with it. LOL! I cannot wait to see the new design you do, I know it will be amasing!!!
Thank you, Ivory!!! I hope it turns out!! ?
I know what you mean ROLAIDS. I used to live in an old farmhouse; wallpaper in every room (ceilings too). Little by little, room by room we made changes. It’s a lot of work but well worth it. I’m looking forward to your next posts.
I bet your house is gorgeous, Carol! Enjoy the rest of your Sunday…I’m relaxing in Sunny FL today which is very rare! -Julie
Waiting for the Laundry Room makeover, It will be GREAT, I am sure, love, Dad in NY
Well Julie, I actually liked that wallpaper!! But I understand when you are not happy with something in your house, and you want to change it, how much better it will be in the end. Thanks for the tutorial and looking forward to the next post!
Hi Teri! Well thank you my friend! Maybe it wasnt as bad as I thought! ?
how can I remove wallpaper if it was put on dry wall that wasn’t painted when installed? When I dry to remove I’m taking drywall with the wallpaper.
That is a nightmare, April. My husband has alot of exp with painting and says it will be impossible without repairing the wall completely. Have you considered doing paneling, or other wall covers?
I’m really not a fan of wall paper or paneling. Could I paint over the wallpaper?
No unfortunately it will peel. I asked my husband the same!
Ok thanks!
Did you dilute the wallpaper stripper as directed or did you use it as a concentrate?
Yes, we did dilute it!